How to Use Makita Impact Driver: Tips and Tricks for Efficient Use

Are you tired of using manual screwdrivers or drills for your DIY or construction projects? It’s time to upgrade your toolbox with a Makita impact driver, a powerful tool that can easily drive screws and fasten bolts with less effort and time. But if you’re new to using this tool, it may seem intimidating at first glance. No worries! In this step-by-step guide, we’ll show you everything you need to know about using your Makita impact driver with ease and confidence.
Think of it like learning to ride a bike – once you master the basics, you’ll be able to handle any task with ease. So let’s get started!
Step One: Choose the Right Bit
When it comes to using a Makita impact driver, the first step is to choose the right bit for your job. The good news is that Makita impact drivers are compatible with a wide range of bits, so you’ll have plenty of options to choose from. However, it’s important to select the right bit for the job to ensure you get the best possible results.
For example, if you’re working with wood, you’ll want to use a wood drill bit, whereas a masonry drill bit is best suited for concrete. Make sure to read the packaging carefully and select the bit that is marked for use with your specific type of material. Once you’ve chosen the right bit, you can easily attach it to your Makita impact driver and start working on your project.
With the right bit in hand, you’ll be well on your way to getting the job done quickly and efficiently.
Select a bit that matches the size and type of the screw you will be driving
The first and most important step in driving screws is to choose the right bit. You want to make sure that your bit matches the size and type of the screw you’ll be using to ensure a secure and easy drive. Using the wrong bit can lead to frustrating stripped screws or even damage to your tools, so it’s important to get this right.
The type of bit you choose will depend on the shape of the screw head – common options include Phillips, flathead, and square. When selecting a size, check the packaging of your screws for guidance, and if in doubt, opt for a slightly larger size to ensure a snug fit. By taking the time to choose the right bit, you set yourself up for success and save yourself a lot of headaches down the line.
So don’t rush this step – it’s better to be safe than sorry!

Step Two: Insert the Bit
Now that you have selected the appropriate bit, the second step in learning how to use a Makita impact driver is to insert the bit. Locate the chuck of the impact driver and loosen it by twisting it in an anti-clockwise direction. Next, insert the bit that you have chosen into the chuck, ensuring that it is securely in place.
The bit should align with the jaws of the chuck, and you should feel it click into place. Make sure to tighten the chuck in a clockwise direction until it is firmly secure, ensuring that there is no wobbling or slippage. It is important to take your time and ensure that the bit is correctly inserted and secured.
With this second step, you are now ready to begin using your Makita impact driver for your project.
Loosen the chuck by turning it counter-clockwise, then insert the bit and tighten the chuck by turning it clockwise until it clicks
When you’re ready to start using your power drill, the next step is to insert the bit. To do this, you’ll need to start by loosening the chuck. It’s important to turn it counter-clockwise to make sure it’s not too tight.
Once it’s loosened up, you can carefully insert the bit into the chuck. Make sure it’s set in securely and then start turning the chuck in a clockwise motion. You’ll want to keep turning until you hear it click into place.
This means the bit is tightly secured and you’re ready to start drilling. The key here is to make sure the bit is inserted correctly and tightened firmly so it doesn’t slip or fall out while you’re working. With these simple steps, you’ll be ready to start your DIY projects in no time.
Step Three: Adjust the Torque Settings
Now that you’ve selected the proper bit and inserted it into your Makita impact driver, it’s time to adjust the torque settings. Torque settings control the amount of force that the driver applies to the fastener, and it’s essential to use the appropriate setting to avoid stripping or damaging the screw or bolt. Makita impact drivers typically have several torque settings to choose from, each designed for specific tasks.
To adjust the torque settings, locate the collar ring near the chuck of the driver and turn it either clockwise or counterclockwise, depending on the desired torque level. Makita impact drivers also have a mode selector switch that enables you to switch between the impact mode and the drill mode. By understanding how to adjust the torque settings for your Makita impact driver, you can efficiently and effectively complete any job, big or small.
Choose the appropriate torque setting for the job by turning the torque adjustment ring to the desired number
When it comes to using a torque wrench, one of the most important steps is to adjust the torque settings to the appropriate level. This can make all the difference in achieving accurate and safe results for your project. To start, locate the torque adjustment ring on your wrench.
This may be located at the base of the handle or at the head of the wrench. Once you’ve found it, you can turn the ring to select your desired torque level. It’s important to choose the appropriate setting for your specific task, as using too much or too little torque can lead to faulty assemblies or even dangerous situations.
Choosing the right torque setting can be a bit daunting at first but taking the time to experiment and familiarize yourself with your wrench is key. Don’t be afraid to consult the manual or ask a professional for guidance. With practice and patience, you’ll quickly become a torque wrench pro!
Step Four: Hold the Impact Driver and Apply Pressure
Now that you have the proper bit in place, it’s time to start using the Makita impact driver. First, hold the tool securely with one hand while positioning it over the screw or bolt you need to fasten or loosen. Then, apply a moderate amount of pressure to the back of the tool with your other hand.
This pressing motion will keep the driver bit engaged with the screw, preventing it from slipping or bouncing off. Without pressure, the impact driver won’t work as effectively and can cause damage to your material or the tool itself. Applying pressure also ensures that the tool’s hammer mechanism can do its job, delivering the quick and powerful impacts needed for faster and easier screwing applications.
Remember, don’t overdo it with the pressure – too much can cause the driver to strip the screw or break it altogether, resulting in a time-consuming and frustrating repair job.
Hold the impact driver with both hands and position it perpendicular to the screw head. Press the trigger to start driving the screw
Now that you have your screw in place, it’s time to grab your impact driver. The impact driver is a powerful tool that requires a bit of pressure to use effectively. First, hold the driver with both hands and make sure it’s perpendicular to the screw head.
This will ensure that the driver doesn’t slip off the head and cause damage. Next, press the trigger to start driving the screw. You’ll feel a burst of power as the driver engages with the screw.
It’s important to keep a firm grip on the driver as you apply pressure. Don’t be too forceful, but make sure you’re using enough pressure to keep the driver steady. Remember, the impact driver is a precision tool, and it requires a delicate touch to use correctly.
With a bit of practice, you’ll be able to drive screws quickly and easily, even in tough materials like metal or hardwood. Give it a try and see the difference an impact driver can make!
Step Five: Release the Trigger When Screw is Flush
When it comes to using a Makita impact driver, the fifth step is crucial for ensuring a perfect finish. After driving the screw, you should release the trigger when the screw is flush. This will prevent the driver from overdriving the screw and causing any damage.
It’s important to note that the amount of pressure exerted while using an impact driver can be intense, so it’s essential to maintain control and only drive the screw to the desired depth. Once the screw is flush, you can then remove the driver bit and move onto the next one. By following these steps, you can ensure that your Makita impact driver is used efficiently and effectively, making it a valuable tool for all your DIY projects.
So next time you’re using your Makita impact driver, always remember to release the trigger when the screw is flush!
Release the trigger when the screw is flush with the surface you are driving it into. Do not over-tighten the screw
When you’re working on a project that requires driving screws, it’s important to know when to stop. Over-tightening screws can result in damaging the materials you’re working with, breaking the screw, or even injuring yourself. That’s why you should always release the trigger when the screw is flush with the surface you are driving it into.
This step is crucial to ensure that the screw is securely in place without causing any damage. When you feel the screw head meet the surface, stop applying pressure and release the trigger. This will prevent any further spinning of the screw, ensuring that it’s properly secured.
Remember, a screw shouldn’t be over-tightened, so resist the urge to keep going. By stopping when the screw is flush, you’ll have peace of mind knowing that the screw is secure without being too tight. So, take a deep breath, release the trigger, and admire your handiwork.
Your project is one step closer to completion.
Step Six: Change Bits as Needed
When using a Makita impact driver, it’s important to change bits as needed. This can vary depending on the project you’re working on and the type of material you’re fastening. For example, if you’re switching from driving screws into wood to driving screws into metal, you’ll need to swap out your screw bit for a metal drilling bit.
The process for changing bits is relatively simple. First, you need to ensure the driver is turned off and the bit is secure before removing it. Then, you can swap out the bit by simply pulling it out and inserting the new bit of your choice.
Make sure to secure the new bit properly to avoid any mishaps during use. With this advice in mind, you’ll be able to efficiently complete any project with your Makita impact driver.
Repeat the process for driving additional screws, switching out bits as necessary
Once you’ve driven the first screw into the material, it’s time to repeat the process for additional screws. However, depending on the type of screw and the material you’re working with, you may need to switch out bits as you go. For example, if you’re working with wood screws and then switch to metal screws, you’ll need a different bit for the metal screws to ensure they go in smoothly and securely.
It’s important to keep in mind that using the wrong bit can damage the screw or material, so take the time to identify which bit is needed before continuing. Changing bits is a simple process of loosening the chuck, removing the current bit, inserting the new one, and tightening the chuck again. With the proper bit in place, you can continue driving screws with confidence.
Conclusion: A Useful Tool for DIY and Professional Projects
When it comes to using a Makita impact driver, the key is to remember that it packs a powerful punch. With its high torque and speed, it can make light work of even the toughest tasks. However, like any good tool, it requires careful handling and attention to detail.
So, before you get started, make sure to read the instructions, familiarize yourself with the settings, and always wear the appropriate safety gear. And remember: with a Makita impact driver by your side, no job is too big or too tough for you to handle!”
FAQs
What is an impact driver and how is it different from a regular drill?
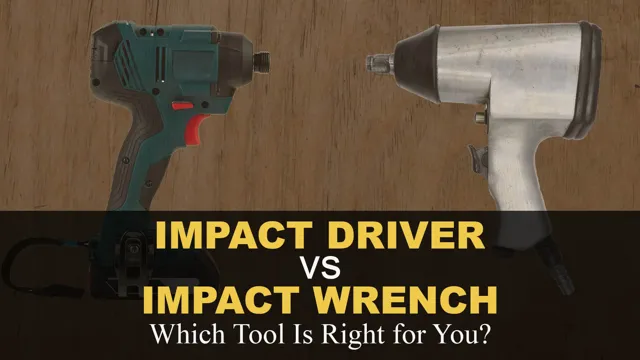
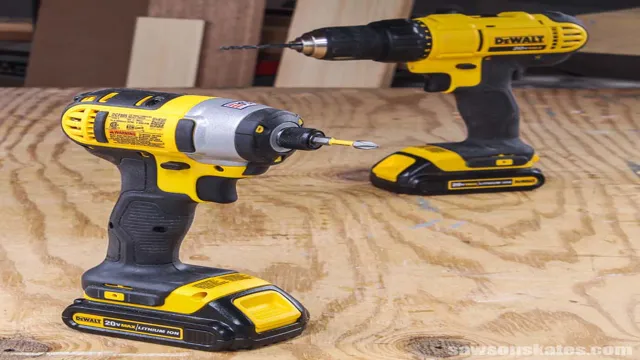
An impact driver is a power tool that delivers higher torque compared to a regular drill and is specifically designed for driving screws and fasteners. The difference between the two tools is that an impact driver exerts downward force through the rotational force, thereby producing more torque.
Can Makita impact drivers be used for heavy-duty DIY projects?
Absolutely. Makita impact drivers are built to handle heavy-duty drilling and driving tasks. You can use them for projects like framing, deck building, and remodeling.
How do I change the bits on my Makita impact driver?
To change the bits on your Makita impact driver, follow these simple steps:
– Press the bit release button located on the chuck
– Remove the old bit
– Insert the new bit into the chuck
– Release the bit release button.
Why is my Makita impact driver not working?
There could be several reasons why your Makita impact driver is not working, such as a dead battery, a faulty switch, or a damaged motor. To determine the cause, check the battery charge, inspect the switch and motor for damage, and clean the tool to remove debris that may be clogging it.
What type of screws can I use with my Makita impact driver?
Makita impact drivers can be used with a range of screw sizes and types. They work well with standard Phillips and Torx head screws and can also handle hex head screws and lag bolts.
How long does a Makita impact driver battery last on a single charge?
The battery life of a Makita impact driver varies depending on the model and usage. However, on average, most Makita impact drivers can run for 30-45 minutes on a single charge.
Can I use my Makita impact driver on concrete or masonry?
Yes, you can use your Makita impact driver on concrete and masonry surfaces with the appropriate drill bits. However, it’s important to note that these materials are harder to drill through, so it may take longer to complete your project.


