Are you a complete beginner when it comes to using a laser level? Don’t worry, we’ve got you covered! Laser levels are amazing tools that have made leveling tasks so much easier. They can help you hang pictures, mount shelves, put up tiles, and even install ceilings and floors. In short, they are incredibly versatile! But if you’ve never used one before, the concept might seem a bit daunting.
That’s where we come in! In this beginner’s guide, we will take you through all the basics of how to use a laser level. By the end of this article, you’ll be feeling confident enough to tackle any leveling job with ease. So let’s dive in and get started, shall we?
Understanding Laser Levels
If you’re wondering how to work a laser level, don’t worry – it’s not as complicated as it may seem at first. Essentially, a laser level is a tool primarily used in construction or landscaping to ensure straight lines or level surfaces. To use a laser level correctly, the first step is to set it up on a stable surface and ensure it’s level itself.
Once it’s calibrated, turn it on and direct the laser beam at the surface you want to work on. You can then adjust the height or angle of the level until the laser beam is hitting the surface at the desired point. Some laser levels even come with a receiver, which can be placed on a tripod and used to pick up the beam from a distance.
By following these simple steps, you’ll be able to use a laser level to make your construction or landscaping projects a whole lot easier to tackle.
What is a Laser Level?
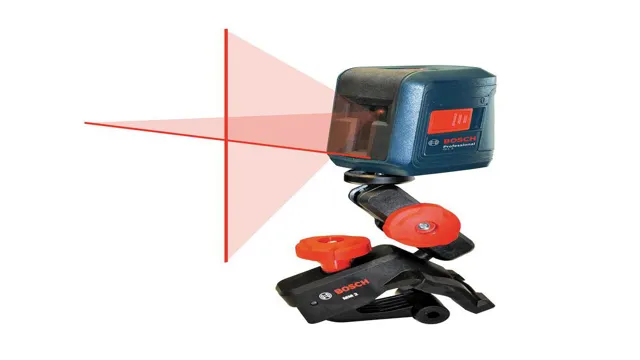
A laser level is a tool used to project a level reference line or plane onto a surface. It works by emitting a focused beam of light, called a laser, which is levelled to the surface. This enables accurate measurement and alignment for construction, carpentry, and other industrial or DIY projects.
Laser levels come in various types, including rotary, line, and dot laser levels. Rotary laser levels project a 360-degree line, while line laser levels project a straight line. Dot laser levels project individual dots in a grid pattern.
Whatever the type, laser levels are highly useful tools that save time and effort, improve accuracy, and prevent errors in construction or DIY projects. With the use of laser levels, professionals and DIY enthusiasts alike can achieve better precision and efficiency in their work.

Types of Laser Levels
Laser levels are an essential tool for construction, home renovation, and DIY projects. They work by emitting a beam of light that creates a straight and level line, helping users to achieve accurate measurements and precise cuts. There are several types of laser levels, each designed for specific applications.
The most common types are point laser levels, line laser levels, and rotary laser levels. Point laser levels emit a single point of light and are ideal for small-scale projects. Line laser levels, on the other hand, emit a straight line and are useful for longer distances or when multiple measurements are required.
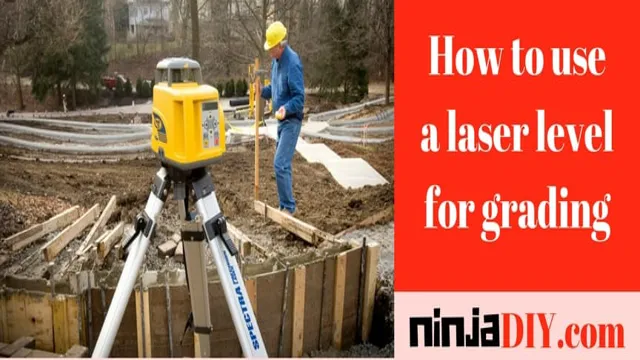
Rotary laser levels project a 360-degree line and are perfect for larger projects that require a lot of accuracy. In addition to these three types, there are also cross-line laser levels, dot laser levels, and plumb laser levels. When choosing a laser level, consider your project’s scale, distance, and leveling needs to select the most appropriate type.
Regardless of the type you choose, a laser level is a useful tool that will help you complete your project with ease and accuracy.
Preparing to Use the Laser Level
Learning how to work a laser level can require a bit of preparation beforehand to get the most accurate results. It’s important to start by choosing the right laser level for your project, considering factors such as the size and complexity of the job. Once you have your laser level, it’s important to read and understand the manufacturer’s instructions thoroughly, as each model can have its own unique features and requirements.
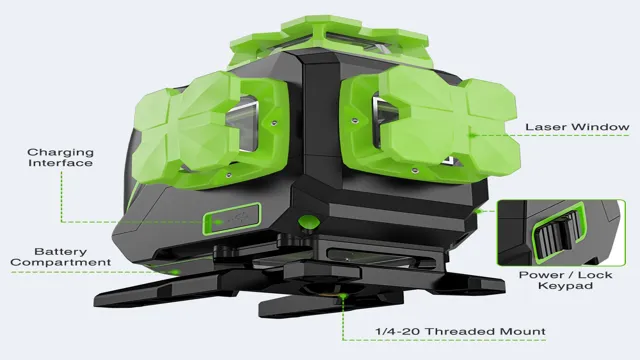
You’ll want to make sure the batteries are charged or that you have backup batteries ready to ensure the laser level maintains a consistent, accurate beam. It’s also important to check the levelness of the surface you plan to use the laser level on, as any bumps or unevenness can impact the accuracy of your measurements. By taking these steps to prepare, you can be confident in the accuracy of your laser level and achieve successful results in your project.
Gathering Materials and Tools
When preparing to use a laser level, it’s important to gather all the necessary materials and tools ahead of time. The first essential item you need is, of course, the laser level itself. Ensure that it’s charged or that you have fresh batteries available to power it.
You’ll also need a tripod or a stable surface to mount the laser level onto. Make sure the tripod is adjustable and can reach the height and angle you require. To help you locate the laser level’s lines accurately, you’ll need a target card or glasses that filter the laser light.
Additionally, measuring tape, a pencil, and a bubble level are useful tools to have on hand. Take the time to gather everything you need before starting your project to prevent disruptions or delays. By having all the necessary materials and tools on hand, you’ll be equipped to handle any challenges that may arise while making it easier for you to get the job done efficiently.
Choosing the Correct Location
When preparing to use a laser level, it’s crucial to choose the correct location for an accurate result. Start by selecting a flat and stable surface to place the laser level. The surface should be clear of debris or any other obstructions that might interfere with the laser’s beam.
One way to ensure the chosen location is level is by using a spirit level or a visual estimation. Also, consider the distance between the starting point and the endpoint where you want to direct the laser. The distance plays a significant role in the accuracy of the measurement.
Choosing a location with less interference will make it easier for the laser to stand out. In summary, take time to choose the perfect location, and your laser level will give you the accurate results needed for your project.
Using the Laser Level
When it comes to working with a laser level, the first thing you need to do is to ensure that it is set up correctly. Start by finding a flat and stable surface where you can place the level. Before turning it on, make sure that it is calibrated to the correct level, as this will enable you to get an accurate reading.
Once it is set up, turn on the laser and use it to project a straight line on the wall or surface that you are working on. From here, you can use the line to guide you as you work, whether you are hanging shelves, installing tiles, or any other task that requires precision. With a laser level, you can ensure that your work is accurate, efficient and professional-looking.
So if you’re looking for a tool that can help you take your DIY projects to the next level, a laser level is definitely worth considering!
Calibrating the Laser Level
Calibrating a laser level is a straightforward process, but it is essential to ensure that the tool delivers accurate and reliable measurements. To begin the calibration, you need to set the laser level up on a flat surface. Next, check the bubble vials to make sure the level is positioned correctly.
Once you have determined that the level is in the right position, turn on the laser and adjust the position of the beam. You can adjust the beam by using the level’s screws. Make sure that the beam is level by checking it with a digital level or by using a straight edge.
Calibrating your laser level ensures that the device is set up correctly to deliver precise measurements, making your work more efficient and effective.
Positioning the Laser Level
When using a laser level, positioning it correctly is crucial to ensure accurate readings. Firstly, make sure the surface you’re placing the level on is stable and free from any bumps or debris. This will prevent any movements that could affect the accuracy of the laser.
Next, adjust the level’s feet or tripod until it is levelled horizontally. Once the level is stable, turn on the laser and aim it towards the area where you want to work on. It’s important to note that you should always wear protective eyewear when working with laser levels, as the laser can be harmful to your eyesight.
By taking the time to properly position your laser level, you can ensure that your measurements are accurate and your work is accomplished with precision.
Following the Laser Level’s Instructions
Using a laser level might seem like a daunting task, but it’s actually quite simple if you follow the instructions provided. First, ensure that the laser level is placed on a stable surface and that it is level. Then, turn it on and adjust the height if necessary.
Next, align the laser level with the marked points on the wall or surface you want to level. Take your time to ensure that it’s aligned correctly. Once you’re confident that it’s aligned, mark the spots on the wall where you want to place your items or install your fixtures.
Remember to take into consideration the level line projected by the laser level when you’re doing this. Finally, turn off the laser level and double-check your markings to ensure that they’re accurate. Following these steps will give you perfectly level markings and save you from any mistakes.
Tips and Tricks for Laser Level Use
Learning how to work a laser level can seem intimidating at first, especially if you don’t have much experience with power tools. However, by following some simple tips and tricks, you can quickly become a pro at using a laser level for all sorts of DIY projects. First, make sure that the device is set up correctly by adjusting the tripod or mounting bracket to ensure a stable and level base.
Then, turn on the laser and adjust the settings as needed to produce the right beams for your project. You can also use a bubble level or digital level to double-check that the lines are straight and level before you start drilling or nailing. One pro tip for using a laser level is to mark the beam with masking tape to create a guide for your tools, helping you avoid mistakes and ensuring accuracy.
By taking the time to learn how to use a laser level effectively, you can save time and effort on your next DIY task and produce professional-quality results.
Keeping the Laser Level Safe and Secure
When using a laser level, it’s vital to keep it safe and secure. Firstly, always transport your laser level in a protective case to avoid any damage. When using the level, make sure it’s on a stable surface or mounted correctly to a tripod.
This will prevent it from falling and breaking or injuring someone. Secondly, be sure to clean the level after each use, wiping off any dust and debris that has accumulated to ensure its accuracy. Store the level in a dry, safe place, free from extreme heat or cold temperatures.
Finally, make sure to turn off and remove the batteries when not in use to prolong their life and avoid leakage. By following these simple tips and tricks, you can ensure that your laser level lasts longer, performs better, and remains in excellent condition for all your construction and DIY projects.
Troubleshooting Common Issues
Laser Levels If you’re using a laser level for the first time, you might encounter a few common issues that could be frustrating. However, don’t worry, as there are simple tips and tricks that can help you troubleshoot and get back to work. Firstly, ensure that the batteries are functioning correctly.
Weak batteries could cause the laser level to malfunction or flicker, which could be quite irritating. You should also ensure that the laser level is working correctly and the bubble vials are level, as this could affect the accuracy of the laser. If the laser level is still not working correctly, try adjusting the leveling screws until the bubble vials are perfectly level.
Finally, you should always test your laser level in a well-lit area, as a poorly lit room could make it difficult to see the laser and adjust it accurately. By following these simple tips and tricks, you can ensure that your laser level is functioning correctly and use it with confidence for all your leveling needs.
Conclusion
Now you know how to work a laser level like a pro! With its precision accuracy and ease of use, you’ll be able to tackle any project with confidence and efficiency. Just remember to always wear your safety goggles and avoid the urge to make laser cat videos. So go ahead, grab your laser level, and get ready to level up your DIY game!”
FAQs
What is a laser level and how does it work?
A laser level is a tool that projects a laser beam onto a surface to help level it. It works by using a laser and a sensor to measure the distance between the laser and the surface it is projecting onto.
How do I calibrate my laser level?
To calibrate your laser level, you need to adjust the lasers to ensure that they are level and accurate. Most laser levels come with instructions on how to calibrate them. Follow the instructions carefully and make sure that you adjust the lasers on a level surface.
What are the advantages of using a laser level over a traditional level?
Laser levels are more accurate and faster than traditional levels. They allow you to work in large spaces and can be used to project multiple lines at once, saving you time and effort.
What are the different types of laser levels available in the market?
There are several types of laser levels available, including line lasers, dot lasers, rotary lasers, and cross-line lasers.
How do I choose the right laser level for my job?
Choose a laser level based on the type of project you are working on. For example, if you are working on a large construction site, you may need a rotary laser level. If you are working on a small project, a line or dot laser level may be sufficient.
What precautions should I take when using a laser level?
You should always wear eye protection when using a laser level. Avoid looking directly into the laser beam and ensure that the laser level is securely mounted before using it.
Can laser levels be used outdoors?
Yes, some laser levels are designed specifically for outdoor use. Look for laser levels with a high IP rating, which indicates that they are waterproof and dustproof.


