How to Use a Laser Level for Retaining Wall to Ensure Perfect Alignment

Have you ever struggled with building a retaining wall that sits perfectly level? It can be a challenging task, especially if you’re using traditional spirit levels. Fortunately, laser levels can make the process a lot easier. Many people swear by them for achieving a neat, level finish.
So, if you’re planning to build a retaining wall in the near future, read on to find out how using a laser level can simplify the job. We’ll share tips for choosing the right laser level and offer guidance on how to use it effectively. With a little practice and patience, you’ll be well on your way to creating a stunning retaining wall that’s perfectly level!
What is a Laser Level?
Using a laser level for retaining wall projects is a great way to ensure precision and accuracy. But what exactly is a laser level? Simply put, it’s a tool that projects a laser beam onto a surface, creating a straight and level line. This line can then be used as a reference point for a variety of construction and home improvement tasks, including building retaining walls.
To use a laser level for a retaining wall project, start by choosing the location of the wall and marking the desired height of the wall. Then, setup the laser level and project the straight line onto the wall surface. This line can be used as a guide to ensure that the retaining wall is built exactly at the desired height and angle, resulting in a more structurally sound and visually appealing finished product.
By incorporating a laser level into your retaining wall project, you can save time and ensure a professional-quality outcome.
Explaining the Tool and its Functionality
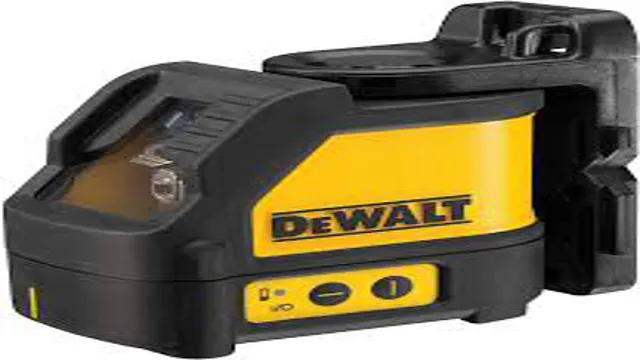
A laser level is a tool that utilizes a laser beam to project a straight line or level plane onto a surface. It is commonly used in construction and home improvement projects to ensure accuracy and precision in measurements. The laser level can be mounted on a tripod or attached to a wall, and it’s typically operated using batteries.
It is a handy tool that saves a lot of time and effort, especially when working on bigger projects. Think about it, can you imagine having to manually measure and mark a straight line across a long distance without a laser level? It would be time-consuming, and the chances of making errors are high. With a laser level, you can work faster, more efficiently, and achieve better results.
Plus, it’s easy to use, even for beginners. Most laser levels have a self-leveling feature that ensures the laser beam stays level regardless of the surface’s unevenness. Overall, a laser level is an essential tool that should be in every home improvement enthusiast or professional’s toolkit.

Choosing the Right Laser Level for Retaining Walls
When it comes to building retaining walls, having a laser level can make the process much easier and more efficient. But with so many options on the market, choosing the right one can often be overwhelming. The first thing to consider is the range of the laser level.
For smaller retaining walls, a lower range may be sufficient, but for larger ones, a laser level with a higher range will be necessary. Additionally, it’s important to consider the accuracy of the laser level. A more precise laser level will ensure that the retaining wall is perfectly level and prevents any potential issues down the line.
Finally, consider the type of mounting options available. Some laser levels can be mounted on a tripod, while others have built-in magnets for easy placement. By considering these factors and selecting the right laser level for your needs, you can ensure that your retaining wall is built to perfection.
And, don’t forget to use a laser level for the retaining wall construction and get the job done right, ensuring a sturdy and long-lasting structure for your home.
Factors to Consider in Selecting a Laser Level
When it comes to retaining walls, choosing the right laser level is crucial for ensuring a sturdy and reliable structure. Firstly, consider the range and accuracy of the laser level. It is important to choose a level that has a range that can cover the length of your retaining wall and an accuracy that will ensure the wall is level and even.
Secondly, think about the type of laser level needed. A rotary laser level is ideal for large retaining walls since it provides a 360-degree coverage, while a line laser level can be used for smaller retaining walls. Finally, consider the durability and waterproofing of the laser level.
Since retaining walls are often exposed to the elements, it is important to choose a level that is durable and can withstand any weather conditions. By taking these factors into consideration, you can choose the right laser level for your retaining wall project and ensure a sturdy and reliable result.
Preparing the Site for the Retaining Wall
When constructing a retaining wall, one of the most important steps is preparing the site. To ensure a sturdy and level wall, a laser level can come in handy. A laser level works by projecting a straight and level beam of light across the area you want to measure.
To use a laser level for a retaining wall, start by marking out the location of your wall and using a long piece of wood or a string line to create a straight edge. Next, position the laser level at one end of the wall and adjust the height until the laser beam reaches the other end of the wall. This will give you a level reference point to work with.
From there, you can use the laser level to mark out the heights of each row of blocks or stones to ensure even spacing and a level wall. Using a laser level for your retaining wall project can save time and effort while ensuring a strong and visually appealing end result.
Setting up the Laser Level for Accurate Measurements
When setting up a retaining wall, it’s important to prepare the site properly to ensure accurate measurements and a sturdy structure that will hold up against the test of time. One of the most important tools you’ll need for this task is a laser level, which can help you achieve a level base for the retaining wall. Start by placing the laser level on a sturdy tripod, and positioning it at a point where it can project a beam across the entire site.
Once you turn on the laser level, you’ll be able to see the line it creates, which you can use as a guide as you prepare the site. Use a tape measure to mark off the boundaries of the site, and ensure that the ground is level by using the laser level as a reference point. By taking the time to set up the laser level properly, you can ensure that your retaining wall is built on a sturdy foundation that will last for years to come.
Calibrating the Laser Level Accordingly
When it comes to preparing a site for a retaining wall, the first step is to calibrate the laser level accordingly. This will ensure that the wall is level and stable, which is crucial for its longevity and strength. Before starting the calibration process, it’s important to clear the site of any debris, rocks, or other obstacles that may hinder the laser’s accuracy.
Once the site is cleared, the laser can be set up and adjusted to the desired level. This may involve adjusting the height of the tripod, moving the laser level, or making other adjustments as necessary. It’s important to take the time to get the calibration just right, as even small errors can have a significant impact on the overall quality of the retaining wall.
With a properly calibrated laser level, however, you can be confident that your retaining wall will be built to last, and that it will provide the stability and security you need to protect your property from erosion and other threats.
Creating the Retaining Wall with the Laser Level
When it comes to building a retaining wall, a laser level can be an extremely useful tool for ensuring accuracy and efficiency. First, it’s important to choose the right type of laser level for the job: a rotary laser level is typically best for outdoor projects. Once the laser level is set up and level, it can be used to mark the height of the wall at regular intervals, ensuring that the wall is being built to the desired height.
The laser level can also be used to ensure that the wall is straight and level, avoiding any unwanted gaps or variations in height. Overall, using a laser level can make the process of building a retaining wall much simpler and more precise, resulting in a better finished product.
Marking the Height and Length of the Wall
When it comes to creating a retaining wall, using a laser level can save you time and effort. To get started, the first step is to mark the height and length of the wall you want to build. This is important as it helps you plan the size of the wall and estimate the materials you need.
Once you’ve done this, you’ll need to set up the laser level on a tripod and level it. Using the laser level, you can create a straight and level line along the wall area. This is done by pointing the laser level at various points along the wall, such as the start and end points or corners.
The laser level will produce a red line, which you can use to guide you when building the wall. It’s important to ensure that the laser level is placed at the same height along the wall area to ensure that the retaining wall is level. Additionally, if you’re building a stepped wall, you’ll need to adjust the laser level accordingly.
By using a laser level to create your retaining wall, you’ll ensure that it’s built straight and level, which is essential for its structural integrity. Plus, using a laser level saves you time and effort compared to traditional methods, such as using a spirit level or a string line. With this tool, you can build a sturdy and attractive retaining wall in no time!
Ensuring Proper Alignment with the Laser Level
When designing and constructing a retaining wall, it’s crucial to ensure proper alignment in order to create a sturdy and safe structure. This is where a laser level comes in handy. Using a laser level allows you to accurately measure and mark the correct height and angle of the retaining wall.
To use a laser level, first, you will need to set up the level on a stable surface. Once the level is in place, turn it on and adjust the swivel to the desired angle. Then, align the laser with the starting point of your retaining wall and mark the spot.
As you move along the designated path of the retaining wall, continue marking each spot where the laser hits. This will ensure the wall is level and straight throughout the construction process. By utilizing a laser level, you can save time and prevent costly mistakes that may occur from inaccurate measurements.
The accuracy and precision of a laser level can help you create a durable and long-lasting retaining wall that fits perfectly with your landscaping design. So, next time you tackle a retaining wall project, be sure to utilize a laser level to ensure proper alignment and efficient construction.
Maintaining the Laser Level’s Precision for Continued Use
When constructing a retaining wall, using a laser level can be a game changer. However, it is crucial to know how to use the laser level properly to maintain its precision. First, ensure that the laser level is placed on a stable surface and adjusted to the correct height.
Next, turn it on and allow it to self-level before beginning any measurements. When taking measurements, be sure to keep the laser level stationary and avoid moving it around too much. After use, clean the laser level thoroughly and store it in a safe place to avoid any damage.
By following these steps, you can trust the accuracy of your laser level for continued use in your retaining wall project.
Conclusion
In conclusion, using a laser level for a retaining wall project is the secret weapon of every DIY enthusiast looking for precision and accuracy. Just like a Jedi needs a lightsaber, you need a laser level to create a wall that’s sturdy and level. Remember to read the instructions carefully, set up the level on a stable surface, and take your time marking out the height of your wall.
With these tips in mind, the force will be with you, and your retaining wall will be the envy of the neighborhood. May the laser be with you!”
FAQs
1. How does a laser level work for retaining wall construction? A: A laser level emits a laser beam that allows for precise leveling and alignment of the retaining wall during the construction process. 2. What are the advantages of using a laser level for retaining wall construction? A: Using a laser level ensures accuracy and saves time compared to traditional leveling methods. It also helps to minimize errors and reduce the need for rework. 3. Can a laser level be used for both small and large retaining walls? A: Yes, a laser level can be used for any size of retaining wall as long as the laser beam can reach the necessary distance. 4. Are there any safety precautions when using a laser level for a retaining wall? A: Yes, it is important to avoid looking directly at the laser beam and to wear protective gear such as safety glasses or goggles. 5. Can a laser level be used for different types of retaining wall materials such as concrete, stone, or wood? A: Yes, a laser level can be used for any material as long as the surface is flat and the laser beam can reflect or penetrate it. 6. How do you calibrate a laser level for retaining wall construction? A: Calibration depends on the type of laser level, but generally involves adjusting the beam to a level point and ensuring it is aligned with the desired direction. 7. Is a laser level expensive to purchase or rent for retaining wall construction? A: The cost of a laser level can vary depending on the type and features, but there are affordable options for purchase or rental that can save time and money in the long run.


