How to Sand a Car with an Orbital Sander: A Step-by-Step Guide for a Flawless Finish

Looking to give your car a smooth, polished finish? A high-quality orbital sander could be just what you need. While the idea of sanding your car may sound intimidating, it’s actually a relatively simple process that can yield fantastic results. In this beginner’s guide, we’ll dive into the basics of sanding a car with an orbital sander, including tips on prep, technique, and finishing.
With our expert guidance, you’ll be well on your way to achieving that sleek, showroom-worthy look for your vehicle. So buckle up and let’s get started!
What is an Orbital Sander
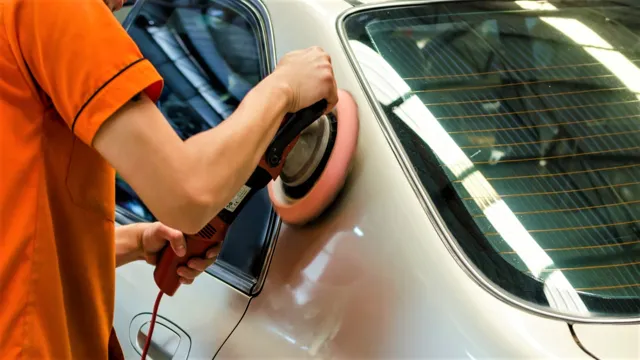
If you’re considering sanding your car for a new paint job, an orbital sander is a great tool to use. An orbital sander is a handheld power tool that moves a sanding pad in a circular motion. It’s commonly used for rough sanding and smoothing surfaces, and is a popular choice for preparing car surfaces for painting.
To sand a car with an orbital sander, start by removing any loose paint or rust with a wire brush or sandpaper. Then, use the orbital sander with a fine-grit sandpaper to remove any remaining paint or imperfections. Be sure to use a dust collection system or wear a protective mask to avoid inhaling dust and debris.
Once you’ve finished sanding, wipe the entire surface down with a tack cloth to ensure it’s clean and dust-free for painting. With the right technique and a bit of patience, an orbital sander can help you achieve a smooth, flawless surface for a beautiful new paint job.
Explain the features of an orbital sander.
An orbital sander is a power tool that comes in handy for sanding large surfaces. Unlike other sanders that move in a straight line, the orbital sander moves in a circular motion, which helps to prevent the sandpaper from getting caught up in one spot. One of the most notable features of an orbital sander is its high speed.
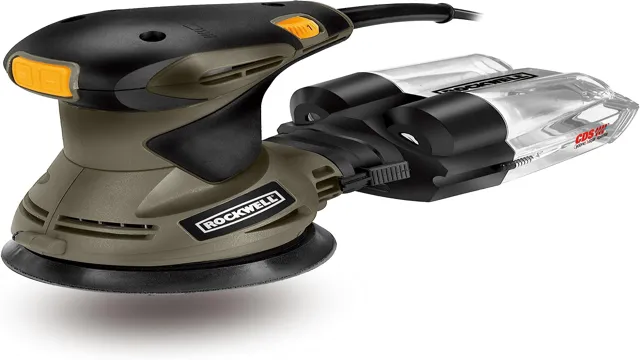
It rotates at a speed of 12,000 OPM (orbits per minute), which makes it a tool suitable for sanding large surfaces quickly and evenly. Another major benefit of using an orbital sander is that it comes with a dust collection system. This feature helps to keep the work area free of dust, which prevents the woodworker or DIYer from inhaling harmful particles.
Additionally, most orbital sanders come with ergonomic handles, which make them comfortable to hold and use for extended periods. Overall, the orbital sander is an essential tool to have in any woodworker or DIYer’s workshop, as it makes sanding large surfaces a breeze.

Benefits of using an orbital sander.
If you’re a DIY enthusiast or a professional carpenter, an orbital sander can quickly become your best friend. An orbital sander is a handheld tool that makes quick and easy work of sanding down wood or metal surfaces. Its circular sanding pad spins in an elliptical pattern, making it ideal for sanding large areas without leaving swirl marks or stalling.
But what are the benefits of using an orbital sander? First and foremost, an orbital sander is a time-saver. It can sand down large surfaces in a fraction of the time it would take with a manual sander. Additionally, an orbital sander creates a smoother finish than manual sanding, making it ideal for sanding down rough spots or removing old paint.
Another benefit of the orbital sander is that it’s versatile and can be used on a variety of surfaces, including wood, metal, and plastic, making it an essential tool in any DIY kit. Orbital sanders also have adjustable speed settings, allowing you to control the speed of the sanding pad to get the perfect finish for your project. In conclusion, an orbital sander is a versatile and efficient tool that’s perfect for any DIY enthusiast or professional carpenter.
Its ability to quickly sand down large surfaces without leaving marks or stalling makes it a time-saver that can help you complete your projects in less time with a higher quality finish. So if you’re looking for a tool that will make your sanding tasks easier and more efficient, consider investing in an orbital sander today!
Preparing the Car and Sander for Sanding
If you’re planning to sand your car with an orbital sander, proper preparation of both your car and the sander are crucial. Begin by thoroughly cleaning the car to remove any dirt, grime, or debris. Use a degreaser to remove any grease or oil on the surface.
Then, sand down any rough spots or imperfections on the car with medium-grit sandpaper. Once the car is clean and smooth, it’s time to prepare the sander. Ensure that the sanding discs are securely attached to the sander, and that it’s set to the appropriate speed level for the job.
It’s important to use the right sanding discs for the job too – coarse discs for rough surfaces, and finer discs for smoother surfaces. Don’t forget to wear proper safety gear such as goggles, a dust mask, and gloves to protect yourself from the debris and dust created during sanding. By properly preparing your car and sander, you’ll ensure a smooth and effective sanding process.
Clean the car surface properly.
One of the most important steps in preparing your car for sanding is to clean the surface properly. This means removing any dirt, grime, or debris that could interfere with the sanding process and prevent you from achieving a smooth, even finish. To do this, start by washing the car with a mild soap and water, using a soft sponge or cloth to gently scrub away any dirt or stains.
Make sure to rinse thoroughly and dry the car completely before moving on to the next step. Once the surface is clean, you can use a sander or sandpaper to remove any imperfections or rough spots, preparing the surface for painting or other finishing work. By taking the time to properly prepare your car for sanding, you can ensure that your finished product looks its best and lasts as long as possible.
So don’t skip this important step – your car will thank you!
Choose the grit for the sanding.
When it comes to sanding your car, it’s important to choose the right grit for the job. The grit you use will depend on the severity of the imperfections on your car’s surface. For rougher areas, start with a coarser grit, such as 80 or 120.
Use a finer grit, like 220 or 320, for areas that are less damaged. Before you begin sanding, make sure your sander is ready to go. Check that the sandpaper is securely fastened and that the machine is well lubricated.
You don’t want to risk damaging your car’s paint or finish because of a poorly maintained sander. Once you’ve selected the right grit for your sanding job and ensured that your sander is in good condition, you’ll be ready to start the process of smoothing out your car’s surface. With a little bit of elbow grease and some patience, you’ll have your car looking like new again in no time!
Attach sandpaper to the orbital sander.
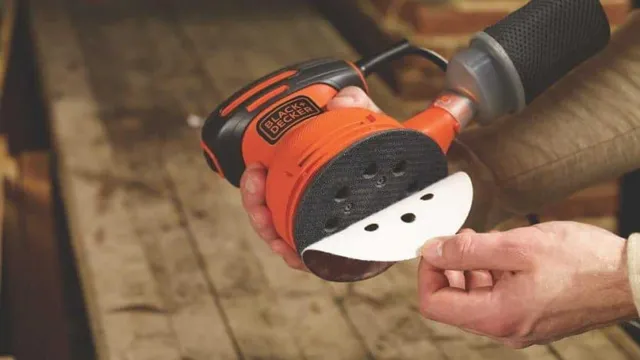
When it comes to preparing your car for sanding, attaching sandpaper to your orbital sander is a crucial step. Make sure the sandpaper grit is appropriate for the type of sanding you’ll be doing – coarse grits for heavy sanding, fine grits for light sanding. It’s also important to evenly distribute the sandpaper on the sander’s pad to avoid any bumps or uneven sanding marks.
Before beginning, inspect the pad to ensure it’s clean and free of debris. If the pad is worn or damaged, replace it before sanding to avoid any complications. Once your sandpaper is securely in place, plug in the sander and give it a quick test run on a scrap piece of metal or plastic to ensure it’s working correctly and the dust collection system is functioning.
Taking the time to properly prepare your car and sander will ensure a successful sanding process and a smooth finish for your vehicle.
Sanding the Car with an Orbital Sander
If you’re looking to give your car a refreshed look without spending a lot of money, sanding it down and repainting it is a great option! But how do you go about sanding your car with an orbital sander? First, it’s important to make sure you have everything you need: an orbital sander, 80- and 220-grit sandpaper, a sanding block, safety goggles, a dust mask, and a respirator. Once you’re properly prepared, you can begin sanding your car. Start with the 80-grit sandpaper, using the orbital sander and sanding block to remove any rough spots or imperfections.
Next, switch to the 220-grit sandpaper and repeat the process, making sure to sand in the direction of the car’s grain. Be sure to take breaks often and wipe off any dust and debris with a clean cloth. When you’re finished, your car will have a smooth, uniform surface that’s ready for paint! With a little patience and some elbow grease, you can achieve great results.
Step-by-step guide to sanding the car surface.
Sanding the Car with an Orbital Sander is the perfect solution to get the surface of your car ready for painting. Before starting, make sure the car is clean and dry. Wipe it down with a clean cloth and use a degreaser for a thorough clean.
Once clean, tape off any areas you don’t want to sand to avoid accidental damage. Now, you can start with a coarse grit sandpaper, about 80-120 grit, and attach it to the orbital sander. Hold the sander flat against the surface and move it in a back-and-forth motion until you get an even surface.
Avoid leaving swirls or scratches by taking it slow. Repeat this process with a finer grit sandpaper, around 180-220 grit, to smooth out the surface. Once done, use a microfiber cloth to wipe down the car and remove any remaining dust or particles.
Remember to wear a mask and eye protection during the sanding process to protect yourself from dust and debris. With these simple steps, you’ll have a smooth and even car surface ready for painting in no time!
Pro tips on sanding efficiently with an orbital sander.
Sanding the car with an orbital sander can be a time-consuming and tedious task, but it doesn’t have to be. With some pro tips on sanding efficiently, you can get the job done quickly and effectively. The first step is to choose the right grit sandpaper for the job at hand.
A coarser grit is best for removing rough spots and paint, while a finer grit is ideal for smoothing out the surface. When using the orbital sander, make sure to keep it moving in a circular motion to avoid creating scratches on the surface. It’s also essential to keep the sander level and apply consistent pressure to avoid creating uneven spots.
Finally, make sure to clean the surface thoroughly before moving on to the next section to avoid cross-contamination. With these pro tips in mind, you’ll be able to sand your car with an orbital sander like a pro.
Final Touches and Clean-Up
Now that you’ve sanded your car with an orbital sander, it’s time for the final touches and clean-up. First, take a clean microfiber cloth and wipe down the entire car to remove any dust or debris from sanding. Then, you can use a tack cloth to pick up any remaining particles.
Next, apply a coat of primer to any areas where you sanded down to the metal. Once the primer is dry, sand it down with a fine grit sandpaper to smooth out any rough spots. Now it’s time for the paint.
Apply at least two coats of your chosen color, allowing each coat to dry completely before applying the next one. Finally, you can apply a clear coat to protect the paint job. And there you have it, your car is now sanded, primed, painted and clear coated to perfection!
Wipe down the car surface after sanding.
After sanding down the car surface, it’s crucial to give it a final wipe down before proceeding with any paint or finishing touches. This step may seem small, but it can make a big difference in the overall look and quality of your car’s paint job. Use a clean, soft cloth or microfiber towel to gently wipe away any dust or debris from the sanding process.
This will ensure that there are no particles or residue left on the surface that could interfere with the paint adhering properly. Additionally, wiping down the car surface gives you a chance to inspect the work you’ve done so far and make any necessary touch-ups or corrections. By taking the time to do this step properly, you’ll end up with a smooth, even surface that’s ready for painting.
So, grab a cloth and give your car one final wipe down before moving on to the next step in the process. It’s a small step, but it could make a big difference in the end result of your car’s new paint job.
Check for any missed spots.
When it comes to any DIY project, the final touches and clean-up are just as important as the initial work. Whether you have been painting walls or furniture, it is essential to take the time to examine the work and ensure that every corner and surface has been covered. One common mistake many people make is missing spots, only to notice them later when it is too late.
To avoid this mishap, take a step back and survey the entire area before putting everything away. Look for any faded or uneven areas that may need touch-ups. Once you have identified any missed spots, use caution and a steady hand to fill them in without ruining the rest of your hard work.
By doing so, you can ensure that the finished project looks polished and professional. Remember, a thorough examination is key to a successful DIY project!
Make sure to properly dispose of any debris.
When you’re finished with any home renovation or construction project, it’s essential to take care of the final touches and clean up your workspace. Not only does this ensure that the final product looks pristine, but it also protects the safety and wellbeing of those around you. One of the most crucial steps in the clean-up process is properly disposing of any debris.
This includes scraps of wood, drywall, plaster, and other construction materials that need to be disposed of safely and responsibly. You can do this by renting a dumpster or contacting your local waste management service to come and collect the debris. It’s also important to dispose of any hazardous materials, such as paint or chemicals, in accordance with local laws and regulations.
By taking these final steps, you can ensure that your project is finished off professionally and that your work environment is left safe and clean for yourself and others.
Conclusion
When it comes to sanding a car with an orbital sander, technique is key. You want to make sure you’re not overworking any one area, but still covering all the necessary ground. Think of it like spreading butter on toast – you want a nice even layer, but not so much that it starts to tear the bread.
With a little bit of patience and finesse, your car will be looking smooth and polished in no time. So grab your sander, take a deep breath, and get ready to make your ride the envy of the neighborhood.”
FAQs
What is an orbital sander?
An orbital sander is a power tool that is used to sand surfaces in a circular motion.
Can an orbital sander be used to sand a car?
Yes, an orbital sander is a great tool to use when sanding a car, especially for larger surfaces.
What grit sandpaper should I use with an orbital sander on a car?
It is recommended to start with a lower grit sandpaper such as 80 or 120 and then move on to higher grits, such as 220 or 320, for a smoother finish.
How do I prepare the car before sanding with an orbital sander?
Before sanding with an orbital sander, it is important to thoroughly clean and dry the car and remove any rust or paint flakes.
Is it necessary to wear protective gear when sanding a car with an orbital sander?
Yes, it is recommended to wear gloves, eye protection, and a mask to protect yourself from dust and potential hazards.
How long does it take to sand a car with an orbital sander?
The amount of time it takes to sand a car with an orbital sander will depend on the size of the car and the skill level of the person sanding. It could take anywhere from a few hours to a full day.
Can you use an orbital sander on a car’s curved surfaces?
Yes, an orbital sander can be used on curved surfaces, but it is important to use caution and a compatible sanding pad to avoid damaging the car’s surface.


