Are you tired of your angle grinder switch not working properly? Does it fail to turn on or off? Before you head out to buy a new angle grinder, it’s worth noting that you may be able to repair the switch yourself. Yes, you heard it right! With a little bit of understanding and patience, you can fix your angle grinder switch and save yourself a lot of money. In this blog post, we’ll walk you through the steps you need to take to repair your angle grinder switch, including identifying the problem, disassembling the switch, and fixing or replacing the faulty parts.
So, let’s get started!
Introduction
If you’re experiencing switch problems with your angle grinder, don’t panic! Repairing an angle grinder switch isn’t as difficult as it seems. The first step is to disconnect the tool from the power source to avoid any unwanted accidents. Then, you’ll need to take apart the switch assembly and clean it thoroughly with a contact cleaner spray.
If the switch contacts are worn or broken, you’ll need to replace them with new ones. You can purchase replacement switches online or from your local hardware store. Once everything is in place, reassemble the switch and test the tool with a power source.
If it’s still not working, it’s best to consult a professional. Remember, safety should always come first when working on power tools, so if you’re not sure what you’re doing, it’s better to seek help from an expert. With these steps, you can repair an angle grinder switch and get back to work in no time.
Explanation of an Angle Grinder Switch
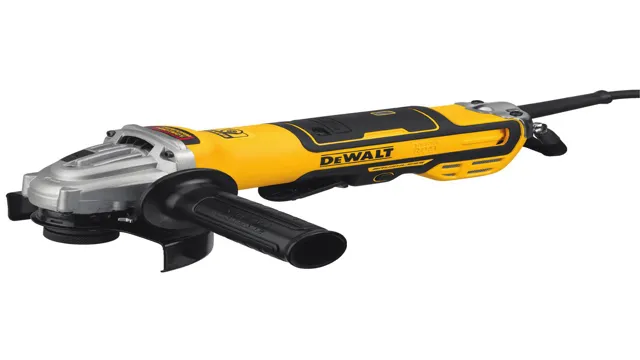
An angle grinder is a versatile tool that can be used for a variety of tasks such as cutting, grinding, and polishing. The switch on an angle grinder is an important component that allows you to turn the tool on and off. The switch is typically located on the side of the grinder and can be either a toggle switch or a paddle switch.
A toggle switch works by flipping a small lever up or down to turn the tool on or off. A paddle switch works by squeezing the switch to turn the tool on and releasing it to turn it off. Both types of switches are designed with safety in mind and can prevent accidental start-ups.
It’s important to use the switch correctly to avoid injury and keep the tool in good working condition. When using an angle grinder, always make sure to turn the tool off and unplug it before changing blades or performing any maintenance.
Common Problems with an Angle Grinder Switch
An angle grinder switch is an essential tool for any DIY enthusiast or professional craftsman. However, users often encounter common problems while using an angle grinder switch. One of the most reported issues is the switch not responding when pressed.
This issue can be caused by a faulty switch, worn-out brushes, or a damaged cord. Another common problem is the switch getting stuck in one position, making it challenging to operate the grinder. This issue could be due to dirt or debris clogging the switch or a damaged spring.
When encountering any of these issues, it is important to troubleshoot the problem and replace the switch or parts if necessary. In doing so, you can prevent accidents and ensure the longevity of your angle grinder.
Tools and Materials
If your angle grinder’s switch is not working correctly, you may be able to repair it without having to buy a new one. The first step is to gather the necessary tools and materials. You will need a screwdriver, wire cutters, a soldering iron, solder, and a replacement switch.
These can all be found at your local hardware store or online. Once you have the tools, you can begin by unplugging the grinder and removing the switch cover. Use the screwdriver to loosen any screws and detach any wires connected to the old switch.
Then, cut the wires off at the switch and strip any insulation from the ends. Solder the wires onto the new switch, making sure to match up the correct connections. Once the wires are securely attached, replace the switch cover and test the grinder to make sure it is working properly.
By following these steps, you can save money and time by repairing your angle grinder’s switch on your own.
Required Tools to Repair an Angle Grinder Switch
When it comes to repairing an angle grinder switch, there are a few tools and materials you’ll need to get the job done right. Firstly, you’ll need a screwdriver to remove the housing covering the switch. It’s important to use the right screwdriver, whether it’s a flat or Phillips head, as using the wrong one could damage the screws or the tool itself.
Additionally, you’ll need a voltage tester to ensure that there’s no power flowing to the switch before you start working on it. This is a critical step in ensuring your safety. Another useful tool is a wire stripper, which will allow you to remove the damaged or broken wires from the switch without damaging them.
Finally, you’ll need replacement parts, including a new switch and wires if necessary, so be sure to check your grinder’s make and model to ensure you purchase the correct components. With these tools and materials, you’ll be able to repair your angle grinder switch safely and effectively.
Materials Needed to Repair an Angle Grinder Switch
If your angle grinder switch is not functioning properly, don’t despair, fixing it is actually not that difficult. All you need are a few basic tools and materials to get started. Firstly, you’ll need a replacement switch, which you can purchase from a hardware store or order online.
A screwdriver is essential for removing the screws on the casing that hold the switch in place. Additionally, you’ll need a voltage tester to check whether the switch is receiving power. A pair of pliers may be useful for removing any damaged wires and replacing them with new ones.
Finally, some electrical tape will be necessary for securing the wires in place and insulating them. With these tools and materials at hand, you’ll be able to repair your angle grinder switch in no time, restoring it to working order and saving yourself some money in the process.
Step-by-Step Guide
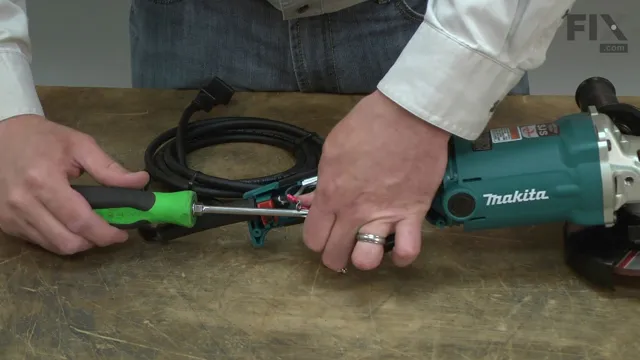
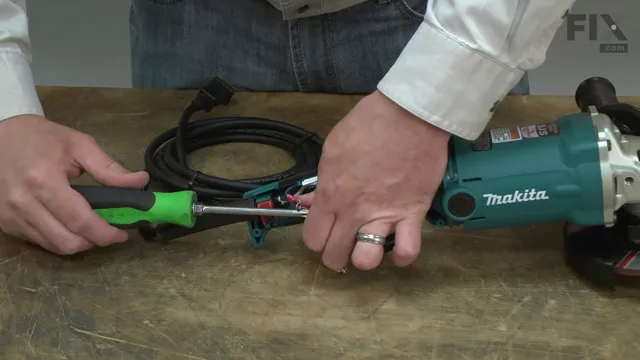
Repairing an angle grinder switch may seem intimidating at first, but with the right tools and steps, it can be a simple and easy process. First, disconnect the angle grinder from the power supply to ensure safety. Then, using a screwdriver, remove the screws holding the switch housing in place.
Carefully remove the housing to access the switch components. Check for any visible damage to the switch and replace if necessary. If the switch appears to be intact, use a multimeter to test for electrical continuity.
If there is no continuity, replace the switch. Once the switch has been repaired or replaced, reassemble the switch housing and carefully tighten the screws back into place. Reconnect the angle grinder to the power supply and test the switch to ensure it is functioning properly.
With these simple steps, repairing an angle grinder switch can be a manageable task for any DIY enthusiast or professional.
Step 1: Turn Off the Angle Grinder and Unplug It
When it comes to using an angle grinder, safety should be your top priority. Before even thinking about working on your project, the first step is to turn off the angle grinder and unplug it. This may sound like an obvious step, but it’s essential to make sure the tool is completely powered down to avoid any accidents.
Even if you’re just taking a quick break, it’s important to take the time to switch off the machine and unplug it so that no one accidentally starts it up when you’re not around. Remember, an angle grinder is a powerful and potentially dangerous tool, so always take the necessary precautions to keep yourself and others safe. So, turn off the angle grinder and unplug it before starting any work.
Step 2: Remove the Switch Cover
Now that we’ve unplugged the switch, it’s time to move onto the second step of this guide. This step is critical because it involves removing the switch cover. To do this, you’ll need to locate the screws that are holding the cover in place.
Depending on the switch model, these may be hidden behind a small panel or located on the outside edge of the cover. Once you’ve located the screws, use a screwdriver to carefully remove them. Make sure to keep the screws in a safe place where they won’t get lost.
With the screws removed, gently lift the switch cover off of the switch. Be careful not to damage the wiring or any other components while doing this. Removing the switch cover will give you access to the inner workings of the switch.
From here, you’ll be able to inspect the components more closely, identify any damage, and make any necessary repairs. It’s also a good opportunity to clean any dust or debris that has accumulated. Remember to handle the components with care and be mindful of any potential hazards, like exposed wiring.
Now that you’ve removed the switch cover, it’s time to move on to the next step of this guide.
Step 3: Inspect the Switch Contacts and Wires
Now that you’ve examined the switch’s exterior, it’s time to inspect the contacts and wires inside. Begin by opening up the switch carefully, ensuring that you don’t damage any parts. Once inside, take a look at the contacts – these are the metallic components that make contact with each other when the switch is flipped on or off.
Check for any signs of corrosion, rust, or damage that might be causing issues. If you come across these issues, you may need to replace the contacts and clean the surrounding area to prevent future damage. Next, inspect the wires.
Ensure that they’re connected properly to their respective terminals and that they’re not frayed or damaged in any way. If there’s any dirt or debris present, use a dry cloth or brush to remove it gently. Remember to be careful when handling the wires, as they can easily break or snap if you apply too much force.
By inspecting the switch contacts and wires, you can quickly identify and fix any problems with your switch, ensuring that it remains in perfect working order.
Step 4: Replace the Faulty Switch Parts
Now that the faulty switch parts have been detected, the next step is to replace them. This process may differ based on the type of switch, but generally involves opening up the switch and removing the faulty parts. It’s important to ensure that the replacement parts are of the same type and specifications as the faulty ones.
This is because using incompatible parts may not only cause the switch to malfunction again, but can also create additional problems such as electrical hazards. Once the replacement parts have been secured, carefully reassemble the switch and test it to ensure that it’s functioning properly. Remember, when dealing with electrical components, safety should always come first.
Before beginning any repairs, turn off the power supply and use appropriate safety gear such as insulated gloves, goggles and rubber-soled shoes. By following these guidelines, you can effectively replace faulty switch parts and ensure the safety and functionality of your equipment.
Step 5: Reassemble the Switch and Angle Grinder
Now that you have cleaned and lubricated the switch, it’s time to put everything back together. Reassembling your angle grinder and switch can be a bit tricky, but with a steady hand and a bit of patience, it should be relatively straightforward. The first step is to reattach the wires to the switch, making sure to connect the right wires to the right terminals.
Then, carefully guide the trigger back into place, ensuring that no wires get pinched or damaged in the process. Once the trigger is secured, you can reassemble the angle grinder, starting with the end cap and working your way through the various components. Make sure to tighten all screws and fasteners adequately, double-checking your work along the way.
Finally, test the switch to make sure it’s working correctly before using your angle grinder. With a bit of care and attention, you’ll have your tool working like new again in no time!
Safety Precautions
If you need to repair the switch on your angle grinder, it’s important to take safety precautions to avoid any potential accidents. The first step is to unplug the grinder from the power source to prevent any electrical mishaps. Next, make sure to wear protective gear such as gloves, eye protection, and a face shield to shield yourself from any debris that may fly out while you work.
When opening the casing of your angle grinder, be careful not to touch the exposed electrical components. It’s also crucial to use the right tools for the job and to follow manufacturer’s guidelines when repairing any angle grinder components. By taking these safety measures, you can repair your angle grinder switch effectively and avoid any accidents or injuries in the process.
Important Safety Tips to Follow When Repairing an Angle Grinder Switch
When it comes to repairing an angle grinder switch, safety should always be your top priority. In order to avoid any potential accidents, you should make sure to disconnect the grinder from its power supply before attempting any repairs. It’s also a good idea to wear protective clothing, such as safety glasses and gloves, to avoid any injuries from flying particles or sharp edges.
Additionally, be sure to use the correct tools and follow the manufacturer’s instructions carefully. Never force any parts or try to modify the switch if it’s not designed for it. Remember, a little caution can go a long way in preventing serious injuries.
By taking the necessary safety precautions, you can effectively repair your angle grinder switch while keeping yourself and others safe. So, keep these tips in mind the next time you find yourself facing a faulty angle grinder switch.
Conclusion
Repairing your angle grinder switch can seem intimidating, but with the right tools and a little bit of know-how, it’s nothing to be afraid of. Just like any other DIY task, a little bit of patience and perseverance can go a long way. So roll up your sleeves, grab your tools, and get ready to switch things up!”
FAQs
What causes an angle grinder switch to malfunction?
An angle grinder switch can malfunction due to a faulty electrical connection, worn out contacts, or damage to the switch assembly.
How can I troubleshoot an angle grinder switch that is not working?
You can troubleshoot an angle grinder switch by checking the wiring connections, testing the switch with a multimeter, and inspecting the carbon brushes for wear or damage.
Can I repair an angle grinder switch myself?
Yes, you can repair an angle grinder switch yourself if you have basic electrical knowledge and proper tools. However, if you are unsure of what you’re doing, it’s best to have a professional repair it for you.
How much does it cost to repair an angle grinder switch?
The cost of repairing an angle grinder switch depends on the extent of the damage and the cost of replacement parts. It can range from a few dollars for a simple fix to over $50 for a complete switch replacement.
What precautions should I take when repairing an angle grinder switch?
When repairing an angle grinder switch, it’s important to first unplug the tool and wear proper safety gear such as gloves and eye protection. Make sure to follow the manufacturer’s instructions and use the correct replacement parts to ensure safety and proper function.
Can I prevent my angle grinder switch from malfunctioning?
Yes, you can prevent your angle grinder switch from malfunctioning by regularly cleaning and inspecting the tool, avoiding overloading the grinder, and storing it in a clean and dry place when not in use.
How often should I replace my angle grinder switch?
There is no set time for when to replace your angle grinder switch, as it depends on usage and wear. However, if you notice any signs of malfunction or damage, it’s best to replace it as soon as possible to ensure safety and proper functionality.


