Have you ever found yourself in a situation where you have the perfect staple gun but no idea how to fill it with staples? Don’t worry, you’re not alone! Filling a staple gun can seem tricky, especially if you’ve never done it before. But fear not, because we’re here to help you out. In this blog, we’ll walk you through the steps of filling a staple gun like a pro.
From choosing the right staples to inserting them into the gun and testing it out, we’ve got you covered. So sit back, relax, and let’s get started!
Gather necessary materials
Filling a staple gun may seem like a daunting task, but it’s actually quite simple if you have the right materials. The first thing you’ll need is a pack of staples that are compatible with your staple gun. Make sure to check the size and type of staples recommended by the manufacturer before making a purchase.
You’ll also need to have a staple gun with an empty magazine, and a flat surface to work on. To begin, push the latch or release button to open the magazine and expose the staple chamber. Load the staples into the chamber, making sure they are positioned correctly and facing in the right direction.
Close the magazine and test the staple gun on a scrap piece of material to ensure it’s working properly. With these simple steps and the right materials, your staple gun will be filled and ready to use in no time.
Staple gun, staples, and safety goggles
If you’re planning to use a staple gun, the first thing you need to do is gather all the necessary materials. It’s important that you have the right tools on hand to ensure that the job is done safely and effectively. The key tools you need are a staple gun, staples, and safety goggles.
A staple gun is a handheld tool designed to drive staples into wood, plastic, and other materials. Staples are affordable and come in a variety of sizes to fit different needs. Safety goggles protect your eyes from flying debris and prevent injury.
Once you have all these supplies, you’re ready to tackle your stapling task confidently and safely. By gathering all the materials you need beforehand, you’ll save time and minimize the risk of accidents occurring. Remember, safety should always be your top priority when using a staple gun.

Check staple gun type
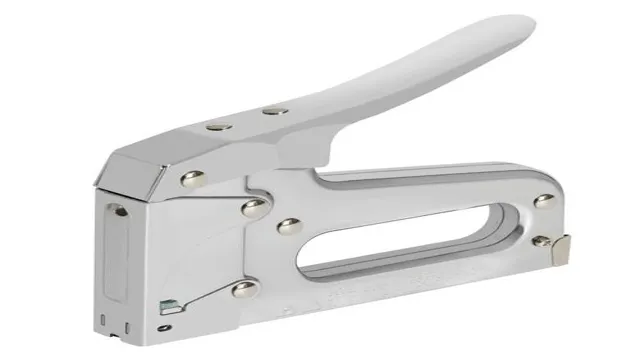
When it comes to filling a staple gun, the first thing to consider is the type of staple gun you have. There are manual staple guns, electric staple guns, and pneumatic staple guns. For manual staple guns, you’ll need to load the staples into the magazine by opening it up and inserting them in.
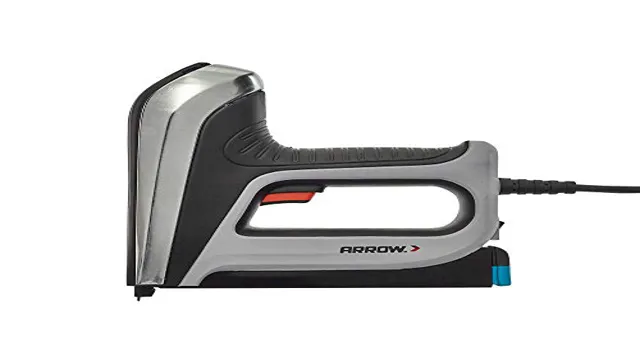
For electric staple guns, you’ll need to locate the magazine release on the bottom of the staple gun and slide it open. Insert the staples into the magazine, slide it back into place, and you’re ready to go. For pneumatic staple guns, you’ll need to attach the air compressor hose to the gun and then load the staples into the magazine just like a manual staple gun.
Overall, filling your staple gun will be a breeze once you know what type of staple gun you have.
Automatic, manual, or electric
Staple guns come in different types, and each has its own advantages and disadvantages. Automatic staple guns are electric-powered and are best for heavy-duty tasks and high-volume staple projects. On the other hand, manual staple guns require manual power, and they are best for small-scale projects.
Lastly, electric staple guns have the power of automatic staple guns and allow for continuous stapling. However, they are also more expensive and less portable than the other types. When choosing the type of staple gun to use, consider the project’s size, frequency, and budget.
For those looking for a versatile staple gun that can handle most projects, manual staple guns are a great choice. But for those looking for a quick, efficient, and powerful staple gun, automatic and electric staple guns are the way to go. Whatever type of staple gun you choose, make sure to read the instructions carefully and practice safe handling to avoid any accidents.
So, are you manual, automatic, or electric? Choose the one that best suits your project needs and start stapling away!
Unloading the staple gun
Unloading a staple gun is a simple and essential process that ensures the tool is ready for the next use. To unload the gun safely, first, make sure the gun is empty of any staples. Then, release the magazine, which is usually located at the back of the staple gun, and gently remove any remaining staples.
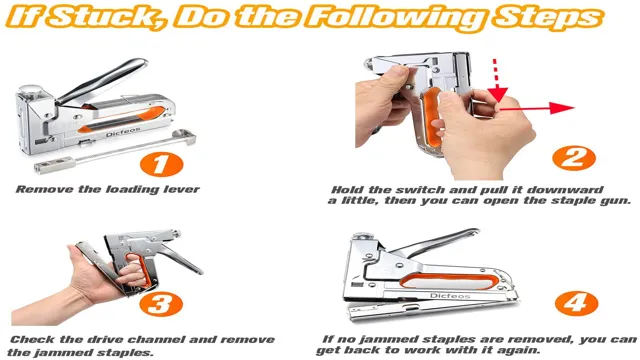
With the magazine removed, open the nose of the staple gun and remove any remaining staples or jammed staples that may be stuck inside. Be sure to use needle-nose pliers to remove any stubborn staples that refuse to come out. Once all staples are removed, carefully close the nose of the staple gun and reattach the magazine.
With the staple gun now unloaded, it is the perfect time to fill the gun with new staples. Simply load the staples according to the manufacturer’s instructions, and the staple gun is now ready to use again. Remember, proper unloading and loading of the staple gun is crucial to its longevity and efficiency.
Release the pressure in the magazine
When it comes to unloading a staple gun, the first thing you need to do is release the pressure in the magazine. This is an essential step to ensure your safety and prevent accidental discharge. To do this, simply locate the release mechanism and press it down.
You should hear a hissing sound as the pressure is released, which will let you know that it’s safe to proceed. Once the pressure is released, you can begin to remove the staples from the magazine. It’s important to take your time with this step to ensure that you don’t damage the gun or injure yourself.
With a little patience and attention, unloading your staple gun can be a simple and safe process.
Remove the attached staples
When it comes to unloading a staple gun, the first thing to do is to remove the attached staples. This may seem like a simple task, but it can be easy to miss a staple or two. Firstly, ensure that the staple gun is turned off and unplugged from any power sources.
Then, locate the staple release mechanism, which could be a lever or button, and press or pull it to release any pressure on the staple magazine. Once the pressure is released, open the magazine and carefully remove any staples that may be stuck in the gun. It’s important to check both the magazine and the feeder to ensure all staples are removed, as any leftover staples could cause issues with the gun’s performance.
Overall, taking the time to properly unload a staple gun can prevent any jams or malfunctions in the future. So, the next time you finish a project and need to unload your staple gun, remember to take the necessary steps to remove all the staples.
Open the magazine from the bottom
Open the magazine from the bottom to avoid damaging the pages and making it easier to unload the staple gun. When you flip through the pages and attempt to pull out the staples, you risk unintentionally tearing important information or photos. Start from the end of the magazine and work your way to the front.
Additionally, when unloading the staple gun, be sure to follow the manufacturer’s instructions. Often, staple guns have a release mechanism that needs to be engaged before the staple strip can be removed. Taking care when unloading the staple gun can prevent accidental firing and injuries.
Remember, it’s always better to err on the side of caution to avoid any mishaps.
Loading the staple gun
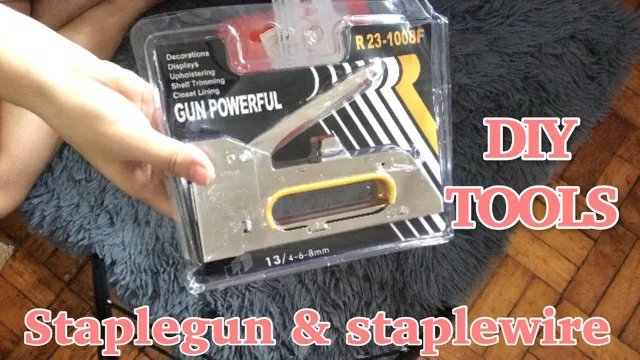
If you’re wondering how to fill a staple gun, don’t worry! It’s not as complicated as it might seem. First, you need to determine the type of staple gun you have – some models require loading staples from the bottom, while others have a slide-out loading chamber. Once you know how to access the staple compartment, you can insert the staples according to the manufacturer’s instructions.
It’s important to use the correct size and type of staples for your particular model of staple gun to ensure proper function and safety. For example, if you’re working with thin materials, you may need to use smaller staples, while heavier-duty materials may require larger staples. After you’ve filled the stapler, you should test it out on a scrap piece of material to ensure the staples are feeding correctly and that the stapler is functioning properly.
Now you’re ready to start tackling your next project with your loaded staple gun!
Choose the correct size of staples
When it comes to staple guns, loading them correctly is crucial to ensure that they work effectively. One key aspect of loading a staple gun correctly is choosing the correct size of staples. Different staple guns may require different sizes, and using the wrong size can lead to jams, misfires, or staples that don’t hold properly.
Look for information on the recommended staple size for your specific staple gun before loading it up. Once you have the right size, loading the gun is typically a matter of pulling back a latch or slide, inserting the staple strip, and then closing the latch or slide securely. Always make sure that the staple strip is aligned properly in the gun to prevent issues.
With these steps done correctly, you should be ready to start stapling with ease and precision.
Slide the staples into the magazine
When it comes to loading a staple gun, it’s important to understand the steps involved to ensure safe and proper use. The first step is sliding the staples into the magazine. Depending on the type of staple gun you have, this may involve pulling back a metal latch or pushing a button to release the magazine.
Once the magazine is open, insert the staples in the appropriate direction, with the pointed end facing down. Be sure to use the correct size staples for your particular staple gun, as using the wrong size can lead to jamming and other issues. After the staples are loaded, close the magazine securely and test the gun to make sure it’s working properly.
Following these simple steps will help you load your staple gun quickly and efficiently, and ensure you can tackle your projects with ease.
Close the magazine and create pressure
When it comes to stapling, loading the staple gun can sometimes be a tricky process. But with a little bit of practice, you’ll be able to do it with ease! First, make sure that your staple gun is unplugged and unloaded. Then, open the magazine and take out the remaining staples.
Once you’ve done that, it’s time to load in the new staples. Take a strip of staples and slide it into the magazine, making sure that the pointed ends are facing down. Push the strip of staples all the way in until it clicks into place.
Then, close the magazine and create pressure by pressing down on the stapler’s head. You’ll hear a click when the staple gun is loaded and ready to go! With this simple technique, you can ensure that your staple gun is loaded properly every time and that you’re always prepared for any stapling needs that may come your way.
Conclusion
In conclusion, filling a staple gun is like refueling a car – it may seem daunting at first, but with a little patience and know-how, you’ll be back up and running in no time. Remember to choose the right size staples, release the magazine properly, and load them in with care. And if you’re still feeling stuck, don’t be afraid to ask for help – after all, two sets of hands are better than one! Happy stapling, folks.
“
Staple gun is ready to use
If you’ve just bought a brand new staple gun, the first thing you’ll need to do is load it up. Thankfully, it’s a simple process and won’t take you very long. First, ensure that the staple gun is in the “open” position, meaning that the magazine is accessible.
Next, insert a strip of staples into the magazine. You’ll want to make sure that the staple legs are facing downwards. Once the staples are loaded, close the magazine and give the staple gun a little test-fire to make sure everything is functioning properly.
That’s it – your staple gun is now ready to use! It’s important to note that different staple guns might have slightly different loading mechanisms, so be sure to check your user manual if you’re unsure. With your loaded staple gun in hand, you’ll be able to tackle all sorts of DIY projects with ease and efficiency.
FAQs
What is a staple gun used for?
A staple gun is used to attach materials together by driving in staples.
How do I load staples into a staple gun?
Every staple gun has a different mechanism, but most will have a spring-loaded magazine that can be pulled back to access the staple chamber. Load the staples in with the points facing down, and then return the magazine to its original position.
Can I use any type of staples in a staple gun?
No, not all staples are created equal. There are different types of staples for different types of staplers. Be sure to check the manufacturer’s instructions for the correct type of staples to use in your staple gun.
How do I adjust the depth of the staple in the material?
Most staple guns have an adjustable knob or lever that will allow you to control the depth of the staple. Practice on a scrap piece of material first to make sure you have the correct depth before starting your project.
What safety precautions should I take when using a staple gun?
Always wear eye protection when using a staple gun. Also, keep your hands and fingers away from the staple gun’s firing mechanism and make sure it is pointed away from your body.
How do I clear a staple jam in my staple gun?
When a staple gets stuck in the staple gun, unplug it or discharge any remaining staples. Use a pair of pliers to pull out the jammed staple and then reload the staple gun.
How do I maintain my staple gun?
Keep your staple gun clean and lightly lubricated to ensure its smooth operation. Also, store your staple gun in a dry place to prevent rust or corrosion.


