How to Cure Plastisol Ink with a Heat Gun: Quick and Easy Way for Permanently Setting Your Designs

Have you ever been in the middle of printing a t-shirt design and realized you don’t have a conveyor dryer to cure the plastisol ink? Don’t worry because there’s a simple solution – a heat gun. Yes, you read that right! A heat gun can be used to cure plastisol ink on your garments. Using a heat gun as a curing tool may sound unconventional, but it’s a tried and tested method used by many printers.
Curing plastisol ink with a heat gun requires less equipment, saves space, and is an affordable option. Plus, using a heat gun gives you more control over the curing process and reduces the risk of ink bleeding or transferring. But how do you cure plastisol ink with a heat gun? It’s simple.
Once you’ve printed your design on your t-shirt and flashed it, aim the heat gun at the ink and move it in a circular motion, making sure you’re not holding it in one spot for too long. You’ll notice the ink starting to melt and solidify, creating a smooth and durable finish. Using a heat gun to cure plastisol ink may not be the ideal solution, but it works in a pinch.
So, the next time you find yourself without a conveyor dryer, don’t panic! Just grab your trusty heat gun, and get to curing. Not only will you save time and money, but you’ll also be able to finish your printing job with ease.
Necessary Equipment
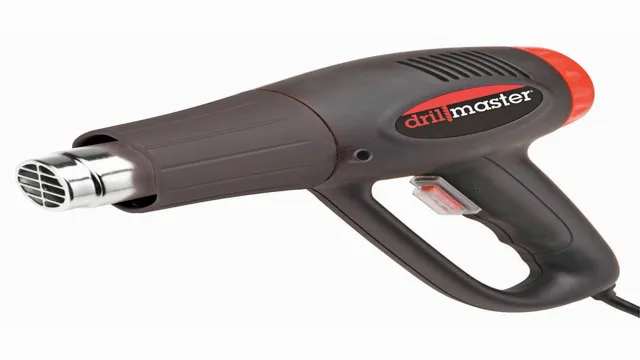
When it comes to curing plastisol ink with a heat gun, there are a few necessary equipment items you’ll need to have on hand. First and foremost, you’ll need a heat gun itself – this is what you’ll use to deliver the necessary heat to your ink. Make sure you choose a heat gun with variable temperature settings so you can adjust it to the proper heat level for your particular ink curing needs.
Additionally, you’ll need a temperature gun or infrared thermometer to test the surface temperature of your substrate and ensure it’s reached the required temperature. A timer is also helpful to keep track of curing times and ensure the ink is properly cured. Of course, you’ll also need your plastisol ink, a substrate to print on, and a screen printing setup.
With these equipment essentials in place, you’ll be well on your way to curing plastisol ink with a heat gun like a pro.
– Heat Gun
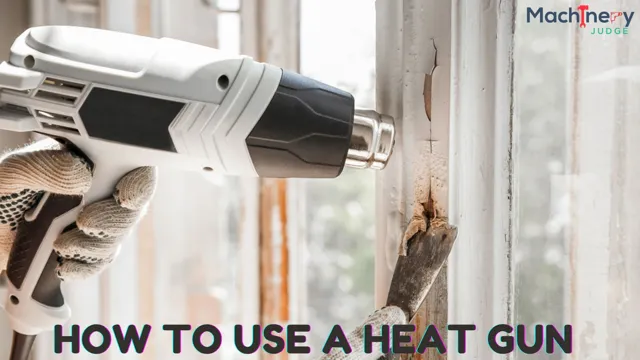
If you’re involved in DIY projects, a heat gun might just be an essential piece of equipment that you need to add to your toolkit. A heat gun is a crucial power tool that can be utilized in a plethora of ways. It is incredibly versatile and can be used for stripping paint from surfaces, removing adhesives, thawing frozen pipes, shrink tubing, and even welding.
A heat gun works by blowing heated air onto a surface and can heat up to temperatures between 100 to 1000 degrees Fahrenheit. Its high temperature makes it useful for melting and bending plastics, as well as shaping metal. It is also great for defrosting frozen pipes, and all you need to do is direct the heat towards the frozen area, and within minutes, the ice melts.
Overall, a heat gun is a tool that every DIY enthusiast should consider adding to their collection of equipment.

– Thermometer
A thermometer is an essential piece of equipment that most people have in their homes. It is a device that is used to measure body temperature, and it can come in different forms such as digital or mercury-based. Thermometers can be used to diagnose health problems and determine if someone has a fever or not.
They are widely used in medical facilities to monitor the temperature of patients and ensure that they remain healthy. In addition to being used for health purposes, thermometers can also be used in cooking to measure the temperature of food, which is crucial for ensuring that it is cooked thoroughly. In short, a thermometer is a must-have tool that can provide valuable information about our health, cooking, and many other aspects of our daily lives.
– Teflon Sheet
When it comes to heat pressing, the necessary equipment you need to ensure successful transfers is crucial. One of the essential components to have is a Teflon sheet. A Teflon sheet provides a barrier between your heat press and your transfer material, preventing any unwanted marks or residue from being left behind.
It also helps protect your transfer material from scorching or burning during the pressing process. These sheets are durable and able to withstand high temperatures, making them a valuable investment for any heat pressing project. Whether you’re a beginner or a pro, having a Teflon sheet in your heat pressing arsenal is a game-changer.
So next time you’re embarking on a heat pressing mission, consider adding a Teflon sheet to your must-have equipment list.
Preparation
If you’re looking to cure your plastisol ink with a heat gun, there are a few things you should do to prepare beforehand. Firstly, make sure your workspace is set up correctly to avoid any potential accidents. The area should be well-ventilated, with plenty of room for you to move around and avoid knocking anything over.
It’s also a good idea to lay down some protective material, such as a tarp or old newspapers, to prevent any ink from getting on your surfaces. Additionally, you should consider the type of heat gun you’ll be using. Make sure it’s appropriate for curing plastisol ink, and that you know how to operate it safely before starting.
By taking the time to prepare carefully, you can ensure that your plastisol ink curing process is safe, efficient, and produces optimal results.
– Set up your workspace with good ventilation.
When it comes to setting up your workspace, one crucial factor that often gets overlooked is good ventilation. Ensuring that there is an adequate flow of fresh air in your workspace can have a significant impact on your health and well-being. Poor ventilation can lead to a buildup of harmful pollutants and allergens, which can irritate your respiratory system and cause breathing difficulties.
It can also exacerbate symptoms for those with pre-existing conditions like asthma or allergies. In addition, good ventilation can help regulate temperature, reduce humidity levels and prevent the growth of mold and other harmful microorganisms. So, be sure to open windows, use fans and air purifiers, and avoid working in closed, stuffy spaces.
Taking these steps will help keep you healthy and productive!
– Place your t-shirt or fabric item on the Teflon sheet.
Preparing your t-shirt or fabric item for transfer printing is a crucial step in ensuring the success of your design. To start, you will need to place the fabric item on a Teflon sheet. This will serve as a protective layer between the fabric and the heat press machine, preventing any adhesive from getting stuck on the equipment.
It is important to ensure that the fabric is flat and smooth, without any wrinkles or creases as these can affect the quality of the print. Additionally, you should make sure that the fabric is clean and free of any dirt or debris that could interfere with the transfer process. By taking the time to properly prepare your fabric item, you are setting yourself up for a successful transfer printing experience.
So, take a deep breath, lay the fabric item flat, and let’s get printing!
Curing Process
If you’re looking for a quick and easy way to cure plastisol ink on your t-shirts or fabric DIY projects, using a heat gun can be an excellent solution. To start, after applying the ink to your fabric, use a handheld heat gun on high heat to dry and cure the ink. Be sure to keep the heat gun moving across the surface, ensuring an even cure and preventing any scorching or burning.
For best results, it’s recommended to cure the ink for at least 30 seconds, but you may need to adjust this time depending on the amount of ink applied or the thickness of the fabric. Using a heat gun to cure plastisol ink can be a convenient alternative to time-consuming oven or flash dryer setups and can help you get your projects done quickly and efficiently. Just remember to follow all safety precautions when using a heat gun and be careful not to expose the ink to too much heat or for too long.
– Preheat your heat gun.
The curing process is a crucial part of any heat gun project. To ensure the best results, it’s important to preheat your heat gun before starting the curing process. This helps to ensure that the temperature is consistent throughout the curing process, which is important for achieving a strong and lasting bond.
Preheating your heat gun is a simple process – just turn it on and let it run for a few minutes before you start. Once your heat gun is preheated, you’re ready to begin the curing process. With a little patience and care, you can get great results every time.
Remember, the key to a successful curing process is to take your time and be patient. Rushing through the process could lead to a weak bond, and that’s the last thing you want when you’re working on a project. So take your time, preheat your heat gun, and enjoy the process.
– Hold the nozzle 2-3 inches away from the printed area.
The curing process is a crucial step in 3D printing that involves using UV light to cure the resin and ensure that the final product is strong and durable. This process is essential as it allows the printed product to fully solidify, increasing its strength and rigidity. To achieve a successful curing process, it’s important to consider the distance between the nozzle and the printed area.
Holding the nozzle 2-3 inches away from the printed area helps to ensure that the resin is cured evenly, eliminating any weak points that may compromise the strength of the final product. This distance is optimal as it ensures that the UV light is not too intense, which can lead to over-curing and cause the resin to become brittle and prone to breakage. By carefully following the correct curing process, you can ensure that your 3D printed products are of the highest quality, and will stand the test of time.
– Slowly move the heat gun over the print in circular motions.
The curing process is an essential step in achieving the best possible 3D print. This process involves applying heat to the print to make it firm and stable. A heat gun is the preferred tool for curing, and it is important to use it correctly to avoid damaging the print.
The first step is to set the heat gun to the appropriate temperature based on your filament. ABS filaments require a higher temperature compared to PLA filaments. Slowly move the heat gun over the print in circular motions, keeping it no more than one inch away.
The heat should be kept moving to avoid any one area from being exposed to too much heat. After a few minutes, the print should change slightly and start to seem a bit firmer. Continue this process until the entire surface of the print has been cured.
Remember to remain cautious and avoid overheating your print. With proper curing techniques, your 3D printed items will be sturdy and strong, able to withstand heavy use and long-term wear and tear.
– Check the temperature regularly with your thermometer.
Curing is an essential process in the production of cured meats, and it involves a series of steps to ensure the meat is preserved properly. One critical step in the curing process is checking the temperature regularly with a thermometer. This step is important because it ensures that the meat is neither too hot nor too cold, which could cause spoilage or even make it unsafe to eat.
Keeping a close eye on the temperature also ensures that the curing agents penetrate the meat evenly, resulting in a more flavorful and consistent product. Investing in a high-quality thermometer and taking the time to monitor the temperature during the curing process can make all the difference in the final product’s taste and quality. So, if you’re new to curing meats, make sure to prioritize checking the temperature regularly.
– Once the temperature reaches 320-330°F, the ink is cured.
When it comes to screen printing, the curing process is crucial. Once the printing process is complete, the ink needs to be cured to ensure it sets properly. The curing process involves heating the ink to a specific temperature, typically ranging from 320-330°F.
Once the temperature is reached, the ink sets and becomes more durable and resistant to wear and tear. Without proper curing, the ink may appear dry but will easily rub off and fade over time. It’s important to note that the curing time may vary based on the ink type, color, and substrate being used.
Overall, the curing process is a critical step in producing high-quality and long-lasting screen printed products. So, if you want your designs to stand the test of time, make sure to give them the proper curing they need.
Post-Curing
If you’re looking to cure plastisol ink with a heat gun, it’s important to know the proper techniques. First, make sure your ink is fully cured before applying heat. This ensures the ink won’t melt or shrink during the curing process.
Next, use a heat gun with a temperature range between 330-350°F and a low air flow setting. Gently move the heat gun over the ink in a circular motion, making sure not to get too close as to avoid scorching or burning the fabric. Keep the heat gun moving for about 30 seconds, then let the garment cool for a few minutes before handling.
It’s important to note that using a heat gun should not be a replacement for traditional conveyor dryer curing. However, in a pinch, it can be a good alternative for small jobs. Overall, curing plastisol ink with a heat gun takes patience and attention to detail, but with the right tools and techniques, it can be done successfully.
– Let the print cool down completely before touching or washing.
Post-curing is an essential process in 3D printing that involves heating the printed object after it has been formed. This is done to reinforce the strength of the object and make it more durable. Post-curing is particularly important for objects made from materials like resin and plastic, as they can be prone to cracking and breaking if they are not adequately hardened.
During the post-curing process, the object is heated to a specified temperature for a set amount of time. This process allows the material to bond more efficiently, resulting in a stronger and more robust object. After post-curing, it is crucial to let the print cool down completely before handling or washing it.
A lack of patience and eagerness to handle the print can lead to structural defects and deformities. Therefore, it’s essential to wait for the print to reach room temperature before taking any further actions. In conclusion, post-curing is a vital process that ensures your 3D prints are robust and long-lasting.
Conclusion
So there you have it, folks! If you’re looking to cure plastisol ink in a flash, all you need is a handy-dandy heat gun. Remember to keep a safe distance and move the heat gun constantly to prevent scorching. And who knows? Maybe with a little practice, you’ll become the Michelangelo of plastisol printing.
Or, at the very least, save yourself from a tacky t-shirt disaster. Happy printing!”
FAQs
Can I cure plastisol ink with a heat gun?
Yes, you can cure plastisol ink with a heat gun by heating it to the recommended temperature for a certain amount of time.
What temperature should I set my heat gun to cure plastisol ink?
It is recommended to set your heat gun to a temperature between 320-330°F (160-165°C) to cure plastisol ink properly.
How long should I use the heat gun to cure plastisol ink?
The recommended time for curing plastisol ink with a heat gun is between 60-90 seconds.
Can I use a heat gun to cure plastisol ink on any material?
It is not recommended to use a heat gun to cure plastisol ink on heat-sensitive materials such as nylon or polyester.
Can I cure multiple layers of plastisol ink with a heat gun?
Yes, you can cure multiple layers of plastisol ink with a heat gun. It is recommended to cure each layer separately for the best results.
What are the advantages of curing plastisol ink with a heat gun?
Curing plastisol ink with a heat gun allows for faster and more efficient curing of the ink, which can save time and improve productivity.
What precautions should I take when curing plastisol ink with a heat gun?
It is important to wear protective gloves and safety glasses while using a heat gun to cure plastisol ink. Additionally, avoid pointing the heat gun directly at the ink to prevent scorching or burning.


