Can You Spray Stain with a Paint Sprayer? Find Out the Benefits and Techniques of Staining with a Paint Sprayer.

If you’ve ever worked with wood or other porous materials, then you know the hassle of applying stain. The go-to method for most professionals is typically to use a brush or rag, but there’s another option that saves time and gets better results – spraying stain with a paint sprayer. While it might seem daunting to try spraying stain with a paint sprayer, it’s actually quite easy.
In fact, it can be a game-changer when it comes to staining large surfaces, intricate designs, or hard-to-reach areas. Not only will you save time, but your finished product will look more even and professional. But where do you even start? What kind of sprayer do you need? What type of stain should you use? Don’t worry, we’ve got you covered.
In this post, we’ll discuss everything you need to know about spraying stain with a paint sprayer. From the best sprayer type to the perfect stain consistency, we’ll cover it all. So, if you’re tired of the brush and rag method and want to streamline your staining process, keep reading.
By the end of this post, you’ll be ready to tackle any staining project with confidence.
The Basics of Spraying Stain
Yes, you can definitely spray stain with a paint sprayer. In fact, using a paint sprayer to apply stain is a popular technique because it can save time and produce an even coating on your surface. Before spraying stain with a paint sprayer, however, there are some basics you should know.
First, you want to make sure that the stain is thinned correctly, which will help it flow smoothly through the sprayer. You’ll also want to adjust the sprayer settings to achieve the desired pattern, as well as take precautions to protect yourself and your surroundings from overspray. Additionally, it’s important to note that when spraying stain, the coat should be light and thin, as multiple coats can be applied if needed to achieve the desired depth of color.
By following these basics, spraying stain with a paint sprayer can be an efficient and effective method for staining your surfaces.
Understanding Your Paint Sprayer
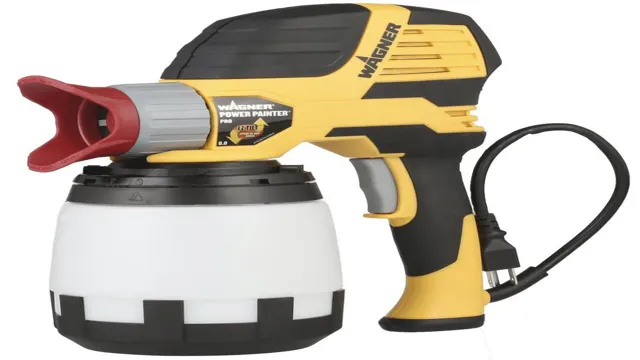
Using a paint sprayer is a great way to achieve a professional-looking finish on your stained surfaces, but it takes a bit of practice to master. First, you need to choose the right type of sprayer for the job at hand, which will depend on the size and complexity of your project. For staining, an airless or HVLP sprayer is best, as they provide a fine mist that evenly coats the surface without creating too much overspray.
Before you start spraying, it’s important to properly prepare your surface by cleaning, sanding, and applying a primer if necessary. When you begin spraying, keep the nozzle perpendicular to the surface and move the sprayer in a smooth, even motion. It’s also important to maintain a consistent distance from the surface, typically around six to eight inches for staining.
By following these basic steps and taking the time to practice and perfect your technique, you can create a beautiful finish that will last for years to come.

Choosing the Right Stain for Spraying
Choosing the Right Stain for Spraying: The Basics of Spraying Stain Spraying stain can be an excellent way to speed up your staining projects, provided you have the right tools and know-how. One of the most important factors to consider when spraying stain is the type of stain you’ll be using. Some stains are better suited to spraying than others, so it’s important to choose wisely.
Oil-based stains, for example, can be difficult to spray because they tend to be thick and sticky, which can cause clogged spray nozzles and uneven coverage. Water-based stains, on the other hand, are generally easier to spray because they have a thinner consistency and dry more quickly. Another important factor to consider when choosing a stain for spraying is color.
Some stains are highly pigmented and opaque, while others are translucent and allow the wood grain to show through. Generally, opaque stains are better suited to spraying because they tend to provide more even coverage, while translucent stains can be difficult to apply evenly and may require multiple coats. Ultimately, the best stain for spraying will depend on your specific project and the tools you have available.
It’s a good idea to test out different stains and application methods on a small area of wood before committing to a larger project. By choosing the right stain and using the proper spraying techniques, you can achieve a professional-looking finish in no time.
Preparing for Spraying Stain
Yes, you can definitely spray stain with a paint sprayer. However, it’s important to prepare properly in order to achieve the best results. First and foremost, make sure that the paint sprayer you plan on using is compatible with stains.
Some sprayers are designed for use with thicker paints and may not work as well with stains. Once you’ve confirmed compatibility, take the necessary precautions to prevent overspray and ensure even coverage. Cover nearby surfaces and objects with drop cloths or painter’s tape, and practice your technique on a test board before tackling the entirety of your project.
It’s also important to choose the right type of stain for the job and thin it properly if needed. Remember, spraying a stain can be a time-saving method, but it’s not necessarily a shortcut. A little bit of preparation and care can go a long way in achieving a professional-looking finish.
Protecting Surrounding Area
When preparing to spray stain, it’s important to protect the surrounding area to prevent damage to nearby plants, furniture, and other objects. Start by covering any nearby plants with drop cloths or plastic sheeting, making sure they are completely covered to avoid exposure to the spray. If there are any items that cannot be moved, such as outdoor furniture, cover them as well to avoid staining or damage.
Additionally, use painter’s tape to cover any nearby hinges, door handles, or other hardware that could be affected by the spray. This will prevent any accidental staining or damage, allowing you to focus on achieving a smooth and even finish. By taking the time to protect the surrounding area, you can ensure that your spray staining project goes smoothly and without any unintended consequences.
Preparing Your Surface for Stain
Spraying Stain Before applying stain to your surface, it’s important to prepare it properly. One of the best ways to apply stain is by spraying. However, before you can start spraying, you need to make sure that your surface is clean and ready to accept the stain.
Start by removing any dirt, dust, or debris from the surface using a brush or a vacuum. It’s also important to remove any existing paint or finish from the surface, as the stain won’t properly adhere to it. This can be done using a chemical stripper or sandpaper.
After removing any paint or finish, make sure to thoroughly clean the surface with soap and water to remove any residue. Finally, make sure that the surface is completely dry before applying the stain. By properly preparing your surface, you can ensure that your stain has the best chance to adhere properly and look great.
So, give your surface the attention it deserves and get ready to spray your stain for a beautiful finish.
Mixing and Diluting Your Stain
When it comes to preparing for spraying stain, mixing and diluting your stain is an important step to achieve a smooth and even finish. The first thing to consider is the type of stain you are using, as the mixture ratio may vary. Generally, oil-based stains require a higher amount of solvent for dilution, while water-based stains need less.
It is advisable to mix the stain thoroughly before diluting to ensure consistency. Next, you can gradually add the solvent in small amounts and mix it well each time until you reach the desired consistency. It is crucial to check the manufacturer’s instructions for dilution and consult with an expert to avoid over or under dilution that can affect the stain’s performance.
Overall, proper mixing and dilution of your stain can make spray application easier and more effective, providing excellent results on your woodworking project.
Spraying Stain with Your Paint Sprayer
If you’re wondering whether you can use a paint sprayer to apply a stain, the answer is yes, you absolutely can! In fact, it’s a great way to achieve a smooth and flawless finish on large surfaces like decks, fences, and siding. However, it’s important to note that not all paints sprayers are created equal. You’ll need to make sure you have the right type of sprayer and the right nozzle to accommodate the thicker consistency of stain.
Additionally, you’ll want to make sure you properly prepare the surface, including filling in any cracks or holes and applying a wood conditioner if needed, to ensure the stain properly adheres and penetrates into the wood. With the right equipment and preparation, spraying stain with a paint sprayer can be a quick and easy solution to achieving a professional-looking finish.
Adjusting Your Sprayer Settings
Spraying stain with your paint sprayer can be a bit tricky, but if done correctly, it can provide a smooth and even finish to your project. One of the most important things to consider when using a paint sprayer for staining is adjusting your sprayer settings. The right settings can make a big difference in the overall quality of your work.
You’ll want to adjust your sprayer’s flow rate, spray pattern, and pressure to ensure that you get the right amount of stain on your project without leaving any imperfections. When adjusting your sprayer, start by testing it out on a scrap piece of wood or material similar to what you’ll be staining. Make sure to adjust the flow rate to a level that is appropriate for the thickness of your stain and the size of your project.
You’ll also want to adjust the spray pattern so that it matches the shape and size of your project. This will help ensure that you get an even coat of stain with no streaks or blotches. Lastly, it’s important to adjust the pressure of your sprayer.
Too much pressure can cause overspray and waste your stain, while too little pressure can result in an uneven coat. Adjust the pressure until you get the perfect balance for your project. By adjusting your sprayer settings, you can achieve a professional-looking finish that will last for years to come.
Don’t be afraid to experiment with your settings until you find what works best for you. With a little practice and patience, you’ll be a pro at spraying stain with your paint sprayer in no time!
Spraying Techniques
Spraying stain with your paint sprayer can be a bit daunting if you’re new to DIY or haven’t tried it before. However, spraying stain can be much easier and more efficient than doing it with a brush or roller. The most important thing to remember is to choose a compatible spray tip for the stain’s thickness, so it can get atomized and sprayed evenly.
Also, make sure to follow the manufacturer’s instructions for thinning the stain, if needed. It’s crucial to use a mask to protect yourself from fumes and airborne particles. Additionally, it’s a good idea to practice spraying on a piece of scrap wood or cardboard before starting the actual project to get comfortable with the sprayer’s settings and technique.
With the right preparation and technique, spraying stain with your paint sprayer can be an excellent way to achieve a beautiful, consistent finish on your project.
Tips for a Successful Stain Spray Job
Can you spray stain with a paint sprayer? Yes, you can. It’s actually a more efficient and faster way to apply stain to large surfaces like decks, fences, and furniture. However, there are some tips you should follow to ensure a successful stain spray job.
First, choose a high-quality stain that’s suitable for sprayer application. Secondly, prep the surface by thoroughly cleaning and sanding it. Cover any areas you don’t want stained with plastic drop cloths or painter’s tape.
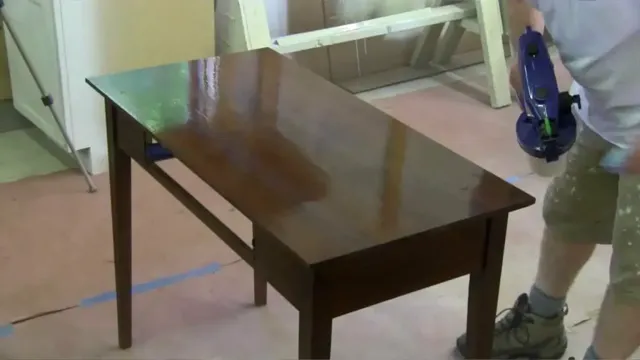
Before you begin spraying, do a test run on a small, inconspicuous spot to ensure the flow and consistency are correct. Then, start spraying in even strokes, keeping the nozzle about six to eight inches away from the surface and moving it in a side-to-side motion. Finally, wait for the stain to dry completely before applying a second coat (if desired) or sealing the surface with a protective coating.
By following these tips, you can achieve a professional-looking stain spray job that lasts for years.
Conclusion
In conclusion, while it may seem like a quick and easy solution to spray your stain with a paint sprayer, it’s important to consider the type of stain you’re using and the equipment required to achieve the desired finish. Just like you wouldn’t use a fork to eat soup, using the wrong tool for the job can result in a messy and unsatisfactory outcome. So, if you’re looking to achieve a flawless finish, it’s best to stick with the recommended application method for your chosen stain.
Happy staining!”
FAQs
Can you spray stain with a paint sprayer?
Yes, you can spray stain with a paint sprayer. In fact, it can be a more efficient and even application method compared to using a brush or roller.
What type of paint sprayer is best for spraying stain?
A HVLP (high volume low pressure) paint sprayer is best for spraying stain. It allows for better control over the flow and pattern of the stain.
Do you need to thin stain before spraying it with a paint sprayer?
Yes, it is recommended to thin stain before spraying it with a paint sprayer. This will ensure a smooth and even application. Follow the manufacturer’s instructions on how much to thin the stain.
Can you use a regular paint sprayer nozzle for staining?
Yes, you can use a regular paint sprayer nozzle for staining, but it may not provide as precise of a spray pattern as a specialized stain nozzle.
How do you clean a paint sprayer after spraying stain?
To clean a paint sprayer after spraying stain, first flush out the sprayer with mineral spirits or paint thinner. Then, disassemble the sprayer and clean all parts with warm water and detergent. Rinse thoroughly and let dry before storing.
Can you spray stain on outdoor surfaces with a paint sprayer?
Yes, you can spray stain on outdoor surfaces with a paint sprayer. However, make sure to choose a stain that is meant for outdoor use and follow proper safety precautions like wearing protective gear and covering any nearby plants or objects.
What is the best technique for spraying stain with a paint sprayer?
The best technique for spraying stain with a paint sprayer is to start with a light coat and gradually build up the thickness. Keep the sprayer moving in a smooth, steady motion and overlap each pass slightly to ensure even coverage.


