Can You Use a Paint Sprayer on Walls: Pros, Cons, and Tips for Flawless Finish

Have you ever considered using a paint sprayer on your walls? It may seem intimidating at first, but with the right techniques and tools, it can save you a lot of time and effort. Not to mention, the finish is often more even and professional-looking than traditional rollers or brushes. Think of it like frosting a cake – you wouldn’t use a spoon to spread the icing, right? A paint sprayer allows for a smooth, consistent application that can cover large areas quickly.
Plus, you can easily adjust the pressure and paint flow to customize your spray for the type of surface you are painting. Of course, there are some things to keep in mind when using a paint sprayer on walls. Proper preparation, such as masking off areas you don’t want painted and covering floors or furniture, is crucial.
And it’s important to practice using the sprayer on a test surface before diving into your walls. But with a little practice and know-how, using a paint sprayer on your walls can be a game changer for your DIY projects. Say goodbye to the time-consuming task of using a roller or brush, and hello to a professional-looking finish with minimal effort.
Advantages of Using a Paint Sprayer
Yes, you can definitely use a paint sprayer on walls, and there are many advantages to doing so. First of all, a paint sprayer can cover a large area quickly and evenly, eliminating the need for multiple coats and touch-ups. This can save you a lot of time and energy, especially if you have a large area to paint.
Additionally, using a sprayer can provide a smoother, more professional finish than traditional methods like brushed or rolled-on paint. This is because the sprayer atomizes the paint particles, creating a fine mist that adheres to the surface more evenly and dries faster. Finally, a paint sprayer can also help you to save on paint costs, as you can typically use less paint overall than you would with other methods.
Overall, if you are looking for a faster, easier, and more professional way to paint your walls, a paint sprayer may be the perfect tool for the job.
Time-saving
If you’re looking to save time on home or DIY projects, a paint sprayer can be a game-changer. Unlike traditional brushes or rollers, paint sprayers spray paint quickly and evenly over a large surface area, making it easy to finish a project in a fraction of the time it would take with conventional methods. This can be a huge advantage for busy homeowners or contractors who need to complete a project quickly.
Plus, spraying paint can often lead to a smoother finish with fewer visible brush or roller marks, resulting in a more professional-looking end product. So if you’re looking to save time and achieve a more polished look, investing in a paint sprayer is definitely worth considering.

Efficient
As a home renovator, I always want to get the job done right and quickly, which is why I love using a paint sprayer. Not only does it save me time, but it also ensures a smoother finish. Using a paintbrush or roller can be time-consuming and tiring, especially for large projects.
With a paint sprayer, I can cover large areas with ease and get into tight spaces with precision. One of the advantages of using a paint sprayer is that it allows for a more even application. The sprayer atomizes the paint into tiny particles, creating a fine mist that covers surfaces without leaving brush or roller marks.
This results in a smooth and consistent finish that looks professional. Additionally, a paint sprayer also helps to reduce overspray, making it an efficient tool for the job and saving paint. Overall, a paint sprayer is a tool that every DIY enthusiast should have in their toolkit.
Not only does it save time, but it also provides a more professional and consistent finish. I highly recommend using a paint sprayer for your next home renovation project.
Even coverage
If you’re in need of painting furniture, walls, or any surface, a paint sprayer can be an excellent tool to use. Advantages of using a paint sprayer include even coverage, significant time savings, and versatility. With a paint sprayer, you can quickly achieve a smooth and uniform finish to the surface you’re painting.
Unlike a roller or brush, which can leave uneven spots or streaks, a paint sprayer gives you a consistent layer of paint. Additionally, since paint sprayers apply paint in a fine mist, you can cover a surface much faster than you would be able to with a roller or brush. This makes it the perfect tool for large painting projects or surfaces that have intricate patterns.
Overall, using a paint sprayer can make painting a lot easier and more efficient, delivering a professional-looking finish every time.
Saves paint
Using a paint sprayer comes with several advantages, and one of the most significant is that it saves paint. Unlike traditional painting methods where a brush or roller is used to apply paint, a sprayer releases a fine mist that covers the surface evenly. This means that less paint is needed to achieve the desired coverage.
Additionally, sprayers allow for precision, meaning that you are less likely to overspray or waste paint on areas that do not require it. This not only saves on paint costs, but it also saves on cleanup time and effort. By using a sprayer, you can save money in the long run while enjoying a smooth, professional-looking finish.
So if you’re looking to cut costs on your next painting project, using a paint sprayer might be the way to go.
Preparations for Using a Paint Sprayer
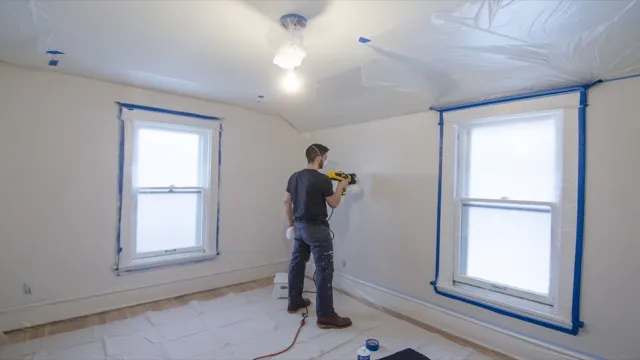
Using a paint sprayer on walls can save you a lot of time and deliver a flawless finish if done properly. However, a few preparations are needed before you get to work. First, make sure you cover all the surfaces you don’t want to paint, including the floor and furniture, with drop cloths or plastic sheets.
This will protect them from any overspray and drips. Next, inspect the wall surface and clean it thoroughly to remove any dirt, dust, or debris. If necessary, patch up any cracks or holes and sand the surface evenly.
Then, choose the right paint for your sprayer and thin it appropriately if needed. Finally, practice your spray technique on a piece of cardboard or scrap wood before applying it to the wall. This will help you get a feel for the sprayer and adjust the settings as needed.
By taking these steps, you can achieve a professional-looking paint job that will last for years.
Cover floors and furniture
When using a paint sprayer, it is important to take the necessary precautions to avoid making a mess. One of the most important preparations you can make is to cover your floors and furniture. Paint can easily splatter and may even drift in the air, so covering surfaces that you want to protect is essential.
You can use drop cloths, plastic sheeting, or even old newspapers to create a barrier between your paint sprayer and your valuables. Just make sure that you secure the coverings tightly so that they don’t move around or get in the way while you’re working. By taking the time to cover your floors and furniture before using your paint sprayer, you can minimize the risk of damage and ensure that your space stays clean and mess-free.
So, don’t forget to cover up before you start spraying!
Mask edges with painter’s tape
When it comes to using a paint sprayer, preparation is key. One important step that cannot be overlooked is masking the edges with painter’s tape. This will help ensure clean and crisp lines, as well as protect any areas that should not be painted.
Make sure to use high-quality painter’s tape, as cheaper brands may not adhere properly or leave a residue. When applying the tape, press it firmly to the surface and use a putty knife or similar tool to smooth out any bubbles or wrinkles. Be sure to also remove the tape carefully once the paint has dried to prevent any peeling or damage.
By taking the time to properly mask the edges, your paint job will look more professional and polished.
Prime the walls
When using a paint sprayer to paint your walls, it is crucial to prime the walls first. Priming creates a smooth and even surface that the paint can easily adhere to. Plus, it helps to cover up any imperfections on the walls.
Before applying the primer, make sure the walls are clean and dry. Use a damp cloth to wipe away any dust or debris. Next, apply painter’s tape to any areas that you don’t want to be painted.
Once everything is prepped and ready, you can get started on applying the primer. The primer should dry completely before proceeding with the paint sprayer. With the right prep work, your walls will be ready for a professional-looking paint job that is sure to impress.
Thin paint to appropriate consistency
When using a paint sprayer, thinning the paint to the appropriate consistency is a crucial step in preparing for your project. Thin paint will ensure that your sprayer will work correctly and that the paint will apply evenly to your surface. The ideal consistency to aim for is similar to that of whole milk – not too thick and not too thin.
You can achieve this by slowly adding water to your paint and then stirring it until it is well mixed. Be cautious not to add too much water or thin your paint too much. Doing so can result in a loss of color intensity, spotty coverage, and even clogging of your sprayer.
It’s always better to add small amounts of water at a time until you achieve the right consistency. By doing so, you’ll minimize the risk of runny or lumpy paint and ensure that your paint sprayer performs at its best throughout your project.
Steps to Painting Walls with a Paint Sprayer
If you’re wondering if you can use a paint sprayer on walls, the answer is a resounding yes! Using a paint sprayer can make painting walls much faster and easier than using a roller or brush. Before starting, be sure to protect any furniture, floors, or other items in the room that could be damaged by paint mist. Also, make sure to clean the walls thoroughly and repair any cracks or holes.
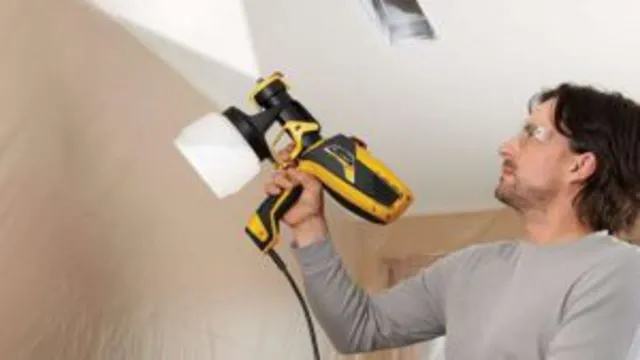
Once you’ve set up your equipment and filled the paint cup, start at the top of the wall and work your way down in sections, overlapping each pass of the sprayer to ensure even coverage. Don’t forget to wear appropriate safety gear, such as a mask and goggles, and follow the manufacturer’s instructions for proper use and cleaning of the sprayer. With a little patience and practice, you’ll soon have perfectly painted walls that will make your space feel brand new!
Fill the sprayer with paint
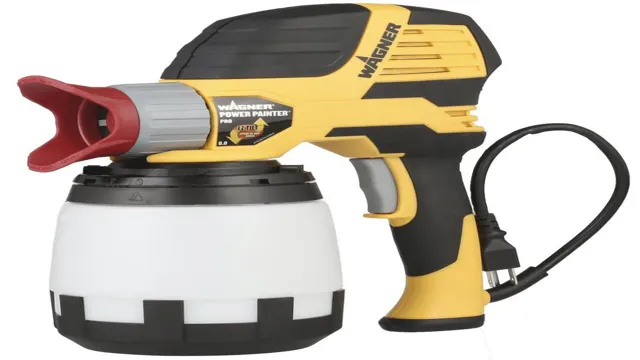
When it comes to painting walls with a paint sprayer, the first step is to fill the sprayer with paint. This may seem like common sense, but it’s important to note that not all paints are created equal. It’s essential to use a paint that’s specifically designed for sprayers, as this will result in a better finish, and it will also be easier to use.
Once you have your paint, you need to mix it thoroughly, making sure to follow the manufacturer’s instructions. Pour the paint into the sprayer’s container, and then use a stirring stick to ensure that it’s evenly mixed. When filling the sprayer, it’s important not to overfill it, as this can cause the paint to leak.
As a general rule of thumb, you should fill the sprayer to about 60% capacity. By following these steps, you’ll be ready to start painting your walls with a paint sprayer in no time.
Test the sprayer on a scrap surface
Before starting to paint your walls with a paint sprayer, it’s important to test the sprayer on a scrap surface to ensure that you have the right consistency and flow. This step can save you a lot of time and frustration later on, as it will help you get a feel for how the sprayer works and how to adjust it for the best results. To do this, simply choose a small, inconspicuous area of your wall, set up the sprayer according to the manufacturer’s instructions, and then apply some paint onto the surface.
This will allow you to see how the paint sprays, how thick it is, and how it covers the surface. Once you’re satisfied that the sprayer is working properly and you know how to adjust it for the best results, you can begin painting your walls with confidence. Remember to always clean your sprayer thoroughly after each use to keep it in good condition and extend its lifespan.
Begin painting from top to bottom
When it comes to painting walls with a paint sprayer, there are several steps you need to follow to ensure a smooth and flawless finish. The first step is to prep the room by covering floors and furniture with drop cloths or plastic sheets, and by taping off any areas you don’t want to be painted. Once you’ve prepped the room, it’s time to prepare your paint sprayer by filling it up with your chosen paint and testing the spray pattern on a small, inconspicuous area.
Once you’re ready to start painting, it’s important to begin at the top of the wall and work your way down, painting in controlled, even strokes. This will help to avoid any drips or splatters, and will ensure a consistent finish. As you paint, take breaks to keep an eye out for drips or runs, and to adjust the spray pattern as needed.
With these steps, you can achieve a professional-looking paint job that will leave your walls looking fresh and new. So go ahead and get started on transforming your space with your trusty paint sprayer!
Overlap each pass by 50%
When it comes to painting walls with a paint sprayer, there are a few steps you’ll want to follow to ensure a smooth and even finish. First, make sure to properly prepare your walls by cleaning them thoroughly and taping off any areas you don’t want to be painted. Next, select the right paint and thin it according to the sprayer’s instructions.
Before you begin painting, it’s essential to practice spraying on a test surface to get a feel for how the sprayer works and adjust as needed. When you’re ready to start, hold the sprayer 6-8 inches away from the wall and overlap each pass by 50% to avoid any missed spots. Remember to keep the sprayer moving at a consistent speed to prevent drips or uneven coverage.
By following these simple steps and using the proper technique, you’ll be able to achieve professional-looking results with your paint sprayer.
Allow paint to dry before adding another coat
When it comes to painting walls with a paint sprayer, there are several key steps you need to follow to ensure a smooth, professional finish. Step one is preparation: make sure your walls are clean, dry, and free of any loose debris or flaking paint. Next, you’ll need to mask off any areas you don’t want to paint, such as baseboards or trim.
Once your prep work is complete, it’s time to start spraying. Begin by holding the sprayer at a 45-degree angle to the wall and moving it in a smooth, steady motion from side to side. Be sure to overlap each pass slightly to avoid any gaps in your coverage.
Remember, it’s better to apply several thin coats rather than one thick one, as this will minimize drips and ensure a more even finish. Finally, allow each coat to dry completely before applying the next one, and resist the urge to rush the process. By following these simple steps and taking your time, you can achieve a gorgeous, professional-looking paint job that will stand the test of time.
Tips and Tricks for Using a Paint Sprayer
Using a paint sprayer can be a game-changer when it comes to painting walls. Not only can it save you time, but it can also give you a smooth and even finish that’s hard to achieve with traditional brushes and rollers. So, can you use a paint sprayer on walls? Absolutely! In fact, paint sprayers are great for walls, especially large ones or those with a lot of corners and edges.
However, it’s important to use the right technique and equipment to get the best results. Make sure to use the right paint and thin it properly, as well as adjust the nozzle depending on the type of surface you’re painting. Take the time to prepare the area by covering floors, furniture, and fixtures, and practice on a small section before taking on the entire wall.
With a little bit of practice, you’ll soon be painting walls like a pro with your trusty paint sprayer by your side!
Practice on a scrap surface first
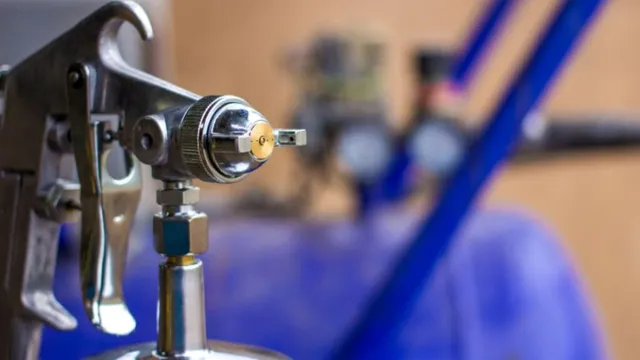
When using a paint sprayer, it’s important to remember to practice on a scrap surface first. This will help you get a feel for the spray pattern and make any necessary adjustments before applying the paint to your project. It’s also a good idea to test out different nozzle sizes and spray speeds to see what works best for your specific project.
By taking the time to practice and experiment, you can avoid the frustration of having to redo your work or ending up with a subpar finish. So, before you start spraying on your project, take a few minutes to practice on a spare piece of wood or cardboard. Trust me, it will save you time and headaches in the long run.
Maintain consistent speed and distance from the wall
When using a paint sprayer, it is important to maintain a consistent speed and distance from the wall to achieve a professional-looking finish. Moving too quickly or too slowly can cause uneven coverage and drips, while straying too far from the wall can result in overspray and wasted paint. To keep a steady pace, try practicing on a scrap piece of wood or cardboard before tackling a larger project.
Additionally, using a spray guide or painter’s tape can help ensure a consistent distance from the wall. Remember to adjust your speed and distance depending on the type of paint you are using and the surface you are painting on. By keeping these tips in mind, you can create a smooth, even finish that will leave your walls looking flawless.
So, the next time you pick up a paint sprayer, remember to maintain your speed and distance for a flawless application.
Clean the sprayer thoroughly after use
After you’ve finished using a paint sprayer, it’s crucial to clean it thoroughly to ensure it’s ready for its next use. Leaving residual paint in the sprayer’s components can cause blockages, reduce efficiency and ultimately damage the machine. Begin by detaching the spray tip and wiping it clean with a cloth or brush.
Remove any remaining paint left in the sprayer by flushing it out with the appropriate solvent. You can use water for water-based paints, but for oil-based paints, you’ll need something like mineral spirits. Once all the components are clean, reassemble the sprayer and run clean water or solvent through it to flush out any remaining debris.
Lastly, ensure you store the sprayer correctly by keeping it in a dry and safe location. These simple steps will keep your paint sprayer in tip-top condition, ready to use whenever you need it. Remember that proper maintenance of your equipment can extend its lifespan and save you money in the long run.
Use an extension pole for higher walls
A paint sprayer can be a fantastic tool when it comes to painting large walls. However, when dealing with high walls, using an extension pole can help make the job more manageable. An extension pole can be attached to your paint sprayer, allowing you to reach those hard-to-reach spots with ease.
This can save you time and energy, as you won’t have to climb up and down a ladder or stand on a platform to reach the higher portions of your wall. When using an extension pole with your paint sprayer, it’s important to ensure that the pole is secure, and that you have a firm grip on both the pole and the sprayer itself. With a little practice, you’ll be able to achieve a smooth and even coat of paint on even the tallest of walls.
So, if you’re planning on painting a high wall, don’t forget to grab an extension pole to make the job a little easier!
Conclusion
As we’ve discovered, the answer to the question “Can you use a paint sprayer on walls?” is a resounding YES! Not only is it a time-saving and efficient method for painting large areas, but it also allows for a flawless finish. So, don’t be afraid to try something new and give your paint roller a break. Just remember to wear a mask and cover your floors and furniture before getting started!”
FAQs
What type of paint sprayer is recommended for painting walls?
Airless paint sprayers are the best choice for painting walls.
Do I need to thin the paint before using a paint sprayer?
It depends on the type of paint sprayer and the viscosity of the paint. Some paint sprayers require thinning, while others can handle thicker paint without thinning.
Can a beginner use a paint sprayer to paint walls?
Yes, with proper preparation and practice, beginners can use a paint sprayer to paint walls.
How do I prepare the walls before using a paint sprayer?
Walls should be cleaned, repaired, and primed before using a paint sprayer. Cover floors and furniture with drop cloths.
What safety precautions should I take when using a paint sprayer?
Wear protective clothing, including a mask and goggles. Work in a well-ventilated area and avoid spraying near sparks or open flames.
How do I clean my paint sprayer after using it to paint walls?
Follow the manufacturer’s instructions for cleaning the paint sprayer. Typically, you will need to flush the system with water or cleaning solution.
Can a paint sprayer be used to apply textured paint?
Yes, some paint sprayers can handle textured paint. Check the manufacturer’s specifications before using a paint sprayer for textured paint applications.


