How to Use 360 Laser Level for Accurate and Efficient Measurements

Have you ever wanted to take on some DIY challenges at home but were hampered by uneven surfaces and wonky angles? Or perhaps you’re in the construction field and need to ensure that your projects meet professional standards. Look no further than a 360 laser level. This tool helps create a perfectly level and plumb surface by emitting a laser beam in a 360-degree circle.
Whether you’re a DIY enthusiast or a seasoned professional, a 360 laser level can help streamline your work. In this beginner’s guide, we’ll explore the basics of using a 360 laser level, including tips and tricks for getting the most out of this versatile tool. So grab your safety gear and let’s dive into the world of 360 laser levels!
What is a 360 Laser Level?
If you’re looking to upgrade your home renovation projects or construction work, a 360 laser level is a great tool to invest in. As the name suggests, this device emits a 360-degree laser beam that creates a perfectly level line around the entire room or outdoor space. This makes it incredibly versatile, as it can be used for a wide range of applications, from installing ceiling tiles to laying out garden beds.
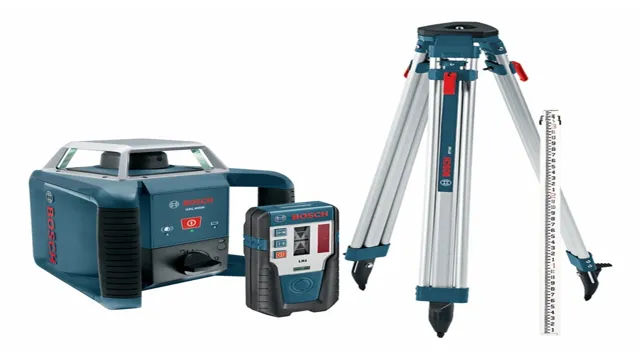
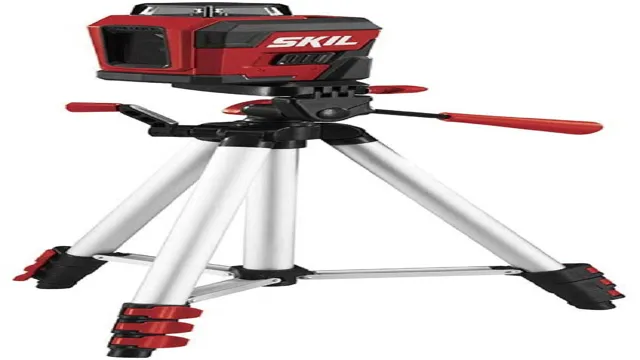
To use a 360 laser level, simply set it up on a tripod or stable surface, switch it on, and adjust the level until the laser line is exactly where you need it. With its accuracy and ease of use, a 360 laser level can save you time and effort, while also ensuring a professional-looking finish to your projects. Whether you’re a DIY enthusiast or a professional contractor, a 360 laser level should definitely be on your list of must-have tools.
Key Features
A 360 laser level is an essential tool for both professional builders and DIY enthusiasts. This tool projects a 360-degree laser beam that enables you to work on walls, ceilings, and floors with precise alignment. The accuracy of a 360 laser level is unmatched and offers a clear guide for measurement and layout on multiple surfaces.
This type of laser level offers a panoramic view that eliminates the need for multiple setups, which can save time and improve efficiency. Some key features of a 360 laser level include self-leveling technology, an adjustable base, and a rechargeable battery. Whether you are building a new home or carrying out renovation work, a 360 laser level is a valuable tool for achieving the perfect level and alignment across surfaces.
This tool is highly recommended for anyone who values precision, accuracy, and efficiency.

Why Use a 360 Laser Level?
A 360 laser level is a tool that projects a laser beam in all directions, providing a precise level reference for construction projects. Unlike traditional bubble levels, which can be limited in their range of measurement, a 360 laser level enables you to measure a complete workspace in a single setup. This means you can easily level walls, floors, ceilings, and more with greater accuracy, saving time and effort.
Plus, a 360 laser level can help you ensure that every aspect of a project is level and plumb, reducing the risk of mistakes and costly project delays. Whether you’re a professional contractor or a DIY enthusiast, a 360 laser level can be an essential tool for any construction project. So, why not take your level measurement to the next level with the help of a 360 laser level today?
Setting up Your 360 Laser Level
If you’re wondering how to use a 360 laser level, the first step is to set it up properly. Before turning on the device, make sure it’s placed on a stable, flat surface and that the bubble level is centered. Once it’s secure, turn it on and select the desired mode.
Many 360 laser levels have a horizontal and vertical mode, and some even have dual-axis modes for more advanced use. Once the mode is selected, the laser beam will project around the room in a 360-degree pattern, giving you a level line to work from. To ensure accuracy, double-check that the laser is level and make any necessary adjustments.
With a little bit of practice, using a 360 laser level can save you valuable time and effort on any job requiring precise measurements or leveling.
Step 1: Choose the Right Location
When setting up your 360 laser level, choosing the right location is crucial to ensure accurate results. To start, you need to find a spot that is level and free from any obstructions that may interfere with the laser. A good rule of thumb is to choose a location that is at least 10 feet away from any walls or other objects.
You should also consider the lighting conditions in the area. Ideally, you want to work in a well-lit space to ensure the laser is visible and easy to track. Another important factor to consider is the distance between the laser level and your work area.
Be sure to position the laser level at a height that is comfortable for you to work with, and ensure that your work area is within the appropriate range for the tool to function correctly. By taking the time to choose the right location, you can set yourself up for success and ensure accurate results with your 360 laser level.
Step 2: Adjust the Level
To properly set up your 360 laser level, you must adjust the level to ensure accuracy. The first step is to find a flat and stable surface to place the laser level on. Once you have found a suitable spot, turn on the device and activate the self-leveling feature.
This feature will automatically adjust the level until it is perfectly level, ensuring that your measurements are precise. You can also manually adjust the level by using the adjustment knobs or screws on the device. It is important to take your time when adjusting the level as it can greatly affect the accuracy of your measurements.
By taking the time to properly adjust the level, you can ensure that your 360 laser level is ready to provide you with accurate and reliable measurements for your projects.
Step 3: Mount Your Laser Level
To set up your 360 laser level, it’s important to mount it properly. First, ensure that the surface you’ll be mounting the level on is clean and free of debris. Then, attach the mounting bracket securely to the bottom of the level.
Once the bracket is in place, find the spot where you want to place the level and mark it with a pencil or piece of tape. Finally, attach the bracket to the marked spot using screws or adhesive, making sure that the level is level and secure. It’s important to ensure that the level is mounted securely to prevent it from shaking or moving during use, which could affect the accuracy of the laser.
With a properly mounted laser level, you’ll be able to complete your projects with ease and accuracy.
Step 4: Turn On the Laser Level
Setting up your 360 laser level requires a few important steps to ensure accuracy and precision. Once you have positioned your laser level on a sturdy surface and leveled it using the built-in bubble vials or adjustable base, the next step is to turn on the laser. Before doing so, it’s important to make sure that the laser level is set to the right mode depending on your specific project needs.
For instance, if you’re working indoors, you’ll want to set it to pulse mode to conserve battery life and reduce eye strain. On the other hand, if you’re working outside, you’ll want to set it to continuous mode to ensure maximum visibility and clarity. Once you have selected the right mode, turn on the laser and make sure that it’s projecting a visible beam of light on the surface you’re working on.
From there, you can begin to use the laser level to take accurate measurements, align surfaces, and complete a range of other tasks with ease.
Tips for Using Your 360 Laser Level
If you’re wondering how to use a 360 laser level, don’t worry, it’s actually quite easy! First, ensure you have a stable surface to place the level on. Next, turn on the laser and use the adjustable tripod to position the level at the desired height and angle. The 360-degree laser will emit a full circle beam that projects across the room, allowing you to easily mark the walls with the appropriate measurements.
It’s important to note that you should avoid looking directly at the laser beam, as it can cause damage to your eyes. Another tip is to take advantage of the self-leveling feature to ensure accurate readings each time. With these simple tips, you’ll be a pro in no time!
Tip 1: Keep the Laser Level Clean
If you’re using a 360 laser level, keeping it clean is important to ensure accurate readings. Dust, dirt, and debris can easily accumulate on the lens and cause the laser beam to scatter, leading to incorrect measurements. To prevent this from happening, make it a habit to wipe down the laser level before and after each use.
Use a soft cloth or microfiber towel and avoid using harsh chemicals or abrasive materials that could scratch the lens. Remember that a clean laser level will not only give you precise measurements but also extend the life of your device, saving you money in the long run. So, don’t forget to take a few extra minutes to maintain your laser level and get the most out of it.
Tip 2: Use Laser Detector When Needed
One of the handy features of a 360 laser level is its ability to project a straight line in any direction. However, sometimes it can be challenging to see the laser line in bright daylight or over long distances. This is where a laser detector comes in handy.
A laser detector is a small device that picks up the laser beam and emits a sound and flashing light when it detects the beam. This allows you to easily locate and follow the laser line, even in challenging conditions. To use a laser detector, simply attach it to a compatible tripod or holder and turn it on.
Then, move the detector back and forth until it picks up the laser beam. Remember to adjust the height of your 360 laser level so that the laser line is at the same height as the detector. This tip saves you time and prevents errors when working with your 360 laser level, making your job much easier.
Conclusion
In conclusion, the 360 laser level is a powerful tool that can make your construction projects more accurate and efficient. By following these simple steps, you’ll be able to use the laser level to find level and plumb lines quickly and easily. Whether you’re a professional contractor or a DIY enthusiast, the 360 laser level is a must-have tool that will make your projects run smoothly.
So next time you’re looking to level up your construction game, be sure to give the 360 laser level a spin – you won’t regret it!”
FAQs
What is a 360 laser level used for?
A 360 laser level is used for accurately measuring and leveling surfaces, such as walls, floors, and ceilings, in all directions.
How do you use a 360 laser level for vertical leveling?
To use a 360 laser level for vertical leveling, place the device in the center of the area to be leveled, turn it on, and use a laser detector to find the exact level line.
What types of surfaces can a 360 laser level work on?
A 360 laser level can work on a variety of surfaces, including concrete, wood, metal, and drywall.
Can a 360 laser level measure distances?
No, a 360 laser level cannot measure distances, but it can be used in combination with a measuring tape or ruler to obtain accurate measurements.
How do you know when the 360 laser level is level?
The 360 laser level will emit a continuous beam of light when it is level. If it is not level, the beam will flash or blink.
Can a 360 laser level be used in bright sunlight?
Yes, some 360 laser levels have a higher power output that allows them to be used in bright sunlight without losing visibility.
What is the maximum operating range of a 360 laser level?
The maximum operating range of a 360 laser level depends on the specific model, but most range from 30 to 100 feet.


