How to Put Socket on Impact Driver: Step-by-Step Guide

Have you ever been stuck in a situation where you’re trying to attach a socket to an impact driver but just can’t seem to figure out how? Worry not, as we’ve got you covered! In this guide, we’ll walk you through the steps of how to put a socket on an impact driver, making your DIY projects a breeze. Impact drivers are a game-changer when it comes to construction and DIY projects. They’re perfect for drilling, driving screws, and bolts, and come with a variety of features that make them more versatile than traditional drills.
One aspect of impact drivers that can be confusing, however, is how to attach a socket to them. Thankfully, the process is relatively simple. All you need is an impact driver, a socket, and an adapter.
The adapter is crucial for this process, as it allows the socket to fit securely onto the impact driver. Once you have all the tools, it’s just a matter of following a few simple steps, and you’ll be ready to go. Putting a socket on an impact driver is an essential skill to have, especially if you’re regularly working on DIY projects.
It saves time, effort, and ensures that your projects are completed to a high standard. So, let’s dive into the steps you need to follow to put a socket on an impact driver.
Gather Tools
Putting a socket on an impact driver is a simple process that involves a few essential tools. First and foremost, you will need an impact driver and a socket set that includes the socket size you need. Ensure that the socket set includes the size that matches the nut or bolt you are looking to tighten or loosen.
Next, you’ll need to attach an adapter to the impact driver with the drive size matching your chosen socket. This adapter will serve as the bridge between your impact driver and socket. Finally, insert your socket onto the adapter, ensuring that it is secure before you begin to use it.
Voila! You’re now ready to use your impact driver with the socket to tackle any job you have. With these simple tools and steps, you’ll be able to put a socket on your impact driver, making your DIY projects and repairs a breeze.
Impact Driver
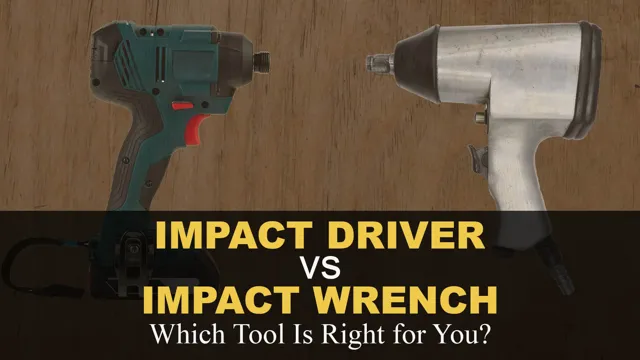
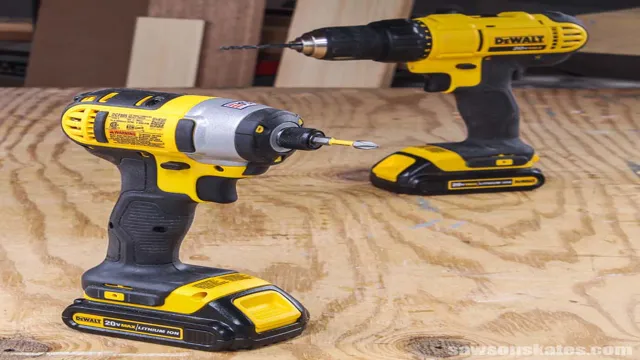
Impact driver If you’re planning to do some serious DIY or home improvement projects, having the right tools is essential. And one of the tools that can come in incredibly handy is an impact driver. This powerful tool is designed to make driving screws and bolts a breeze.
Unlike a regular drill, an impact driver delivers a huge amount of torque, which can help you power through even the toughest materials. But before you start using an impact driver, it’s important to gather the right tools. For example, you’ll need various types of drill bits, screwdriver bits, and sockets to attach to your impact driver.
You may also want to invest in a set of impact-resistant gloves, as well as safety glasses to protect your eyes. With the right tools on hand, you’ll be well-equipped to tackle any project that comes your way. And an impact driver can make even the most challenging tasks a breeze.
So don’t be afraid to add one to your tool collection today – you won’t regret it!

Socket Set
If you’re planning to do some repairs or maintenance around the house, a socket set is an essential tool to have in your toolbox. With a socket set, you’ll be able to tighten or loosen bolts and nuts of various sizes with ease. You won’t have to use a pair of pliers or a wrench and risk damaging bolts or nuts.
A socket set consists of different sizes of drivers or wrenches that fit over the head of a bolt or a nut to tighten or loosen it. Not only is it more efficient, but a socket set also makes your job easier, especially if you work with automotive, mechanical, or plumbing projects. It’ll save you time and effort, and it’ll make you feel confident that you can take on any job that comes your way.
Don’t leave home without your socket set – it’s the tool that’ll get you through any repair or maintenance task.
Prepare the Impact Driver
If you want to know how to put socket on impact driver, it’s pretty straightforward. Firstly, you need to prepare the impact driver. Make sure it’s charged, and the battery is connected.
Once it’s fully charged, take out the socket from your toolbox. Next, insert the socket into the slot of the impact driver. You should hear a clicking sound when it’s locked in place.
Now, all you need to do is turn on the impact driver, and the socket is ready to use. Make sure to always double-check that the socket is securely placed on the driver before using it to avoid any accidents. And, that’s it – now you’re an expert on how to put socket on impact driver!
Turn off the Power
Before starting any project involving power tools, safety measures should always come first. Turn off the power to the area where you will be working to avoid any accidents. Once the power is off, it’s time to prepare your impact driver.
Make sure to have the appropriate size and type of drill bit or driver bit for the job. Double-check that the chuck is securely tightened to avoid any wobbling during use. You may also want to adjust the clutch setting to ensure that the driver does not over-torque the screws or bolts you will be working with.
Taking the time to properly prepare your impact driver can help you avoid frustrations and ensure that your project goes smoothly. Remember, preparation is key to success.
Loosen the Chuck
“impact driver” Before using an impact driver, it’s important to prepare it properly to ensure it works efficiently. One crucial step is loosening the chuck, which holds the drill bit securely in place. Whether you’re using a keyless or keyed chuck, turning it counterclockwise will release the drill bit.
You can then insert the desired bit and tighten the chuck by turning it clockwise. Once the chuck is tightened securely, you can proceed to use the impact driver. It’s important to note that before using the driver, you should also check the battery level and position the tool properly to ensure your safety and the effectiveness of the task at hand.
By properly preparing your impact driver, you’ll be able to complete your project quickly and effectively.
Attach the Socket
Putting a socket on an impact driver can be a bit tricky, but it’s not impossible. First, ensure that the impact driver is turned off and unplugged. Then, select the correct socket size for your task and insert it into the socket adapter.
Place the adapter onto the end of the impact driver and apply pressure until it locks into place. You’ll know it’s secure when you can’t pull it off easily by hand. It’s important to choose the right size socket to avoid any slipping or stripping of the bolt head.
With the socket attached, you’re now ready to tackle your DIY project with ease. Remember to always use proper safety equipment such as goggles and gloves when working with power tools. Putting a socket on an impact driver is a small step in the process but it’s an important one that can save you time and effort in the long run.
Choose the Correct Socket
When it comes to attaching a socket, it’s essential to choose the correct one for the job. Using the wrong socket can not only damage your equipment but also pose a safety risk to yourself and others. Before getting started, make sure you have the right size and shape of the socket that fits your nut or bolt.
It’s also crucial to match the socket to the drive size of your ratchet or wrench. A common mistake is using a socket with the incorrect drive size, which can lead to the wrench or ratchet slipping and causing injury. So next time, double-check your socket’s size, shape, and drive size before getting started to ensure a safe and successful job.
Insert the Socket into Chuck
When it comes to working with power tools, attaching the socket correctly is crucial. To ensure a secure fit, you must insert the socket into the chuck and tighten it properly. First, check to make sure the socket matches the size of the chuck.
If it does, place the socket into the chuck and turn it clockwise to tighten. You should hear a clicking sound when it’s secure. Remember to use the correct drill bit or driving tool to attach the socket.
Failure to attach the socket properly could result in the drill bit or socket coming loose and potentially causing injury or damage to your project. By following these simple steps, you can easily attach the socket and get started on your next project.
Tighten the Chuck
Tightening the chuck of your power drill is essential for ensuring a strong grip on the socket, so it doesn’t slip or wobble while in use. It’s a fairly easy process, but it’s important to do it right to avoid damaging your tool or injuring yourself. To start, insert the appropriate socket into the chuck, making sure it’s securely seated.
Then, hold the drill body with one hand and with the other hand, tighten the chuck by rotating it clockwise. You should use enough force to ensure a firm grip but avoid overtightening, which can damage both the chuck and the socket. Remember to check the tightness periodically during use, especially if you’re drilling through hard materials.
With a little practice, you’ll become adept at tightening the chuck quickly and efficiently, helping you complete your projects with ease.
Test the Socket
Putting a socket on your impact driver might seem like a simple task, but it’s important to do it correctly to avoid accidents. First, make sure the driver and socket are the same size. Then, insert the socket into the driver’s quick-release chuck and give it a tug to ensure it’s securely in place.
How do you know if the socket is securely attached? Test it by running the impact driver slowly and gradually increasing the speed. If the socket wobbles or falls off, stop immediately and re-attach it. Once you’re certain that the socket is securely attached, you’re ready to use the impact driver.
Remember to always wear safety gear and read the manufacturer’s instructions before operating any power tool.
Power On the Impact Driver
Once you’ve got your impact driver in hand, it’s time to power it up and get to work! But before you do, it’s important to test the socket and see if it’s working properly. Simply plug your driver into the socket and turn it on. If you hear a clicking or buzzing sound, that’s a good sign that everything’s working as it should be.
If you don’t hear anything at all, however, there may be a problem with the socket or the wiring. In that case, it’s best to call in a professional to take a look. Once you’ve ensured that the socket is working, you can move on to your project with confidence, knowing that your impact driver is ready to tackle whatever tasks you throw its way! So, go ahead and get started – your project isn’t going to finish itself!
Test the Socket with a Bolt
Testing the socket with a bolt is an essential task to ensure your socket is working correctly. First, you need to verify the type and size of the socket before selecting the appropriate bolt. Once you have chosen the suitable bolt, insert it into the socket and tighten it using a wrench.
If the bolt fits securely, then you have confirmed that the socket is working correctly. It’s important to check the socket regularly, especially if you use it frequently in your home or workspace. Ensuring the socket functions correctly is crucial to avoid incidents like electrical fires, shocks, and short circuits.
So, taking a few minutes to test your socket with a bolt can save you from major inconveniences in the future.
Conclusion
So there you have it folks, putting a socket on an impact driver is as easy as sliding a hot knife through butter. Just remember to turn off the power and make sure the socket is securely attached before letting the sparks fly. And if all else fails, just ask yourself: what would Tim “The Toolman” Taylor do? (Hint: probably add more power).
Happy DIY-ing!”
FAQs
Can I attach a socket directly to an impact driver?
Yes, an impact driver usually has a hex bit holder that can securely hold a socket with a hex shank.
Do I need a special adapter to attach a socket to an impact driver?
No, you don’t need a special adapter if the socket has a hex shank. Otherwise, you may need a socket adapter that can fit into the hex bit holder.
Is it safe to use an impact driver with a socket?
Yes, as long as you use the correct size and type of socket for the job, an impact driver can be a safe and efficient tool for driving fasteners.
Can an impact driver replace a socket wrench?
While impact drivers and socket wrenches serve a similar purpose, they have different strengths and weaknesses. An impact driver is more efficient in driving fasteners, while a socket wrench provides more control and precision.
How do I change sockets on an impact driver?
To change sockets, release the current socket from the hex bit holder and insert the new socket with a hex shank. Make sure it is securely fastened before use.
What size socket do I need for my impact driver?
The size of the socket you need depends on the size of the fastener you are working with. Check the specifications of your impact driver and choose the appropriate socket size.
Can I use impact-rated sockets with a regular cordless drill?
While you can technically use impact-rated sockets with a regular cordless drill, it’s not recommended. Impact-rated sockets are designed to withstand the high-torque and vibration of an impact driver, which a regular drill cannot provide.


