How to Cut Floor Tiles with an Angle Grinder: A Comprehensive Guide

When it comes to tiling your floors, precision is key. You want everything to fit together perfectly, flawlessly, and without any bumps or misalignments. For that, you need the right tools.
And one that you definitely don’t want to miss is an angle grinder. Yes, you read that right. A powerful angle grinder can be your best friend when it comes to cutting floor tiles.
It might seem like a surprising choice, but with the right blade and the right technique, an angle grinder can quickly and easily cut through ceramic, porcelain, or even stone tiles with ease. Of course, using an angle grinder might sound intimidating, especially if you’ve never done it before. But don’t worry.
With a few tips and tricks, you can learn how to use this versatile tool to cut perfect tiles without breaking a sweat (or your tiles, for that matter). So, are you ready to take your tiling game to the next level and learn how to cut floor tiles with an angle grinder? Buckle up, grab your safety gear, and keep reading. We’re about to dive into all the details you need to know to get started.
Why use an Angle Grinder?
If you’re planning on installing floor tiles, using an angle grinder can make the job much easier and faster. But first, you’ll need to know how to cut floor tiles with an angle grinder. An angle grinder is a versatile tool that allows you to cut through all sorts of materials, including tiles.
Simply attach a diamond blade to your grinder, and you’re ready to go. One of the main benefits of using an angle grinder is that it allows you to make precise cuts quickly, which is essential for cutting floor tiles. Additionally, angle grinders are relatively inexpensive and portable, making them a great tool to have in your toolbox.
However, it’s important to wear protective gear and take safety precautions when using an angle grinder, as it can be a dangerous tool if not used properly. With some practice, cutting floor tiles with an angle grinder can be a breeze and save you both time and effort.
Efficiency
Angle grinders are versatile and powerful tools that can be used for a variety of tasks, making them an essential addition to any DIY enthusiast’s tool kit. Whether you need to grind down metal or cut through concrete, an angle grinder offers both speed and precision. With its compact size and lightweight design, an angle grinder is also easy to maneuver, making it perfect for tight spaces or hard-to-reach areas.
If you want to save time and effort when completing your DIY projects, then using an angle grinder is the way to go. It allows you to work quickly and efficiently, making light work of even the toughest tasks. So, why not invest in this handy tool today and see how it can transform the way you work?

Versatility
Angle Grinder Angle grinders are incredibly versatile tools that can be used for a variety of tasks. From grinding and cutting to sanding and polishing, an angle grinder is a powerful tool with endless applications. Whether you’re a DIY enthusiast or a professional, an angle grinder is a must-have in your toolkit.
It offers the ability to tackle tough jobs with ease, making it a popular choice for those in the construction and metalworking industries. You can use an angle grinder to cut through steel pipes, remove rust and paint from metal surfaces, and smooth out rough edges. Its compact size makes it easy to maneuver into tight spaces, while its powerful motor ensures that it gets the job done quickly and efficiently.
So, if you’re looking for a versatile tool that can handle a wide range of tasks, look no further than an angle grinder.
Preparing to Cut Tiles
If you’re looking to add some tile work to your home, you may be wondering how to cut floor tiles with an angle grinder. The first step is to ensure you have all the necessary safety equipment, including eye and ear protection, as well as a face mask. Additionally, you’ll need to have the right kind of angle grinder with a diamond blade suitable for cutting tiles.
Before beginning your project, take some time to plan out your cuts and measure your tiles carefully to make sure they fit properly. It’s also important to mark your tiles clearly so you know exactly where to cut. Once you’re ready to start cutting, take it slow and steady, allowing the blade to do the work and avoiding applying too much pressure.
With the right preparation and technique, you can achieve professional-looking tile cuts that will enhance the look of your home.
Safety Measures
When it comes to cutting tiles, safety measures should always be your top priority. Before you even begin the cutting process, make sure you have the necessary safety equipment. This should include gloves, safety glasses, and a dust mask.
Remember, cutting tiles can produce a lot of dust and debris, which can be hazardous to your health if inhaled. Furthermore, you should always ensure that your workspace is clean and clear of any distractions. Keep your floor and work area dry to prevent any slips and falls.
It’s also essential to have a stable work surface. Make sure that your tile cutter is securely attached to a stable surface to avoid any movement during the cutting process. Lastly, take your time and work carefully.
Rushing through the cutting process can lead to mistakes, accidents, and injuries. Always start with a small cut and build the cut as you go, rather than trying to cut the entire tile at once. By taking these safety precautions, you can ensure a smooth and safe tile-cutting process.
Pre-cuts and Measurements
Preparing to Cut Tiles – Tips on How to Use Pre-cuts and Measurements When it comes to preparing to cut tiles, one of the key elements to consider is the use of pre-cuts and measurements. These tools can help ensure that you get the right cuts, that your tiles are evenly spaced, and that you don’t waste any materials. Pre-cuts are pre-sized tiles that are designed to fit specific areas, such as corners or edges, which can save you time and effort.
They come in a variety of shapes and sizes, so be sure to choose the ones that will work best for your project. When it comes to measurements, always double-check before making any cuts. Use a ruler or measuring tape and mark your tiles with a pencil before cutting them.
This will help ensure accuracy and prevent mistakes. Remember, precision is key when it comes to cutting tiles, so take your time and measure twice if you have to. By using pre-cuts and taking precise measurements, you can make your tile cutting process more efficient and accurate.
Cutting the Tiles
Cutting floor tiles can be a challenge without the right tools. One effective tool that you can use is an angle grinder. This powerful tool can be used to cut tiles quickly and accurately.
However, there are a few steps you need to take before you start cutting. First, you will need to measure the tiles to ensure that you cut them properly. Next, mark the tiles with a pencil or marker where you want to make the cuts.
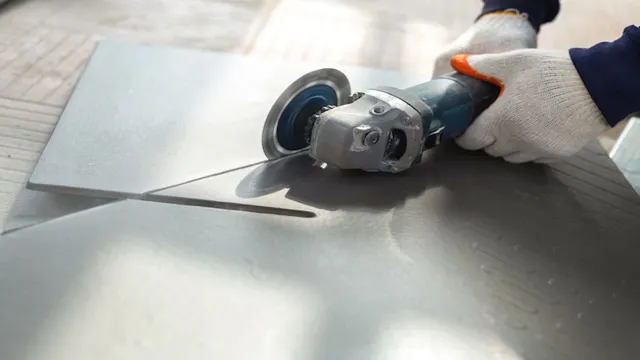
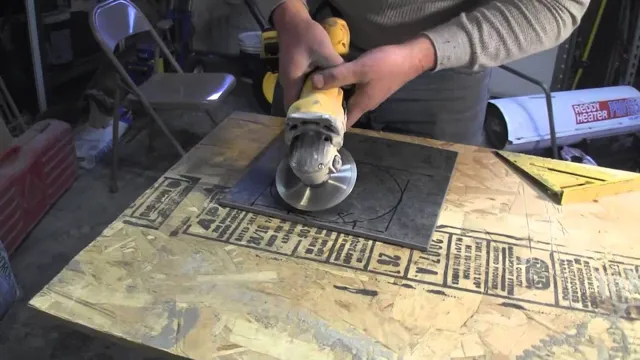
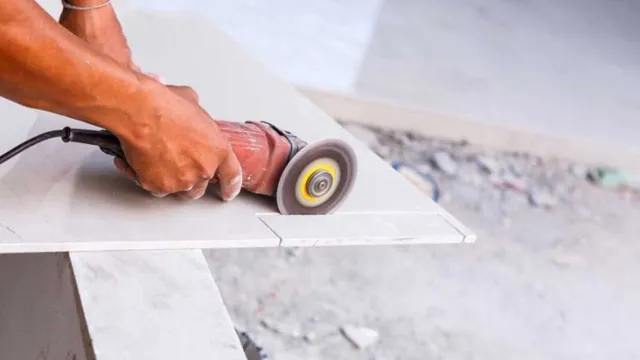
Then, attach a diamond blade to the angle grinder and adjust the depth of the blade to match the thickness of your tile. For safety, you should wear protective glasses and a dust mask to avoid inhaling dust while cutting. Finally, hold the angle grinder with both hands, switch it on, and gently guide it along the marked line.
The diamond blade will cut through the tile smoothly and precisely. With these simple steps, you’ll be able to cut your tiles like a pro and achieve the perfect fit for your flooring.
Choose the Right Blade
When it comes to cutting tiles, choosing the right blade is crucial. Not all blades are created equal, and each type is designed for specific materials and tile sizes. There are two main types of tile blades – continuous rim and segmented rim blades.
Continuous rim blades are designed for use with softer tile materials, such as ceramic and porcelain, while segmented rim blades are ideal for harder materials, such as granite, marble, and stone. Additionally, the size of the tile being cut will determine the size of the blade needed. It’s important to select a blade that is the same size, or slightly larger, than the tile being cut to ensure a smooth, precise cut.
Overall, taking the time to choose the correct blade for the job will not only result in a better-looking finished product but will also save time and money in the long run.
Marking the Cutting Line
When it comes to cutting tiles, it’s essential to mark the cutting line accurately to avoid any mistakes. To get started, you’ll need a tile cutter, a pencil, and a ruler. First, measure the space where you need to fit the tile and mark it on the tile’s surface.
Then, use your ruler to draw a straight line across the tile where you’ll be cutting it. Make sure to use a sharp pencil for this step to ensure your line is visible. Once you’ve drawn your line, place the tile cutter’s blade on it, keeping it straight along the marked line.
Apply gentle pressure to the handle, slowly bringing the tile cutter down the line. With the right pressure and accuracy, the tile should split smoothly along the cut line. By taking the time to mark your cutting line correctly, you can avoid costly and time-consuming mistakes while getting perfect tile cuts.
Cutting the Tiles
Cutting the tiles is a crucial step in any tiling project, and it requires precision and accuracy. To start, first, measure the area where the tile needs to be installed and mark the tile with a pencil or marker where it needs to be cut. Then, using a tile cutter or a wet saw, carefully cut the tile along the marked line.
It’s essential to hold the tile securely while cutting to avoid any mishaps. Remember to wear safety gear like eye protection and gloves while using the tile cutter. If the tile needs to be cut at an angle, use a miter saw or a tile saw to achieve a clean cut.
With little practice and patience, anyone can become skilled at cutting tiles for their home renovation projects.
Finishing the Cut Tiles
If you’re looking to finish the cut tiles on your flooring project, an angle grinder is a versatile tool that can help you get the job done. To start, ensure that you have the right blade installed on your angle grinder, one that’s compatible with the type of tile you’re working with. Start by marking the tile where you need to make the cut with a pencil or a marker and use a straight edge to guide the angle grinder.
Once you’re ready, turn on the angle grinder and make careful cuts along the marked line, using steady pressure and a smooth motion. Take your time to ensure that you’re cutting straight and precise, making gradual, careful cuts rather than trying to cut too much at once. When you’re done cutting, use a sanding block or a sanding disc to smooth out the edges of the tile and create a neat, clean finish.
Remember to wear proper safety gear, including eye protection and a dust mask, while working with an angle grinder to prevent injuries. With these tips, you can efficiently finish your cut tiles and enjoy beautiful new flooring in no time.
Smoothing the Edges
Smoothing the edges of cut tiles is an essential step in finishing any tile installation. After cutting tiles to fit a specific area such as a corner or a curve, the rough edges need to be smoothed out before laying them down. The best way to achieve this is by using a proper tile file or sandpaper.
The goal is to create a smooth, even surface along the cut edge, ensuring a perfect fit with the adjacent tiles. It is crucial to wear protective gear such as gloves and a mask when smoothing out the edges to avoid inhaling dust particles. By taking the time to properly smooth out cut tiles’ edges, you’ll achieve a professional, seamless finish that will last for years to come.
So, make sure to equip yourself with the necessary tools and safety gear before starting on your tile installation project.
Cleaning up the Work Area
Cleaning up the work area after cutting tiles is an important part of any tiling project. You don’t want leftover debris or tile pieces getting in the way of laying down the next batch. Once you have finished cutting the tiles to the desired size, it’s time to sweep the area and dispose of the excess materials.
If you are working on a bigger project, it’s recommended to use a dust extractor or a shop vac to remove any dust created during the cutting process. This will prevent the dust from settling on the tiles and ruining the adhesive. You can also use a damp cloth to wipe down the surrounding surfaces and remove any marks left behind by the tiles.
With a clean work area, you can now move on to the next step in your tiling project with confidence and ease.
Conclusion
Cutting floor tiles with an angle grinder may seem challenging, but with the right technique and skills, you can turn any tile into a masterpiece. Just remember to take the necessary precautions, such as wearing protective gear and planning out your cuts, and you’ll be well on your way to achieving a flawless finish that will have your friends and family envious. So, grab your angle grinder and let your creativity run wild as you transform your tiles into stunning works of art.
Who said DIY wasn’t fun and glamorous?”
FAQs
What safety precautions should I take when cutting floor tiles with an angle grinder?
Always wear safety goggles, ear defenders, a face mask, and work gloves. Keep the area clean and free from any obstacles, and unplug the grinder when not in use.
What kind of blade should I use to cut floor tiles with an angle grinder?
Use a diamond blade, which can cut through hard materials like tile with ease and precision.
How do I make a straight cut when using an angle grinder to cut floor tiles?
Use a straight edge or guide to help keep your cut on track. Place the edge or guide on the tile surface, and then align the grinder blade with the edge.
Can I use an angle grinder to cut curves in floor tiles?
Yes, but it requires some practice and technique. Use a flexible template to guide the grinder blade along your desired curve.
How do I avoid chipping or cracking the tile when cutting with an angle grinder?
Use a slow, steady speed when cutting, and avoid applying too much pressure. Take breaks to let the tile cool down if it starts to overheat.
What is the best way to minimize dust when cutting floor tiles with an angle grinder?
Use a water attachment on the grinder to suppress dust, or work outside in a well-ventilated area. Wear a dust mask to protect your lungs.
Can I use an angle grinder to cut thick or layered tiles?
Yes, but it may take longer and require multiple passes. Use a steady, consistent speed and let the blade do the work.


