Why Does My Paint Sprayer Keeps Clogging? Learn the Causes and Solutions

Paint spraying is an efficient way to give your walls, furniture, and other surfaces a smooth, even coat of paint. However, if your paint sprayer keeps clogging, you might find yourself battling frustration instead of enjoying the process. A clogged paint sprayer can ruin the quality of your work and lead to wasted time and money.
So, what causes clogs and how can you prevent them? In this blog, we’ll explore the reasons behind paint sprayer clogs and provide tips on how to avoid them. So, grab your painting gear and join us as we unravel the mystery of why your paint sprayer keeps clogging!
Understanding Paint Sprayer Clogs
If you’ve been experiencing repeated clogs with your paint sprayer, you’re not alone. Many DIYers and professionals alike have been faced with the frustrating issue of their paint sprayer clogging. Understanding the cause of these clogs is the first step in preventing them from happening in the future.
One common reason for clogs is the use of thick or poorly mixed paints. When the paint is too thick or has clumps, it can cause blockages in the sprayer. Another reason is debris or contaminants that may be present in the paint.
It’s important to strain your paint before use to remove any impurities. Additionally, a lack of proper cleaning and maintenance can lead to clogs. Make sure to thoroughly clean your sprayer after each use and follow the manufacturer’s maintenance instructions.
By addressing these issues and taking preventative measures, you can avoid frustrating clogs and achieve a smooth, even paint finish.
Types of Clogs
Understanding paint sprayer clogs is essential for any DIY enthusiast or professional painter. A paint sprayer clog can occur for various reasons, such as using a low-quality paint, not properly cleaning the sprayer after use, or even using the wrong type of nozzle. Paint sprayer clogs come in two types: tip clogs and inlet valve clogs.
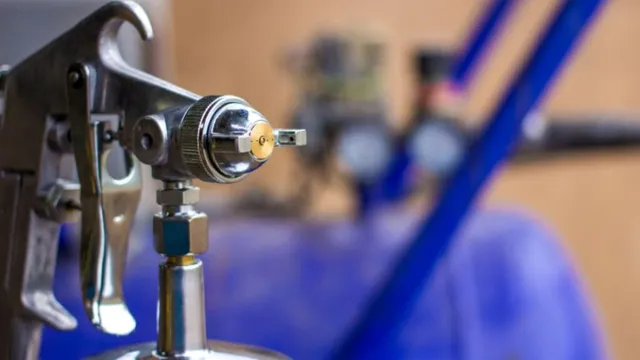
Tip clogs occur when a buildup of paint or debris blocks the tip of the sprayer. Inlet valve clogs, on the other hand, happen when there is a blockage in the inlet valve or suction tube. Understanding the type of clog you have can help you troubleshoot and fix the issue efficiently.
For example, for a tip clog, you can simply remove the tip and clean it thoroughly, whereas an inlet valve clog may require disassembling the sprayer to access and clean the valve. By being aware of the different types of paint sprayer clogs and their causes, users can avoid disruptions during their painting projects and maintain the longevity of their paint sprayer.

Causes of Clogs
Understanding paint sprayer clogs is essential for anyone who uses these tools regularly. One of the primary causes of clogs is using the wrong type of paint. Many types of paint are too thick and can cause clogs even in high-quality paint sprayers.
Another cause of clogs is using a paint sprayer with a damaged or worn-out tip. The tip is the smallest part of the sprayer, and if it becomes damaged, it may cause the paint to come out in clumps, leading to clogs. Additionally, not cleaning the sprayer properly before and after use can also cause clogs.
This is especially true for oil-based paints and stains, which can dry and harden quickly, creating a blockage in the sprayer. Understanding the causes of clogs and how to prevent them can help you avoid the frustration and wasted time associated with having to clear a clog mid-project.
Preventing Paint Sprayer Clogs
If you’re using a paint sprayer and finding that it keeps clogging, there are a few things you can do to prevent this frustrating issue. One of the most common causes of clogs is using paint that’s too thick, so make sure to thin your paint to the manufacturer’s recommended consistency. Another factor to consider is the size of your spray tip.
If the tip is too small for the thickness of your paint, it can easily clog. Using the recommended tip size for your paint can help prevent this issue. Additionally, it’s important to properly clean your sprayer after each use.
Paint residue can build up and harden, leading to clogs the next time you use it. By taking the time to properly maintain your paint sprayer and follow the manufacturer’s guidelines, you can prevent clogs and paint smoothly and evenly every time.
Choosing the Right Paint
When it comes to using a paint sprayer, you want to make sure you choose the right paint to prevent clogs. The last thing you want is for your paint to dry in the sprayer and ruin your project. It’s best to use paint that is specifically formulated for spray guns, as they are designed to be thinner and more consistent to avoid clogging.
You should also make sure to strain your paint before using it, as this will remove any chunks or impurities that may cause clogs. If you do experience a clog, try using a cleaning solution or simply soaking the affected parts in warm water. Taking a few extra steps to prevent clogs can save you time and frustration in the long run.
Thin Your Paint
Thin Your Paint Preventing paint sprayer clogs is essential for achieving optimal painting results, and thinning your paint is a simple trick that can help you avoid clogs. In essence, thinning your paint means reducing its viscosity to ensure that it flows through your paint sprayer more easily. This helps to prevent blockage in the sprayer’s tip, nozzle, or filter, which is the primary cause of paint sprayer clogs.
When you thin your paint, you can use a lower pressure setting, which also helps to avoid clogs. The optimal thinning ratio varies depending on the type of sprayer you’re using, as well as the paint you’re working with. Generally, thinning your paint by 10% to 20% with water, paint thinner, or other additives can work wonders in reducing clogs while ensuring a smooth and flawless paint job.
Don’t forget to test your paint’s consistency before you start spraying to get the best results.
Cleaning and Maintenance
If you’re using a paint sprayer, it’s essential to maintain it properly to avoid clogs that can ruin your project. One of the best ways to prevent clogs is to filter your paint before adding it to the sprayer. Use a mesh filter to sift out any lumps or debris that may be present in the paint.
Additionally, always clean your paint sprayer thoroughly after each use. Follow the manufacturer’s instructions for disassembling and cleaning the sprayer. Don’t forget to run clean water through the sprayer to flush out any remaining paint.
If you notice any signs of clogs, like reduced pressure or spitting, stop using the sprayer immediately and clean it. By taking these simple steps, you can keep your paint sprayer running smoothly and produce beautiful results every time.
Troubleshooting Paint Sprayer Clogs
Do you keep experiencing clogs in your paint sprayer? This can be frustrating and delay your painting project. There are a few reasons why your paint sprayer might be clogging. One of the most common reasons is using paint that is too thick or has not been adequately strained.
It’s essential to follow the manufacturer’s instructions and use the right paint for your sprayer. Another reason could be a dirty or worn-out filter. Make sure to clean or replace the filter regularly to avoid clogs.
Additionally, a worn-out spray tip or a damaged nozzle can also cause clogs. It’s crucial to inspect them and replace them if necessary. Lastly, low air pressure can also cause clogs.
Make sure your air compressor is powerful enough for your sprayer and that it’s set to the correct air pressure. By addressing these issues, you can prevent clogs in your paint sprayer and make your next painting project a more seamless and successful one.
Clearing Clogs
When using a paint sprayer, dealing with clogs is a common issue that requires troubleshooting. A clogged sprayer can lead to uneven application or completely stop the painting process. The first step in clearing a clog is to turn off the sprayer and disconnect it from the power source.
Then, remove the sprayer tip and clean it thoroughly with a brush or a toothpick, removing any dried paint or other debris that may be causing the clog. If the clog persists, try flushing the sprayer with water or a cleaning solution recommended by the manufacturer. It’s important to note that prevention is key when it comes to avoiding clogs.
Regular maintenance, such as cleaning the sprayer after each use, can prevent buildup and extend the life of your sprayer. With a little bit of patience and troubleshooting, clearing clogs in your paint sprayer can be a minor inconvenience rather than a major setback in your painting projects.
Identifying and Fixing Issues
Troubleshooting paint sprayer clogs can be a frustrating but necessary task when working on a painting project. One common issue that occurs is a clogged spray tip, which can prevent the paint from coming out evenly or at all. To fix this, you can remove the spray tip and clean it thoroughly using a brush or thin wire.
Another issue that can arise is a clogged suction tube, which can cause the sprayer not to draw paint properly. In this case, you can try removing the tube and soaking it in warm water or a cleaning solution to unclog it. Keeping your sprayer clean and well-maintained can prevent these clogs from occurring in the first place.
By taking the time to troubleshoot and fix these issues, you can ensure a smooth and successful painting experience.
In Conclusion
It seems like your paint sprayer has an uncanny ability to attract and collect all the unpleasant particles that come near it, resulting in clogging. But fear not, for with a little maintenance and proper usage, you can prevent this from happening and keep your sprayer running smoothly. So don’t let clogs bog you down, and let your paint sprayer become the superhero it was meant to be!”
FAQs
What causes a paint sprayer to clog?
Clogging can occur due to various reasons, including using the wrong type of paint, inadequate spraying techniques, or failing to clean the sprayer after use.
How can I prevent my paint sprayer from clogging?
To avoid clogging, ensure that you use the correct paint type and viscosity, strain the paint before pouring it into the sprayer, and periodically clean the sprayer while working.
What is the best way to clean a clogged paint sprayer?
First, disassemble the sprayer and remove clogged parts. Soak them in a solvent or appropriate cleaning agent before flushing them out and reassembling the sprayer.
Why does my paint sprayer get clogged faster when I use thicker paints?
Thicker paints typically have a higher viscosity, which makes them more challenging to spray. They can clog the sprayer more readily, making it necessary to strain and thin the paint before spraying.
Can a low-quality paint sprayer cause frequent clogging?
Yes, low-quality paint sprayers may have inadequate filtration systems or poorly designed nozzles, making them more prone to clogging compared to high-quality sprayers.
How often should I clean my paint sprayer?
You should clean your sprayer after every use to keep it in good condition and avoid clogging. Additionally, you may need to clean the sprayer midway during prolonged spraying sessions.
What should I do if my paint sprayer keeps clogging despite following best practices?
You may need to invest in a better quality paint sprayer or replace worn-out parts such as filters, nozzles, or valves. It may also be helpful to consult a professional for more advice on improving your spraying technique.


