What Grit Sandpaper for Orbital Sander: A Comprehensive Guide on Choosing the Right Abrasive

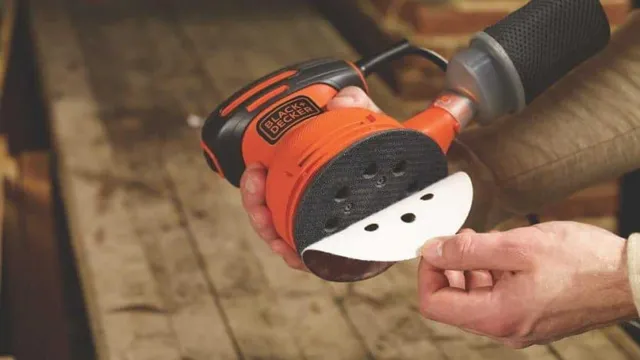
If you’re planning to start a DIY project and need to sand down surfaces, then you’ll need to know what grit sandpaper to use for your orbital sander. Look no further, as we’re here to help guide you on your sanding journey with our expertise. Using the right grit sandpaper can make all the difference in achieving a smooth and even finish.
But, what exactly is grit sandpaper? It’s a type of abrasive material with different levels of roughness. The grit number represents the number of abrasive particles on the sandpaper per square inch, with a higher number indicating a finer grit and a lower number indicating a coarser grit. Choosing the right grit sandpaper may seem confusing at first, but it depends on the type of surface you’ll be sanding.
Coarse grits like 60 or 80 are ideal for removing a rough surface or paint, whereas 120 grit is perfect for smoothing out scratches or preparing a surface for paint. For fine finishes, opt for higher grits like 220 or even 320. Using the wrong grit sandpaper can lead to a subpar finish or damage the surface you’re working on, which is why it’s essential to determine the best grit for your project.
With the right grit, you can achieve a professional-looking finish that will last for years to come. So, before you start your sanding project, take a moment to consider what grit sandpaper to use for your orbital sander. With our guide, you can take on your DIY project with confidence and achieve a flawless finish.
Understanding Grit Numbers
When it comes to sanding, choosing the right grit for your orbital sander is crucial. Grit numbers refer to the coarseness of the sandpaper, with lower numbers indicating a coarser texture and higher numbers indicating a finer texture. For example, a grit of 60 is very coarse, while a grit of 220 is considerably finer.
If you’re working on a project that requires heavy sanding- such as removing rough spots or paint- a lower grit sandpaper might be the best choice. On the other hand, if you’re looking to smooth out surfaces or repair blemishes, a higher grit sandpaper is ideal. When in doubt, it’s always best to start with a lower grit sandpaper and gradually work your way up to a higher grit to achieve the desired finish.
Overall, choosing the right grit number is crucial for achieving the desired result and ensuring the proper functionality of your orbital sander.
Different Grits and Their Uses
When it comes to sandpaper and other abrasives, grit numbers can be a bit confusing. The grit number refers to the size of the abrasive particles embedded in the sandpaper or disc. Lower numbers, such as 60 grit, have larger particles and are ideal for quickly removing material or shaping a surface.
Higher numbers, such as 400 grit, have smaller particles and are better suited for smoothing or finishing work. It’s important to understand the intended use of the sandpaper and select the appropriate grit number. Trying to sand a surface with too low of a grit number can result in scratches or damage, while using too high of a grit number may not effectively remove enough material or provide the desired finish.
In general, a good rule of thumb is to start with a lower grit number and work your way up to a higher grit number for a smooth and polished result.

Choosing the Right Grit for Your Project
When it comes to sanding or polishing a surface, choosing the right grit is crucial to achieving the desired result. Understanding grit numbers can help you select the appropriate abrasive for your project. Grit numbers range from 24 to 1,200, with lower numbers being coarser and higher numbers being finer.
For heavy-duty sanding or leveling, start with a low grit number of 20-40. For smoothing out scratches or preparing for paint, use a medium grit of 80-120. If you want to achieve a polished or shiny finish, opt for a higher grit number between 220-400.
Keep in mind that finer grits create finer scratches, and it’s essential to sand progressively from low to high grits. By selecting the right grit, you can ensure that your project will have a smooth, even, and professional-looking finish. So, next time you begin a sanding or polishing project, choose the appropriate grit and sand away with confidence!
Factors to Consider When Choosing Grit
When it comes to using an orbital sander, one of the most important considerations is choosing the right grit sandpaper. The grit of the sandpaper determines how rough or smooth the surface will be after sanding. Typically, the higher the grit number, the smoother the finish will be.
However, it’s important to also consider the material being sanded and the desired outcome. For example, a lower grit may be needed for rougher surfaces such as stripping paint or removing rust. On the other hand, a higher grit may be used for finishing a smoother surface such as a woodworking project.
Ultimately, it’s important to experiment with different grits to find the one that yields the best results for the specific task at hand. So, what grit sandpaper for an orbital sander? It depends on the surface and desired outcome, but generally, a range from 60-220 grit is suitable for most sanding tasks.
Material Being Sanded
When it comes to sanding, the grit of the sandpaper is a very important factor that can have a big impact on the quality of your work. The first thing you need to consider when choosing the right grit is the type of material you will be sanding. For softer materials like wood, a lower grit (rough) sandpaper like 60 or 80 would work best for removing large imperfections and creating a rough surface for further sanding.
On harder materials like metal or plastic, a higher grit (fine) sandpaper like 220 or 320 would be ideal for smoothing out any scratches and creating a smooth surface. It’s important to note that sanding with too fine of a grit can actually make it harder to apply paint or finish to your project, so it’s important to find the right balance. Overall, choosing the right grit is all about finding what works best for your specific material and project.
Level of Roughness Desired
When choosing grit, the level of roughness desired is an important factor to consider. The grit level determines how smooth or rough the surface will be after sanding or polishing. Coarser grits, such as 40 or 60, are ideal for removing rough spots or marks, while finer grits, such as 400 or 600, produce a smooth surface.
The level of roughness desired depends on the type of project being worked on. For instance, a woodworking project may require a coarser grit to remove rough edges and blemishes, while polishing a piece of jewelry may require a finer grit to achieve a smooth and reflective surface. It’s important to take into account the material being worked on as well, as certain materials may require a specific grit level to avoid damage.
Ultimately, the level of roughness desired is subjective and dependent on the specific project and personal preference.
Type of Orbital Sander Being Used
When it comes to choosing the right grit for your orbital sander, there are a few key factors to keep in mind. First and foremost, you need to consider the type of surface you’ll be sanding. Coarser grits, such as 40 or 60, are ideal for smoothing out rough surfaces or removing an old finish.
However, if you’re working with a delicate or easily damaged surface, such as veneer, you’ll want a finer grit, like 220 or 240, to avoid causing any damage. Additionally, it’s important to consider the type of orbital sander you’re using. Some sanders may perform better with certain grits, so be sure to check the manufacturer’s guidelines before making a decision.
Overall, taking the time to carefully consider the grit you’re using can help ensure a smooth, successful sanding project from start to finish.
Conclusion
To sand away your biggest challenges, you’ll need grit, determination, and the right sandpaper. For an orbital sander, the grit you choose will depend on the surface you’re working on and the finish you desire. But whether you’re tackling rough edges or smoothing out imperfections, one thing is certain: with the right grit sandpaper, you’ll be unstoppable.
“
FAQs
What is an orbital sander?
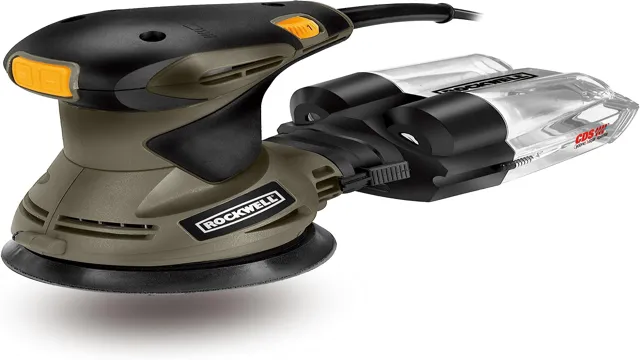
An orbital sander is a handheld power tool used for sanding and smoothing surfaces.
What are the different types of sandpaper for an orbital sander?
There are various types of sandpaper available for use with an orbital sander, including coarse, medium, fine, and extra-fine grits.
What grit sandpaper should I use for removing paint from wooden furniture with an orbital sander?
For removing paint from wooden furniture, start with 60-grit sandpaper and work your way up to finer grits such as 120 and 220.
Can I use wet sandpaper with an orbital sander?
Yes, you can use wet sandpaper with an orbital sander. Wet sandpaper is ideal for sanding metal surfaces or finishing auto bodywork.
How often should I change the sandpaper on my orbital sander?
Sandpaper should be changed whenever it becomes worn or clogged. As a general rule, it’s recommended to change the sandpaper after every 15-20 minutes of use.
What safety precautions should I take when using an orbital sander?
When using an orbital sander, always wear safety goggles and a face mask to protect your eyes and lungs from dust and debris. Also, ensure that your workpiece is firmly secured, and never force the sander onto the surface you are sanding.
Can I sand curved or rounded surfaces with an orbital sander?
While an orbital sander is not ideal for sanding curved or rounded surfaces, you can still use it for light sanding or finishing on these types of surfaces. Alternatively, you can use a handheld rotary tool or a sanding sponge for more intricate sanding tasks.


