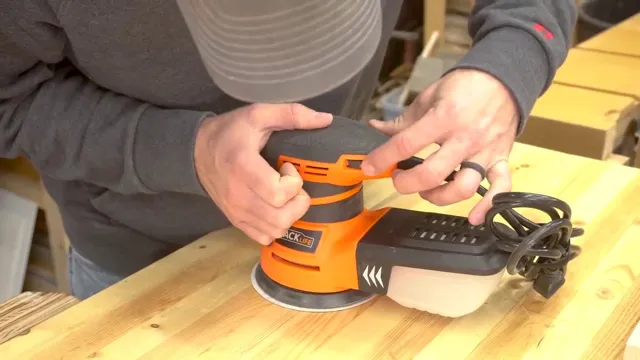
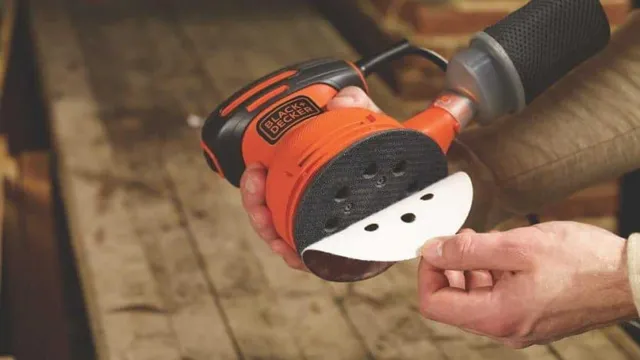
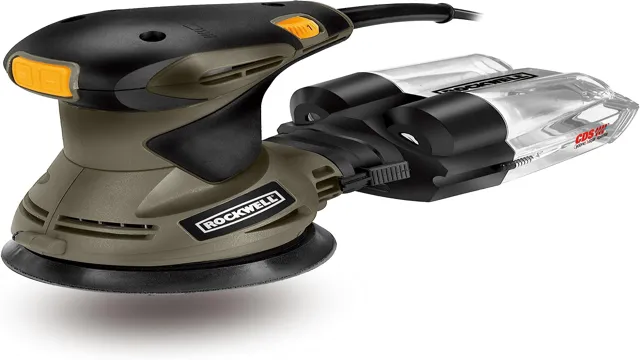
How to Sand Flat with Orbital Sander: Tips and Tricks for a Perfectly Smooth Finish.

Get ready to tackle that DIY woodworking project and achieve a truly professional finish! If you’re looking to achieve a perfectly flat surface on your piece, an orbital sander could be just the tool you need. But how do you sand flat with an orbital sander like a pro? In this blog post, we’ll guide you through the steps you need to follow to ensure that your sanding efforts pay off in a flawless finish. From selecting the right sandpaper grit to using the right technique to avoid swirl marks and scratches, we’ve got you covered.
So let’s dive in and get sanding!
Choose the Right Grit Sandpaper
When it comes to sanding flat surfaces with an orbital sander, choosing the right grit sandpaper is crucial for achieving a smooth finish. The grit number on sandpaper refers to the coarseness of the abrasive particles – the higher the number, the finer the grit. For initial sanding on rough surfaces, start with a coarse grit such as 60 or 80.
As you progress, move up to finer grits such as 120 and 220 for a smoother finish. It’s important not to skip grits as each grit removes scratches left by the previous one, resulting in a polished surface. Experiment with different grits to find the ideal level of coarseness for your project.
By selecting the right grit sandpaper and progressing through the grits, you can create beautiful, glass-smooth finishes on flat surfaces using an orbital sander.
Different Grits for Different Jobs
When it comes to sanding, choosing the right grit sandpaper is crucial to getting the job done right. Different grits are suitable for different tasks, and using the wrong grit can cause damage or lead to uneven results. So, what is grit? Grit refers to the number of abrasive particles per square inch on the sandpaper.
The higher the number, the finer the grit. For instance, 100-grit sandpaper has 100 abrasive particles per square inch, while 400-grit has 400 abrasive particles. The lower the grit, the more aggressive the sandpaper is, and the higher the grit, the smoother the sandpaper is.
Knowing this, you can choose the appropriate grit for what you are sanding. For removing paint or rust, a lower grit of 60 or 80 would be appropriate, while finishing woodwork may require a higher grit of 220 or 320. By choosing the right grit for the job, you’ll be able to achieve your desired results efficiently and effectively.

Start with Coarse Grits and Go Finer
When it comes to sanding, choosing the right grit sandpaper is crucial for achieving a smooth and even finish. Starting with coarse grits and gradually moving to finer ones is a tried-and-true method for achieving the desired results. But how do you know which grits to use? Generally, the coarser the grit, the more material it will remove, making it ideal for rough shaping and smoothing uneven surfaces.
As you move to finer grits, you’ll refine the surface, removing scratches and other imperfections left by the previous grit. Whether you’re sanding wood, metal, or other materials, start with a coarse grit sandpaper and work your way down to a finer grit for the best results. Remember to take your time and use the right technique, and your project will be sure to turn out beautifully.
Prepare the Surface
When it comes to sanding flat surfaces, using an orbital sander can make the job much easier and quicker. However, before you start sanding, it’s important to prepare the surface properly. Begin by inspecting the surface and identifying any imperfections or rough areas.
You can then use a scraper or putty knife to remove any bumps or flaking paint. Next, clean the surface with a damp cloth to remove any dust or debris that may interfere with the sanding process. It’s also important to choose the right type of sandpaper for your orbital sander.
If you’re sanding wood, a coarse grit may be necessary to remove imperfections and stains, while a finer grit may be needed for a smoother finish. By properly preparing your surface, you’ll achieve a more even and professional-looking result with your orbital sander, making your DIY project a success!
Remove Any Obstacles or Residues
Before starting any surface preparation project, it is crucial to remove any obstacles or residues that may affect the outcome of the job. This step involves clearing away any debris, dirt, or grime that may be present on the surface. Other obstacles that may need addressing include any old coatings, adhesives, or sealants that may remain on the surface.
Removing such residues is essential in ensuring that the new coatings or finishes adhere well to the surface. Techniques such as sandblasting or grinding may be used in removing stubborn residues. This essential step guarantees that your surface will be ready for the next stage of the preparation process, ensuring quality and durability of the final result.
Ensure a Dry and Clean Surface
Preparing the surface is an essential step to ensure the best results when applying any coating or adhesive. The first and most important thing to do is to ensure that the surface is dry and clean. Any moisture, dust, debris, or contaminants can compromise the adhesion and durability of the coating or adhesive.
Therefore, you should remove any dirt, oil, grease, or other substances that might be present on the surface using a suitable cleaner or solvent. Make sure that the surface is completely dry before applying any coating or adhesive. You can use a cloth, brush, or vacuum to remove any residual moisture or particles.
Remember that a properly prepared surface is the foundation of a successful project. So, take your time, and make sure that you follow the manufacturer’s instructions carefully. By doing so, you’ll ensure a long-lasting and reliable finish.
Cover Surrounding Areas to Minimize Dust
When it comes to painting or renovating, preparing the surface is crucial. Before you start painting, you should clean the surface thoroughly to get rid of dirt, dust, and debris that can affect the quality of the paint job. Start by scrubbing the surface using soap and water to remove any dirt, grease, or stains.
Then you should sand the surface to even out any bumps or scratches, which can cause the paint to adhere unevenly. If there are any cracks or holes, you should fill them with a spackle or joint compound and sand it smooth before priming the surface. Another important step to prepare the surface is to cover the surrounding area to minimize dust.
Dust and debris can be carried by the wind and deposited on your wet paint, ruining the finish and causing a rough texture. Covering nearby furniture, floors, and other surfaces with plastic sheets or drop cloths is a simple way to keep the dust away and ensure a clean and smooth paint finish. By taking the time to properly prepare the surface, you can ensure that your paint job looks flawless and lasts for many years.
Tips for Sanding with Orbital Sander
Sanding flat surfaces with an orbital sander can be easier than you think if you follow a few tips. First, ensure that the surface is clean, dry, and free of any loose debris that could interfere with the sanding process. Next, choose the right grit sandpaper for the job.
A coarser grit can remove more material, but it can also leave deeper scratches. Finer grits will leave a smoother finish and remove fewer scratches. Start with a coarser grit and work your way up to a finer one.
It’s important to keep the sander moving at all times to avoid creating dips or grooves in the surface. Move the sander in circular motions or back-and-forth motions while applying even pressure. Finally, take your time and let the sander do the work.
Don’t rush or apply too much pressure, or you risk damaging the surface. With these tips in mind, you can achieve a smooth, even surface using an orbital sander.
Use Even Pressure with Your Sander
When it comes to sanding with an orbital sander, one important tip is to use even pressure. This means you should apply the same amount of pressure on the sander throughout the sanding process. If you apply too much pressure, you may end up sanding too much in some areas, creating unevenness, or even going through the material.
On the other hand, if you don’t apply enough pressure, you won’t be able to remove the desired amount of material. It’s important to find that sweet spot where you’re using just enough pressure to get the job done without taking off too much. Additionally, by using even pressure, you’ll be able to avoid leaving swirl marks on the surface, which can be frustrating to remove later.
Remember, sanding can be a time-consuming process, but taking the time to apply even pressure will help you achieve the best results possible.
Apply a Steady Movement from Side to Side
When sanding with an orbital sander, it’s important to maintain a steady movement from side to side. This ensures that you don’t end up with uneven patches or over-sanded areas. The key is to keep the sander moving smoothly without applying too much pressure.
Let the sander do the work, and avoid pushing down too hard, as this can result in the sandpaper becoming clogged or overheating the motor. Another tip is to work in sections, dividing the surface area into manageable portions and focusing on one at a time. This allows for more precision and control, preventing accidental scratches or gouges.
By following these tips, you can achieve a consistent and flawless finish with your orbital sander – making your next sanding project a success!
Overlap Each Pass for Consistent Results
When it comes to sanding with an orbital sander, it’s important to remember to overlap each pass for consistent results. This means that when you make a pass with the sander, you should overlap the previous pass by about one-third. By doing this, you’ll ensure that the entire surface you’re sanding is even and smooth, and you won’t end up with any uneven spots or gouges.
It’s also important to keep the sander moving constantly to avoid creating divots or uneven wear on the sandpaper. Remember to apply light pressure and let the sander do the work for you. By following these tips and using your orbital sander correctly, you’ll achieve a flawless finish every time.
Clean Up the Surface and the Orbital Sander
When it comes to sanding flat surfaces with an orbital sander, the first step is to ensure that the surface is clean and free of any debris. This is crucial to achieving a smooth and even finish. You can use a vacuum, a bristle brush, or a damp cloth to clean the surface.
Once the surface is clean, you can begin the sanding process. It’s important to choose the right sandpaper grit for the job. The grit you choose will depend on the type of material you’re sanding and the type of finish you want to achieve.
For rougher surfaces, you may want to start with a lower grit and work your way up to a higher grit for a smoother finish. Be sure to keep the sander moving at all times to avoid any uneven areas. With a little practice, sanding flat surfaces with an orbital sander can be a quick and easy task that yields great results.
Use a Vacuum or Compressed Air to Remove Dust
One of the essential steps to ensure a smooth and efficient sanding process is to clean up the surface and the orbital sander. Dust can quickly accumulate and end up clogging the sandpaper or damaging the tool. To avoid this, you can use a vacuum or compressed air to remove any dust or debris from the surface.
A vacuum with a dust extraction port is an excellent tool for this purpose, as it can collect most of the dust as you sand. Compressed air, on the other hand, can blow away any remaining particles in hard-to-reach areas. Before starting, make sure to switch off the tool and unplug the power cord for safety.
Use the vacuum or compressed air to get rid of all the dust and debris, and always wear a dust mask to protect your lungs. With a clean surface and a well-maintained tool, you’ll be able to achieve a professional-looking finish on your project.
Wipe Down the Sander after Use
When it comes to using an orbital sander to achieve a smooth finish on your woodworking project, it’s important to keep both the tool and the surface clean. After each use, wipe down the sander with a dry cloth to remove any sawdust and debris. This not only helps ensure the longevity of the sander but also reduces the risk of contaminating the next workpiece.
In addition, make sure to clean up the surface you just sanded before moving on to the next step. Use a soft-bristled brush and a shop vac to remove any remaining sawdust and debris, paying close attention to any crevices or corners. This step is crucial to achieving a flawless finish and preventing any imperfections in your final product.
So, don’t forget to keep your workspace and tools clean to achieve a professional-looking result and make your next project a success.
Conclusion
Congratulations! You’ve successfully sanded your surface flat with an orbital sander and hopefully avoided any headaches or frustration in the process. Remember, if at first you don’t succeed, dust yourself off and try again. With a steady hand and a little patience, you too can achieve a smooth and even surface that would make even the most skilled craftsman proud.
So go forth, my DIY warriors, and conquer those lumpy, bumpy surfaces with your newfound sanding skills!”
FAQs
What is an orbital sander and how does it differ from other sanding tools?
An orbital sander is a type of power tool used for sanding surfaces. Unlike other sanding tools like belt or drum sanders, an orbital sander moves in circles, which helps prevent swirl marks on the surface being sanded.
Can an orbital sander be used for sanding flat surfaces?
Yes, an orbital sander is ideal for sanding flat surfaces like tabletops, cabinets, and shelves. Its circular motion helps provide an even finish and prevents over-sanding in any particular area.
How do I prepare the surface before sanding with an orbital sander?
Before sanding with an orbital sander, make sure the surface is clean and free of any debris. Use a tack cloth to remove any dust or particles, and make sure any loose paint or finish is removed.
What type of sandpaper should I use with an orbital sander?
For flat surfaces, use sandpaper with a grit between 80-120. For a smoother finish, use higher grits like 220 or 320.
Can I use an orbital sander for sanding corners or edges?
No, an orbital sander is not designed for sanding corners or edges. Use a detail sander or sandpaper wrapped around a sanding block for those areas.
How do I prevent swirl marks when sanding with an orbital sander?
Use light pressure when sanding and move the sander in a circular motion. Make sure to keep the sander moving at all times and avoid staying in one spot for too long.
How do I clean my orbital sander after use?
After use, unplug the orbital sander and wipe it down with a dry cloth. Use compressed air to blow out any dust or debris in the vents. Store the sander in a dry and clean location.


