How to Remove Window Tint with Heat Gun: A Step-by-Step Guide

Have you ever been stuck with window tint that just won’t budge no matter how hard you try? Removing window tint can be a frustrating task, especially when it has been on for years. Luckily, there is a solution: a heat gun. This handy tool can make the job a whole lot easier and quicker, but it’s important to use it correctly.
So, how does using a heat gun to remove window tint work? Think of it like cooking. Just like how heat can break down food, it can also break down the adhesive on window tint. The heat gun essentially melts the adhesive, making it easier to peel off.
However, it’s crucial to use the heat gun with precision so you don’t damage the window itself. If you’re planning on using a heat gun to remove your window tint, there are a few things to keep in mind. Firstly, make sure to use a high-quality heat gun and wear protective gloves to prevent burns.
Additionally, heat the tint in sections and slowly peel it off as you go. And remember, the process may take some time and patience but the end result will be well worth the effort. Using a heat gun to remove window tint is a great DIY option for those looking to save some money and tackle a home improvement project on their own.
Ready to give it a try? With the right tools and some patience, you’ll have tint-free windows in no time.
What You Will Need
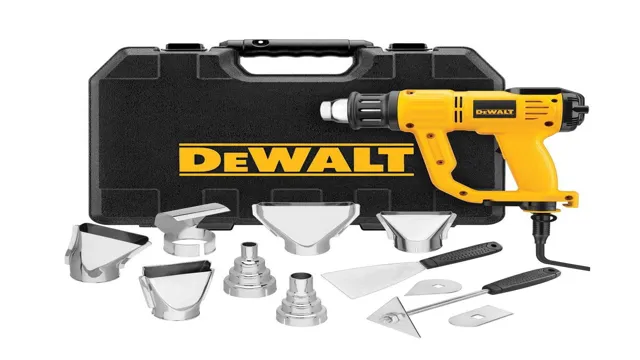
If you’re looking to remove window tint using a heat gun, you’ll need a few things to get started. These include a heat gun, a spray bottle filled with soapy water, a razor blade or scraper, a putty knife, and a pair of gloves to protect your hands. Make sure you choose a heat gun with adjustable heat settings, so you can control the temperature and prevent damage to your car’s windows.
It’s also important to work in a well-ventilated area to avoid inhaling any fumes or harmful chemicals. Once you have all of your materials ready, you can begin the process of removing the old window tint from your car with the help of your heat gun and other tools. With patience and a steady hand, you can remove the tint and enjoy a clear, unobstructed view of the road ahead.
Remember to always wear gloves, use proper safety precautions, and take your time to avoid any damage to your car’s windows.
Heat Gun
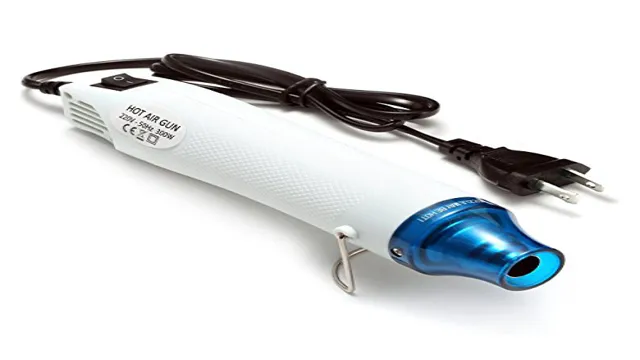
If you’re planning to use a heat gun, there are a few things you’ll need to make sure your project goes smoothly. Firstly, make sure you have a heat gun that’s appropriate for your needs. Some projects only require a lower heat setting, while others may need a higher one.
Additionally, you’ll need appropriate safety equipment such as gloves and eye protection. Heat guns can reach high temperatures, so it’s essential to protect yourself from potential burns or eye damage. Another important item to have on hand is a surface protector or mat, as a heat gun can damage surfaces such as countertops or floors.
Lastly, make sure you have a clear workspace free of any flammable objects or items that could be accidentally knocked over by the hot air. With these items on hand, you’ll be ready to tackle any project that requires a heat gun safely and effectively. Remember to always follow the manufacturer’s instructions and take appropriate safety measures.

Scraper
If you’re interested in web scraping, the first thing you’ll need is a scraper. A scraper is a tool that extracts data from websites automatically, allowing you to collect large amounts of information quickly and efficiently. There are many different types of scrapers available, ranging from simple browser extensions to complex software programs.
Depending on your needs, you may want to choose a scraper that is designed specifically for the type of data you want to collect. For example, if you’re interested in scraping product data from a website, you might choose a scraper that is optimized for e-commerce sites. Similarly, if you’re interested in scraping data from social media sites, you might want to choose a scraper that is designed for that purpose.
Whatever scraper you choose, make sure it is reliable and easy to use, and that it includes features like data cleaning and deduplication to help you get the most out of your data. With the right scraper, you can unlock a wealth of information that can help you make better decisions and gain insights into your industry.
Razor Blade
When it comes to using a razor blade, there are a few things you will need to make sure you have on hand. Firstly, the razor itself, whether it be a disposable or reusable one. It’s important to make sure the blades are sharp and not dull to ensure a smooth cut.
Secondly, you will need shaving cream or gel to apply to your skin to reduce friction and avoid any cuts. It’s recommended to apply the cream or gel evenly and in small amounts, using more if needed. Additionally, having a moisturizer or aftershave can help soothe your skin post-shave.
These products can help reduce irritation and inflammation. Finally, don’t forget a towel and hot water to rinse the blade in between strokes. Using a razor blade can take practice, but with the right tools and techniques, you can achieve a clean and comfortable shave.
Preparing the Area
If you’re thinking about removing window tint with a heat gun, then it’s important to prepare the area properly to ensure a smooth and safe process. First off, make sure you have a flat and stable surface to work on. Cover any nearby furniture or objects with a protective cloth to prevent any scratches or damage.
Next, ensure there is good ventilation in the area, as the heat gun can produce fumes that may be harmful if inhaled. Finally, if you’re working on a car window, make sure to tape some garbage bags around the outside of the window to prevent any shards or debris from flying around in case the window breaks during the removal process. By taking these simple precautions, you’ll be ready to remove your window tint with a heat gun like a pro!
Ventilating the Room
When it comes to ventilating a room, one of the first steps is to prepare the area properly. Before anything else, it’s important to make sure that any and all window coverings are fully opened to allow for maximum air flow. Likewise, any furniture or other items that might be blocking the windows should be moved to allow for air to circulate more freely.
Additionally, it’s always a good idea to remove any debris or clutter from the room, as this can hinder proper ventilation as well. By taking these simple steps, you can quickly and easily prepare the area for proper ventilation, ensuring that the air in your room is fresh and clean. Overall, proper preparation is key to effective ventilation, so be sure to take the time to get things set up correctly before beginning the actual ventilation process.
Covering Areas that May Get Damaged
When undertaking any home improvement project, it’s important to take steps to protect the areas surrounding the work site from damage. Whether you’re painting a room, installing new flooring, or making repairs, it’s all too easy to accidentally drip paint or scratch walls. To prepare the area, start by covering floors and furniture with drop cloths or plastic sheeting.
This will not only protect flooring and upholstery from paint, dust, and debris, but it will also make clean-up much easier. Additionally, use painter’s tape to protect baseboards, door frames, and window sills from accidental drips or damage. By taking these simple steps, you can ensure that your home improvement project goes smoothly and without any costly mishaps.
Removing the Tint
Removing window tint can be a daunting task, but with the right tools and techniques, it can be done efficiently. One method for removing window tint is by using a heat gun. It’s essential to have the right type of heat gun, ideally one that’s capable of producing a high amount of heat.
Begin by peeling off the outer layer of the tint. Then use the heat gun to heat up the tint gradually while peeling it off. Avoid overheating or damaging the glass, as it can take a lot of time and money to repair it.
It’s better to be patient and work in small sections rather than rush the process and end up with a more significant problem than you started with. Removing window tint with a heat gun may take some time, but the potential savings in having to replace the glass make it worth the effort in the end.
Heating the Tint with a Heat Gun
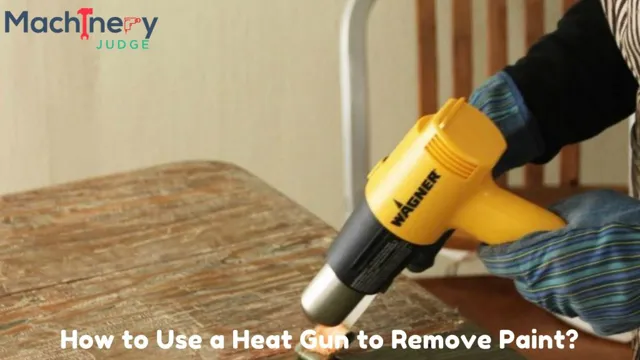
Removing old tint from windows can be quite a hassle, but heating the tint with a heat gun can make the process easier. A heat gun emits hot air that softens the adhesive on the tint, making it easier to peel off. It’s important to be careful when using a heat gun, as overheating can damage the window and make the process even more difficult.
Start by setting the heat gun to a low temperature and hold it about 6 inches away from the first section of tint for about a minute. The heat will cause the tint to wrinkle and bubble. Use a razor blade or scraper to lift the heated tint from the corner and slowly peel it off, working in small sections.
If the adhesive doesn’t soften enough, increase the heat slightly and repeat the process until the tint comes off easily. Remember to wear gloves and eye protection during the process, as the hot adhesive can be messy and can burn your skin. With patience and care, heating the tint with a heat gun is a quick and easy way to remove old tint and give your windows a fresh new look.
Peeling the Tint Slowly with a Scraper
When it comes to removing old tint from windows, it can be a tedious and frustrating task. Luckily, there are several methods that can help make the process easier and faster. One method that many people have found to be effective is using a scraper to slowly peel off the tint.
This method requires some patience and a lot of elbow grease, but it can be a great way to remove the tint without damaging the window. To get started, you will need a razor blade scraper and some soapy water. Start at one corner of the tint and use the scraper to lift the edge.
Then, apply the soapy water to the tint to help loosen the adhesive. Slowly peel the tint back while continuing to apply the soapy water as needed. If the tint starts to tear or becomes difficult to remove, stop and apply more soapy water.
Once you have removed all of the tint, use the scraper to remove any leftover adhesive. With some time and effort, you can remove any old tint from your windows and have them looking as good as new.
Using a Razor Blade to Remove any Residual Adhesive
If you’re looking to remove the tint from your car windows, using a razor blade to remove any residual adhesive could be your best option. Tinted windows that have been on for some time can leave behind a sticky residue after you’ve peeled off the film. You can use a razor blade to scrape off any leftover adhesive easily.
The process is quite simple. You just need to wet the windows and the glue around the edge with a spray solution. Ensure you’re careful when handling the razor blade, as it can easily scratch your glass.
Use the blade at an angle, gently scraping off the adhesive; it should come off without too much effort. Once all the adhesive is removed, be sure to clean your windows thoroughly with a good glass cleaner and a lint-free cloth, but avoid using any abrasive cleaners. With some patience and a little bit of care, you can have your windows looking crystal clear in no time!
Clean Up
If you’re looking to remove window tint using a heat gun, it is important to do so carefully. A heat gun can be an effective tool in breaking down the adhesive on the tint, causing it to come off with ease. However, it is crucial to remember to hold the heat gun at a safe distance from the window to prevent damage.
Begin by setting the heat gun to a low to medium heat setting and run it over the tint for a few seconds at a time. As the tint heats up, use a razor blade or scraping tool to gently peel the tint away from the window. Be sure to wear protective gloves throughout the process to prevent burns.
Once all of the tint is removed, use a mixture of soap and water to remove any remaining adhesive residue on the window. With patience and diligence, you can successfully remove window tint using a heat gun.
Removing Any Leftover Residue
Once you’ve completed the task of removing the majority of the residue, you’d want to leave the area spotless. No leftover residue or dirt should be there. To get rid of any remaining residue, use a mixture of water and vinegar or any standard household cleaning solution.
Dip a rag in the solution and wipe the affected area. Use a clean cloth that is free from any moisture to dry it. If you’ve used a cleaning agent that is unfamiliar to you, take a moment to read the instructions provided with it.
Some cleaning agents need to be diluted, while others need to be washed away with water. Using them improperly could potentially worsen the issue rather than solving it. Besides, it is essential to be cautious and use gloves and other protective gear when dealing with harsh chemicals, so you don’t harm your skin.
By following these steps, you can ensure that the cleaned surface is spotless, residue-free, and gleaming, just as you want it.
Cleaning the Windows
Cleaning the windows can be a daunting task, but it is important to keep them shiny and clear for a better view. Dirt, dust, and grime often accumulate on the windows, making them look dingy and dull. The best way to get started is by removing all the dust and dirt with a soft cloth or brush, then using a window cleaner or a mixture of vinegar and water to remove any leftover stains.
Don’t forget to wipe the glass dry with a squeegee or a lint-free cloth to remove all the cleaning solution and prevent any streaks. While it might seem like a small task, cleaning the windows can make a big difference in the appearance of your home or office. So, roll up your sleeves, put on some music, and get started!
Conclusion
And there you have it, folks! Removing window tint with a heat gun is all about balance and patience. Just like in life, you don’t want to apply too much heat too quickly or you might end up with a hot mess. But with a little bit of finesse and the right tools, you can peel away that stubborn tint and enjoy a clearer view of the world outside.
And who knows, maybe you’ll even find a new appreciation for the art of window tinting. Just don’t forget to put on some gloves and protective eyewear first!”
FAQs
What is the best method for removing window tint using a heat gun?
The best method for removing window tint with a heat gun is to first warm up the adhesive on one corner of the window with the heat gun, then use a razor blade to gradually peel off the tint while continuing to apply heat.
Can a hair dryer be used instead of a heat gun for removing window tint?
While a hair dryer can be used to soften window tint adhesive, it may take longer and not be as effective as using a heat gun.
Is it possible to remove window tint without damaging the window itself?
Yes, it is possible to remove window tint without damaging the window by using a heat gun or a steamer along with a plastic scraper or razor blade.
Is there a certain temperature setting that should be used on the heat gun for removing window tint?
A temperature range of 800-1000°F is recommended for removing window tint with a heat gun, but it can vary depending on the specific model and brand.
Can window tint be removed without any tools?
It is technically possible to remove window tint without any tools, but it would likely be a difficult and time-consuming process, and may not result in a perfect finish.
What should be done with leftover adhesive residue after removing window tint?
After removing window tint, any leftover adhesive residue can be cleaned off using a commercial adhesive remover, rubbing alcohol, vinegar, or soapy water.
Is it possible to reuse the removed window tint on another window?
While it is technically possible to reuse removed window tint, it is not recommended as it may not adhere properly and can result in bubbles or peeling.


