How to Reflow GPU with Heat Gun: A Comprehensive Guide for Beginners

Have you recently noticed your gaming laptop overheating or display issues? One of the most common causes of these problems is a faulty GPU. Before you go out and buy a new laptop, have you considered reflowing your GPU with a heat gun? It’s a cost-effective solution to fixing your GPU without having to replace it entirely. In this step-by-step guide, we’ll show you how to reflow your GPU using a heat gun and get your laptop back to its optimal performance.
Think of it like giving your laptop a warm hug to revive its graphics capabilities. Don’t worry if you’re not tech-savvy, we’ve got you covered with easy-to-follow instructions that will make the process a breeze. So, let’s dive in and get your laptop up and running like new again!
Overview
Are you experiencing graphics problems on your computer or gaming console? One possible solution is to reflow the GPU with a heat gun. Reflowing involves heating up the GPU to a high temperature to re-melt the solder joints. It can help fix common issues like artifacts, freezing, and the infamous “red ring of death” on Xbox consoles.
However, this should only be attempted as a last resort because it carries certain risks, such as damaging the components surrounding the GPU or creating even more problems if not done properly. If you are confident and careful enough to try it out, make sure to do your research, use the right tools, and follow a step-by-step guide. With time and patience, you may be able to revive your device and save some money.
Understanding GPU Reflow
GPU Reflow GPU reflow is a process of heating a graphics processing unit (GPU) to a high temperature to melt the soldered connections between the GPU and the motherboard. This process is carried out using a specialized machine known as a reflow station, which ensures the GPU is heated evenly and consistently. Many people resort to GPU reflow as a solution to fix various issues like graphic glitches, artifacting, black screen, and overheating problems.
Before attempting a GPU reflow, it’s important to identify the underlying issue and determine if it’s worth the risk of potentially damaging the hardware. Although GPU reflow may seem like a quick fix, it’s usually a short-term solution, and the underlying issue may persist. Furthermore, GPU reflow can permanently damage the hardware if done improperly, so it’s best to let a professional handle it.

Why Should You Reflow Your GPU?
If you’re experiencing issues with your GPU, one solution you might want to consider is reflowing it. A GPU, or graphics processing unit, is responsible for rendering the visuals on your screen. Over time, the GPU can develop issues due to heat stress and other factors.
Reflowing is a process where the GPU is heated up to a high temperature and then cooled down rapidly. This process can help to re-join cracked solder joints and fix other issues with the GPU. The main keyword used organically in this section is “reflowing GPU.
” By reflowing your GPU, you can potentially save yourself from having to replace your entire computer or pay for expensive repairs. However, reflowing should only be done by someone with experience and the proper equipment, as it can be dangerous if not done correctly.
Things You’ll Need
When it comes to tackling a new project, having the right tools is essential. This is also true when it comes to blogging, as there are a few basic items you’ll need to get started. First and foremost, a computer or laptop is a must.
While you can technically write a blog post on your phone or tablet, a larger screen and keyboard will make the process much easier. You’ll also need a reliable internet connection, as you’ll be researching topics, downloading images, and uploading content. A camera or high-quality smartphone is also a good investment, as original images can help make your blog stand out.
Finally, consider investing in a comfortable chair and desk setup, as you’ll likely be spending quite a bit of time at your computer. With these basic items, you’ll be ready to get started on your blogging journey and create content that engages and inspires your readers. Keywords: Blogging, Tools, Computer, Internet Connection, Camera, Desk Setup, Inspiration.
Steps to Reflow GPU
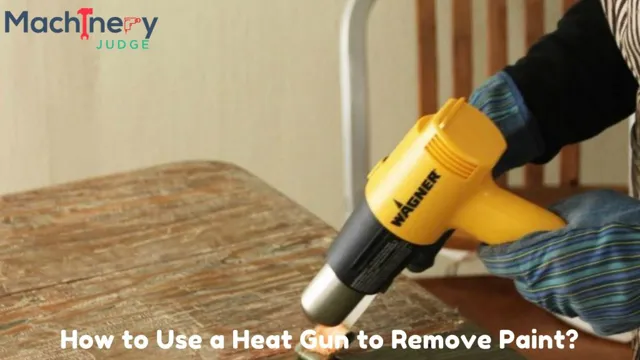
Reflowing a GPU with a heat gun can be a daunting task, but with the right steps, it can be done easily. The first step is to prepare your workstation by clearing a wide and flat surface where you can work. Then, remove the GPU from your computer and place it on the surface.
Make sure to clean the area around it and cover any nearby components with aluminum foil. Next, preheat the heat gun and hold it about 2-3 inches away from the GPU while moving it in a circular motion. You should do this for about 7-10 minutes or until you see the solder start to melt.
Once the solder has melted, turn off the heat gun and let the GPU cool down for 20-30 minutes. Finally, reattach the GPU to your computer and power it on to see if the reflow has solved your problem. With these simple steps, you can easily reflow your GPU and get it back to working order.
Step 1: Disassembling Your Computer
If you are experiencing graphics card issues, overheating, or your computer has a black screen, it might be time to reflow your GPU. This process involves heating up and cooling down your GPU, which will repair any damaged solder. The first step is to disassemble the computer to access the GPU.
It’s important to make sure that you turn off and unplug the computer before disassembly. Then loosen any screws holding the graphics card firmly in place and remove any cables connected to it. Make sure to place all the screws and components in a safe place.
Once you have access to the GPU, you will need to remove any existing thermal paste. This will allow the heat to transfer more effectively during the reflow process. Be gentle and make sure not to damage any parts or components.
Once the GPU is free, you can proceed to the next step of the reflow process.
Step 2: Preparing for Reflow
To prepare for GPU reflow, the first step is to gather the necessary materials. You will need a heat gun, a flux pen, thermal paste, aluminum foil, and a PCB preheater. Once you have all the materials, you need to take out the GPU from the motherboard and protect the surrounding components with aluminum foil.
This is important to prevent any damage to other parts of the motherboard during the reflow process. Next, you need to clean the GPU and surrounding area thoroughly. It is essential to remove any dust, debris, or old thermal paste buildup to ensure that the GPU’s surface is clean and free of impurities.
After cleaning, apply a small amount of thermal paste to the GPU’s surface. Remember to apply the paste evenly, to avoid any air pockets between the GPU and heatsink, as it could cause overheating issues. Finally, use a PCB preheater to bring the temperature of the GPU up slowly and evenly, to avoid any warping or buckling of the motherboard.
Proper preparation is crucial to the success of the GPU reflow process, and with the right materials and techniques, you can get your GPU back to its former glory.
Step 3: Reflowing Your GPU with Heat Gun
If you’ve tried cleaning the dust out of your GPU and updating your drivers but are still experiencing performance issues, reflowing your GPU with a heat gun may be the solution for you. Reflowing involves heating up the solder on your GPU and allowing it to re-settle, potentially fixing any connectivity issues that could be causing lag or crashes. However, it’s important to note that reflowing should only be done as a last resort and can be risky if not done properly.
Before attempting to reflow your GPU, do thorough research and consult with experts to ensure that you have the right tools and technique. Additionally, remember that reflowing may not always fix the issue and could potentially cause permanent damage to your GPU. Proceed with caution and at your own risk.
Step 4: Cooling Down the GPU
Now that the GPU has been heated up to reflow the solder, the next step is to cool it down. This is important to ensure that the solder solidifies and re-adheres to the chips without damage. One effective cooling method is to use a heat gun or blow dryer set on its “cool” setting.
Alternately, you could use compressed air or a fan to gently blow air onto the GPU. It’s essential to let the GPU cool down completely before using it again. To prevent overheating and ensure proper airflow, it’s essential to clean out any dust or debris from the GPU’s fan and heatsink.
Regular maintenance of your GPU can help prevent the need for reflowing in the future. Remember, overheating can damage your GPU’s components, so it’s important to keep it cool and well-maintained.
Step 5: Reassembling Your Computer
Reflow GPU Once you have successfully reflowed your GPU, it’s time to reassemble your computer. Start by placing the motherboard back into the case, ensuring that all the screws and connectors are securely fastened in place. Next, reattach your CPU cooler and thermal paste, making sure that they are applied correctly according to your manufacturer’s instructions.
Once the cooler is in place, plug in all the necessary power cables, including those for the GPU and any other components that may require it. Finally, reattach all your peripherals, such as your keyboard, mouse, and monitor, and power on your computer. Check to see if your GPU is functioning correctly by running a stress test or playing a demanding game.
With a successfully reflowed GPU and a correctly reassembled computer, you can once again enjoy high-quality performance from your beloved machine. Don’t forget to check up on your GPU’s health regularly to ensure that any issues are caught early and dealt with accordingly.
Tips to Remember
If you’re experiencing graphics issues with your computer, such as visual artifacts, freezes, or crashes, it may be time to reflow the GPU. Reflowing the GPU with a heat gun is a common fix for graphics card issues, as it helps to remelt the solder and regain proper connections. However, it’s important to follow some tips to ensure proper reflowing without damaging the GPU or motherboard.
Firstly, use a heat gun with a variable temperature control and start with a lower temperature setting. Move the heat gun in a circular motion around the GPU, and don’t hold it too close or for too long. Keep an eye on the solder melt and smoothness to avoid overheating or underheating.
Use a heat sink to dissipate heat from the surrounding components and let the GPU cool down before powering on the computer. With these tips, you can reflow your GPU with a heat gun and potentially save the cost of a new graphics card or system.
Take Necessary Precautions
When it comes to protecting ourselves, we can never be too careful. Whether it’s from natural disasters or human-made threats, it’s important to take necessary precautions to ensure our safety. One of the best ways to prepare for any potential danger is to have an emergency kit on hand.
This kit should include essentials like water, non-perishable food, first aid supplies, and a flashlight. In addition, it’s important to have a plan in place for evacuation in case of an emergency. Make sure everyone in your household knows the evacuation plan and where to go.
It’s also essential to stay informed about any potential threats or dangers in your area. Keep up-to-date with weather alerts and news updates to ensure you have the information you need to take action. Remember, taking these necessary precautions can make all the difference in keeping you and your loved ones safe.
Use a Good-Quality Heat Gun
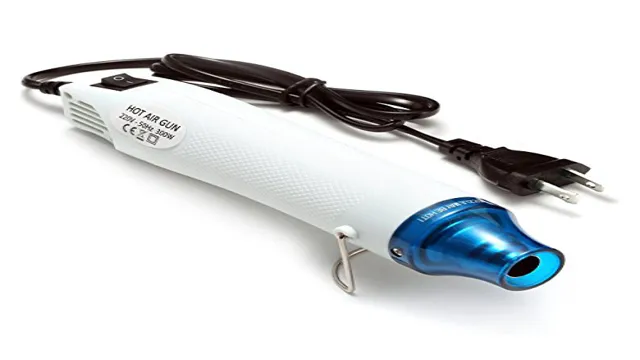
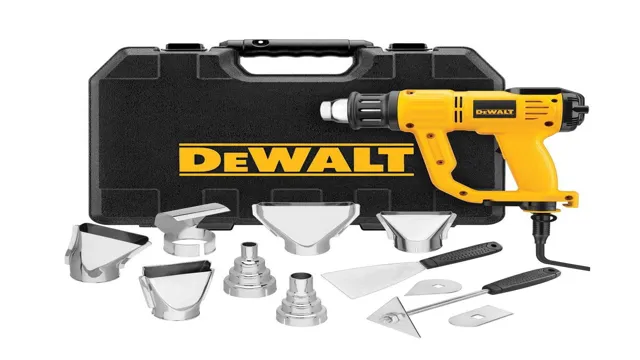
If you want precise and efficient results when using a heat gun, make sure you invest in a high-quality one. A good heat gun will provide regulated temperatures, making it easier to work with different materials. It should also come with different nozzle attachments that allow you to direct the heat accurately.
There are many types of heat guns available in the market, but it’s always best to go for reputable brands that guarantee good performance and longevity. Keep in mind that using a cheap heat gun can lead to uneven heating, damage to surfaces, or even accidents. So, make sure you get a good one and stick to reputable brands for safety and quality reasons.
Go Slow and Steady
Going slow and steady is an essential component of achieving success in any area of life. When you try to rush, you are more likely to miss crucial details and make mistakes. That’s why it’s crucial to take your time and be patient as you work towards your goals.
If you’re feeling overwhelmed, take a break and come back to the task later when you’re more focused and energized. Additionally, it’s important to pace yourself and not take on too much at once. Remember, success is a marathon, not a sprint.
By taking small, consistent steps every day, you’ll reach your destination before you even realize it. So go ahead, take your time, and enjoy the journey.
Be Patient with Cooling Process
When it comes to cooking, the waiting game can sometimes be the hardest part. This is especially true when it comes to waiting for your food to cool down before diving in. Patience is key here, as trying to eat hot food can result in burnt tongues and ruined taste buds.
To make the cooling process a little easier, there are a few tips to keep in mind. First, try cutting your food into smaller pieces to help it cool faster. You can also place your food in the fridge for a few minutes before serving to expedite the process.
Another trick is to blow on your food, but make sure to do it gently to avoid any accidents. Lastly, if you’re really in a rush, use a cold spoon to quickly cool down your food. Remember, taking your time to let your food cool down will ultimately lead to a more enjoyable eating experience.
Conclusion
And there you have it, folks. With just a steady hand, a splash of bravery, and a trusty heat gun, you too can reflow your GPU to perfection. Just remember to take your time, keep your eye on the temperature, and don’t be afraid to give your graphics card a little TLC.
After all, a happy GPU means a happy gamer, and we all know that happy gamers are dangerous gamers. So, reflow away my friends, and may your frame rate be forever high and your GPUs forever cool!”
FAQs
What is GPU reflowing and why is it needed?
GPU reflowing is a process of heating up the graphics processing unit (GPU) in order to re-establish its connection with the motherboard. It is needed when the GPU stops working due to overheating or other issues.
What tools are required for GPU reflowing with a heat gun?
To reflow the GPU with a heat gun, you’ll need a heat gun, thermal paste, and a thermal pad. You may also need a screwdriver to open up your computer case.
How much heat is required for a successful GPU reflow?
The GPU needs to be heated to a temperature of around 200-250 degrees Celsius for about 10 minutes in order to reflow properly.
Can a novice user reflow their GPU with a heat gun?
It is not recommended for novice users to attempt GPU reflowing with a heat gun as it can be a tricky process and improper usage of the heat gun can cause more damage to the GPU.
Is GPU reflowing a temporary fix or a permanent solution?
GPU reflowing is generally considered to be a temporary fix as the issue may reoccur if the root cause of the problem is not addressed. However, it can provide an extended period of use before a more permanent solution is necessary.
What are some alternatives to GPU reflowing with a heat gun?
Some alternatives to reflowing the GPU with a heat gun include replacing the GPU entirely, or finding the cause of the overheating and addressing that issue directly.
How can I prevent my GPU from requiring reflowing in the future?
To prevent your GPU from overheating and requiring reflowing in the future, make sure your computer case has adequate ventilation, use thermal paste and pads of good quality, and monitor the temperature of your GPU regularly.


