How to Open Headlights with Heat Gun: A Step-by-Step Guide

Ever wondered how to open your car’s headlights without breaking them? Well, if you have a heat gun lying around, you’re in luck! Opening headlights with a heat gun is a popular method that many car enthusiasts use to modify or replace their headlights. It’s a cost-effective and efficient way to get the job done, without having to go to a professional or buy expensive equipment. Using a heat gun to open your headlights may sound complicated, but it’s actually quite simple.
The heat gun softens the adhesive that holds the lens and housing together, making it easier to remove the lens. Once the lens is off, you can modify or replace the bulbs, or clean the inside of the lens for better visibility. However, it’s important to note that using a heat gun can be dangerous if not done properly.
It’s essential to wear protective gear and use the heat gun cautiously to prevent damage to your car or injury to yourself. Additionally, it’s crucial to use the correct temperature and timing to avoid damaging the lens or housing. In conclusion, opening headlights with a heat gun can be a great DIY project for car enthusiasts, but it’s important to take the necessary precautions and follow the instructions carefully.
With the right tools and techniques, you can achieve a professional-looking modification or replacement of your headlights. So go ahead and give it a try—you might be surprised at how easy it can be!
Gathering Materials
Opening headlights with a heat gun is not a difficult task, but you need to have the right tools and materials to do it. Firstly, gather all the tools and materials required, including a heat gun, gloves, a screwdriver, a plastic pry bar, and a clean rag. You also need to buy a sealant to reseal the headlights after you open them.
Ensure that you have a clean and well-lit workspace to work on the headlights. After gathering all the materials, heat up the headlights with a heat gun until the sealant softens and becomes easy to remove. With the pry bar and screwdriver, gently remove the cover of the headlights, being careful not to damage the bulbs or wires inside.
Once you have opened the headlights, clean the surface and reseal them using a recommended sealant before reinstalling the cover. With these tips, opening headlights with a heat gun should be a breeze, giving your car a new and improved look.
Heat Gun
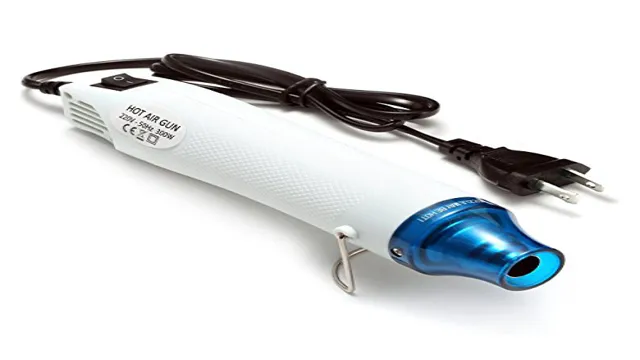
When it comes to DIY projects, one tool that can be extremely helpful to have on hand is a heat gun. But before you start using one, it’s important to gather all the necessary materials. First and foremost, you’ll need the heat gun itself.
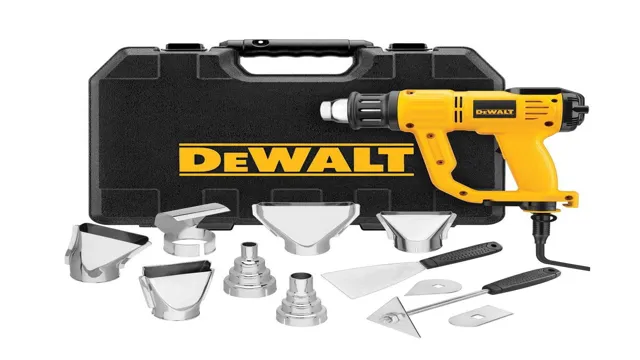
Depending on the project you’re working on, you may also need different types of nozzles to attach to the heat gun to achieve the desired effect. Additionally, it’s important to have protective gear such as safety glasses and gloves to avoid any burns from the heat. Another important material to have on hand is a drop cloth or other protective covering for your work surface to prevent any accidental damage.
With all the necessary materials gathered, you can confidently start your project with your heat gun in hand!

Protective Gear
Protective gear is an essential aspect of any safety plan, whether you’re taking part in a high-risk activity or performing routine tasks. When gathering materials for your protective gear, several factors need consideration to ensure the correct and effective use. First, determine the type of activity you’ll be involved in, as this will influence the gear’s requirements.
A good rule of thumb is to aim for full coverage, from head to toe, with materials that can withstand high impact. Secondly, consider the material’s durability, breathability, flexibility, and weight. Durability is vital for long-lasting wear, while breathability ensures sufficient ventilation to minimize heat retention.
Flexibility allows for unrestricted movement, while lightweight gear will not slow you down. Lastly, fit and comfort are crucial since poorly fitting gear can lead to irritation and discomfort. Regular maintenance of gear will also guarantee optimal safety during use.
Overall, by carefully selecting your protective gear, you will reduce the risk of injury to yourself and your surroundings while ensuring maximum protection.
Preparing the Headlight
Opening headlights with a heat gun can be a tricky process, but with the right tools and technique, it can be done successfully. The first step is to prepare the headlight by removing any screws or clips that may be holding it in place. Once the headlight is free, it’s important to use a heat gun to warm up the glue that holds the lens in place.
This can take several minutes, so be patient and apply the heat evenly to avoid cracking the lens. After the glue has loosened, gently pry the lens away from the housing using a plastic pry tool. It’s important to avoid using metal tools as they can scratch or damage the lens.
Once the lens is removed, you can access the inside of the headlight to replace bulbs or make any necessary repairs. Overall, opening headlights with a heat gun requires careful attention and patience, but with the right technique, it can be a straightforward process.
Removing the Headlight
When it comes to removing a headlight, the preparation process is crucial. Before you even begin to remove the headlight, it’s important to ensure that you have all the tools you need. This typically includes a wrench, a screwdriver, and possibly a socket set.
Additionally, you’ll want to disconnect the battery to avoid any electrical problems. Once you have your tools ready, you can start preparing the headlight by removing any screws or bolts that hold it in place. If the headlight is attached with clips or hooks, carefully release them to avoid damaging the headlight or its housing.
With everything properly prepared, you’ll be ready to move on to removing the headlight itself. By taking the time to properly prepare the headlight, you’ll be able to remove it safely and without causing any unnecessary damage.
Cleaning the Headlight
Preparing the Headlight for cleaning is the first step to getting your headlights shining as bright as new. Start by gathering all the necessary tools and materials needed for the task. You’ll need some microfiber towels, a bucket of warm water, a cleaning solution, and masking tape.
Begin by removing any loose debris that may be stuck on the surface of the headlight lens, such as leaves and twigs. Secure the surrounding area using masking tape to prevent any damage that may occur during cleaning. It’s necessary to ensure that the tape is well fixed to avoid any water seeping through.
Once fully prepared, take your microfiber towel, wet it in the cleaning solution and start scrubbing gently on the surface of the headlight lens. The cleaning motion should be gentle and circular, creating a lather on the surface. Rinse the towel regularly as you clean to avoid spreading dirt on the surface.
This way, you can be sure to prepare the headlight for a thorough cleaning.
Heat Gun Method
Opening headlights with a heat gun is a common method used by car enthusiasts to customize and modify their car’s headlights. The process involves heating the adhesive that holds the headlight cover to the headlight housing with a heat gun. First, you need to remove the headlight from the car and then separate the cover from the housing.
Once separated, use a heat gun to warm up the adhesive around the edges of the cover until it becomes soft and pliable. Be careful not to overheat or damage the plastic cover. Once the adhesive is softened, gently pry off the cover with a plastic pry tool.
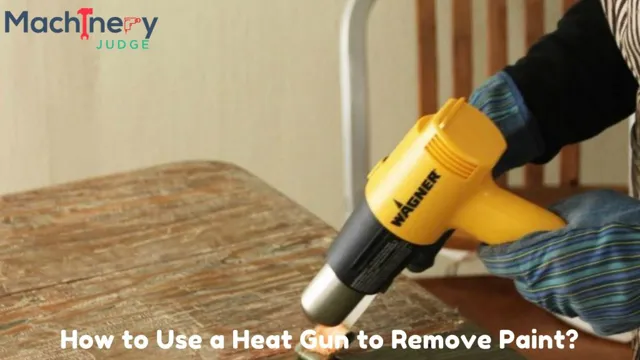
This method takes time and patience, but with the right technique, it can be an effective way to open your car’s headlights. Remember, safety comes first, so wear protective equipment such as gloves and eye protection when handling the heat gun.
Heating the Sealant
When it comes to sealing various surfaces, heating the sealant can be an effective method to ensure proper adhesion. One popular way to heat sealant is by using a heat gun. This powerful tool can quickly and evenly apply heat to the sealant, making it easier to spread and ensuring a more secure bond.
When using the heat gun method, it’s important to be careful not to overheat the sealant, as this can cause it to bubble or even burn. It’s also important to keep the heat gun moving constantly to prevent scorching and ensure the heat is evenly distributed. By using a heat gun to heat the sealant, you can achieve a strong and long-lasting bond on a variety of surfaces, including wood, metal, and plastic.
So if you’re looking for a reliable and efficient way to seal your surfaces, try the heat gun method and enjoy a secure and durable bond.
Warming the Headlight
If you have ever found yourself frustrated with a foggy or dim headlight, you may want to consider warming it up with a heat gun. This method can be an effective way to improve visibility and extend the life of your headlights. Heat guns work by directing hot air onto the surface of the headlight, which can help to clear away any moisture or debris that might be causing the problem.
Additionally, the heat can help to activate any protective coatings on the headlight, which can help to prevent future damage from occurring. Make sure to use a heat gun specifically designed for use with headlights, and be careful not to hold the gun too close to the surface or for too long. With proper use, a heat gun can be a simple and efficient solution for improving the quality of your car’s headlights.
Opening the Headlight
If you’re looking to open your headlight to replace a bulb or install an angel eye kit, a heat gun is one of the simplest and most efficient methods to accomplish this task. Simply remove the headlight from the car, use a heat gun to soften the adhesive around the edges of the headlight, and then gently pry the lens away from the housing. Be sure to work carefully and take your time, as excessive force or heat can damage the lens or housing.
The heat gun method is an inexpensive and reliable way to access your headlight and make the necessary repairs or modifications. So if you’re ready to open up your headlight, grab a heat gun and get to work!
Safety Tips
Opening headlights with a heat gun is a useful approach if you want to replace or modify the bulbs inside. However, before you begin this task, you must first ensure that you have taken the necessary precautions to avoid any accidents. First, make sure that you are wearing appropriate gear such as safety goggles and heat-resistant gloves.
This is to safeguard against any debris that may fly during the process and to avoid getting burned from the heat generated by the gun. Secondly, keep a fire extinguisher handy in case of any fires caused by the heat gun. With these safety tips in mind, you can now use the heat gun to carefully melt the adhesive material that secures the headlights.
But remember to move the gun around constantly to prevent melting the plastic housing. By following these steps, you’ll be able to open your headlights successfully and without incident using a heat gun.
Avoiding Burns
When it comes to preventing burns at home, there are a few safety tips to keep in mind. First, always keep hot liquids and foods away from the edge of counters and tables where they could easily spill. Also, be sure to test bathwater before getting in, and consider keeping the temperature below 120 degrees Fahrenheit to avoid scalds.
In addition, make sure to install smoke detectors and have a fire extinguisher on hand in case of a kitchen or household fire. When cooking, use oven mitts or pot holders to handle hot pots and pans, and keep flammable materials, such as towels and paper products, away from the stove and oven. Remember, prevention is key when it comes to avoiding burns.
By taking simple precautions and being aware of potential hazards, you can keep yourself and your loved ones safe from burn injuries.
Being Careful with the Heat Gun
When it comes to using a heat gun, safety should always be a top priority. These tools can reach extremely high temperatures and if used improperly, can cause serious burns or even start a fire. To avoid accidents, it is important to follow a few safety tips.
First and foremost, always wear protective gear such as gloves and goggles. Make sure the area around you is clear and there are no flammable objects nearby. It’s also a good idea to have a fire extinguisher on hand just in case.
When using the heat gun, avoid pointing it directly at your body or anyone else’s. Instead, hold it at a safe distance and use short bursts of heat. And as with any tool, never leave it unattended while it’s still hot.
Remember, by taking a few simple precautions, you can use a heat gun safely and confidently.
Conclusion
With the help of a heat gun, opening headlights can be a breeze–just remember to have a steady hand, a bit of patience, and maybe a friend to lend a hand. And, of course, always ensure you have the proper safety equipment and precautions in place before starting any DIY project. Once you’ve cracked the code on opening your headlights, you’ll be able to customize and upgrade your car’s lighting like a pro.
So grab your heat gun and let’s shed some light on this DIY project!”
FAQs
What are the benefits of using a heat gun to open headlights?
Using a heat gun to open headlights softens the adhesive, making it easier to remove the headlight and reduce the risk of damage.
How can I safely use a heat gun to open my headlights?
Always wear protective gloves and eyewear while using a heat gun, keep the gun at a safe distance from the headlight, and use a temperature setting suitable for the headlight material.
Can I use a hairdryer instead of a heat gun to open my headlights?
While a hairdryer can also be used to soften the adhesive, it may not reach a high enough temperature to effectively open the headlights.
How long should I use the heat gun to open one headlight?
You should use the heat gun on one section of the headlight for no longer than 2 minutes, taking breaks to avoid overheating the material.
What should I do if the adhesive does not soften with the heat gun?
If the adhesive does not soften, you may need to use a solvent or a pry tool to help loosen the headlight.
Is it necessary to seal the headlight after opening it with a heat gun?
Yes, it is recommended to reseal the headlight with a high-quality adhesive to prevent moisture and debris from entering the headlight assembly.
Can I use a heat gun to open any type of headlight?
No, you should always check the manufacturer’s recommendations and the headlight material before attempting to use a heat gun to open it.


