How to Remove Tint from Car Windows with Heat Gun: A Comprehensive Guide
If you’re tired of having a tinted car or it’s starting to peel off, you might be wondering how to remove it without damaging the glass. With the right tools and some patience, you can easily remove window tint using a heat gun. While it might seem like a daunting task, it’s actually a straightforward process that anyone can do with some time and effort.
Using a heat gun is a great way to soften the adhesive on the tint film and make it easier to pull off. However, it’s important to be careful when working with a heat gun because it can be dangerous if not used correctly. That’s why it’s essential to follow some safety precautions and have protective gear before getting started.
In this blog post, we’ll guide you through the process of removing tint from car windows with a heat gun. We’ll go over the necessary tools and safety precautions to take, step-by-step instructions on how to use a heat gun to remove tint, and tips to ensure a smooth and easy removal process. By the end of this post, you’ll have all the information you need to remove window tint from your car like a pro.
So, let’s get started and say goodbye to unwanted window tint!
Gathering the Required Tools
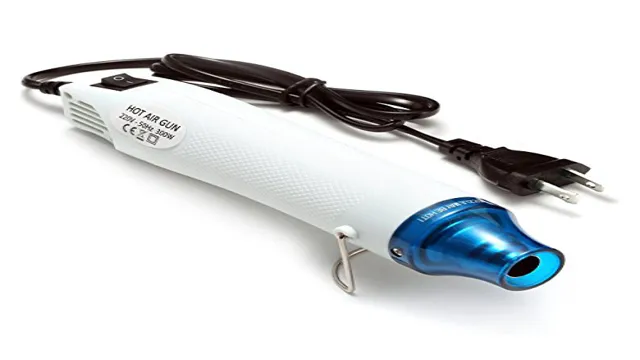
If you’re wondering how to remove tint from car windows with a heat gun, you first need to gather the required tools. It’s important to have the right equipment on hand so that you can safely and effectively remove the tint without damaging the window or injuring yourself. The main tool you’ll need is, as the name suggests, a heat gun.
This can be purchased at most hardware stores and is essential for loosening the adhesive on the tint film. You’ll also need a scraper or razor blade to peel off the film, as well as a spray bottle filled with soapy water to help lubricate the window and prevent scratches. Additionally, you may want to have some gloves and protective eyewear to keep yourself safe from the heat and any shards of glass that may come loose during the removal process.
With the right tools and a little bit of patience, you can easily remove any unwanted tint from your car windows and get back to enjoying a clear view of the road ahead.
Heat Gun
If you’re planning to use a heat gun for any DIY project, you’ll need to gather some necessary tools. First, consider safety gear such as gloves and protective eyewear to prevent burns and eye damage. You’ll also need an extension cord if your heat gun doesn’t have a long enough cord to reach your desired area.
To control the temperature and speed of the heat gun, you may want to invest in a variable temperature setting or a speed control setting. Additionally, you may need some extra tools such as a scraper or sandpaper to remove any residue or finish from the surface you plan to heat. By gathering the appropriate tools for the job, you’ll be able to use your heat gun safely and efficiently.
Razor Blade
When it comes to shaving, having the right tools is essential for a clean and comfortable experience. If you’re using a razor blade, there are a few things you’ll need to gather before you start. First and foremost, you’ll need the razor blade itself.
You’ll also need shaving cream or gel to lubricate your skin and reduce irritation. A good-quality shaving brush can help you apply the cream evenly and lift the hair for a closer shave. Finally, a clean towel and aftershave lotion will help soothe your skin and prevent irritation and inflammation.
It’s important to choose high-quality tools to ensure a comfortable and effective shave, so don’t hesitate to invest in the right equipment. By gathering the right tools beforehand, you’ll set yourself up for success and achieve a smooth, irritation-free shave every time.
Gloves
When it comes to gardening, having a good pair of gloves is essential. Not only do gloves protect your hands from dirt and thorns, but they also provide a better grip on tools, which prevents accidents. To gather the required tools for gardening gloves, you’ll need to consider a few things.
Firstly, the material of the gloves should be strong and durable. Look for gloves made from leather, polyester, or nylon. Next, consider the size of the gloves.
They should fit snugly on your hands to provide maximum protection and dexterity. Additionally, they should be breathable to prevent your hands from sweating excessively. Finally, consider the style of the gloves.
There are various types of gloves, such as gauntlet gloves that cover the wrist, or fingerless gloves for more delicate tasks. By taking these factors into account, you’ll be well on your way to selecting the perfect pair of gloves for your gardening needs.
Preparing the Work Area
If you’re planning to remove tint from your car windows using a heat gun, you’ll need to prepare the work area first. Start by cleaning the windows thoroughly, making sure to remove any dirt, dust, or grime. This will ensure that the heat gun is able to work its magic more effectively and avoid any potential damage to the window surface.
Once the windows are clean, cover the car’s interior with plastic sheets or drop cloths to protect the seats and dashboard from the heat. Additionally, if you’re working outdoors, ensure that you have a shady, well-ventilated area to prevent overheating or discomfort while working. Taking the time to prepare the work area is essential for a successful tint removal process and will help you achieve the best results.
So, take your time and make sure everything is in order before you start using the heat gun.
Parking the Car in a Shaded Area
Preparing the work area is an essential step when parking your car in a shaded area. Start by inspecting the area for debris, such as fallen branches or sharp objects that could damage your car’s tires or undercarriage. Sweep away any leaves, dirt, or stones that might scratch your car’s paint job.
If the area is particularly dirty, consider washing it down with water or a gentle cleaning solution. Once the area is clear, make sure the shade is large enough to cover your car and protect it from the sun’s harmful rays. If there are any low-hanging branches, trim them back to prevent them from scratching your car or falling onto it in a storm.
Taking these simple steps will ensure that your car is safe and protected while parked in a shaded area.
Cleaning the Windows with Soapy Water
Preparing your work area is crucial when it comes to cleaning your windows with soapy water. Firstly, ensure that all windows are closed to avoid water seeping inside. Put down some old towels or a tarpaulin to protect the floor or surrounding area.
Gather all tools required, such as a bucket, squeegee, scrubber, and cleaning solution. Make sure that your cleaning solution has the right concentration of soap to water, as too much soap can leave residue, while too little soap won’t clean your windows efficiently. Additionally, it’s essential to avoid cleaning your windows on a hot, sunny day, as the heat can lead to streaks forming on the windows once the water dries up.
A cloudy day is the perfect day to clean your windows. With these simple steps, you can prepare your work area and have your windows looking as good as new in no time!
Heating the Tinted Windows with a Heat Gun
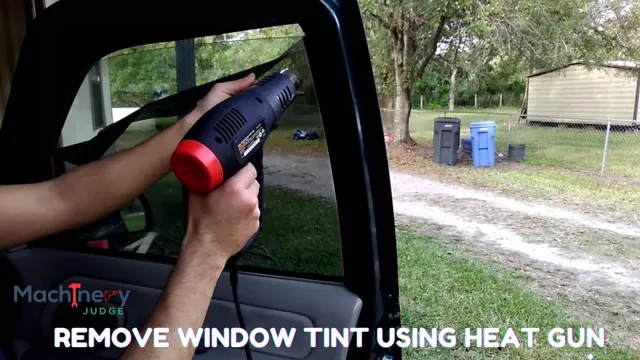
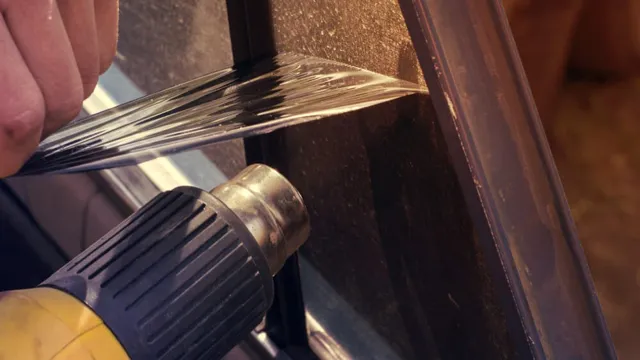
Removing tint from your car windows can be a hassle, but a heat gun can make the process a lot easier. Start by heating the tinted window with the heat gun, being careful not to heat it too much and cause any damage. Once the tint is heated, use a utility knife to gently peel it away from the window.
If any adhesive residue remains, use a mixture of hot water and dish soap to clean it off. By using a heat gun, you can make quick work of removing tint from your car windows. This method is especially useful for older tinting that has become hard and difficult to peel off.
Just remember to exercise caution when using the heat gun, as excessive heat can damage your car’s windows. With a little patience, you’ll have your windows looking like new in no time. So, why not give it a try today?
Starting with the Rear Windshield
When it comes to tinting your car windows, starting with the rear windshield can be a good option. However, tinted windows can be challenging to handle, especially if you’re new to the process. That’s where a heat gun comes in handy.
Heating the tinted windows with a heat gun allows the tint to loosen up, making it easier to install without any bubbles or creases. It’s important to use the right amount of heat and avoid overheating, as this can damage the tint or the window itself. So, make sure to use a good-quality heat gun and apply the right amount of heat to get the desired results.
With some practice and patience, you can easily achieve a professional-looking tint job on your car’s rear windshield.
Applying Heat Gradually and Evenly
When it comes to tinted windows, proper heating is crucial. Heating the tinted windows with a heat gun is one way to achieve the ideal temperature. However, it is important to apply heat gradually and evenly.
Uneven heating can cause the tint to peel or distort, leaving it looking unsightly. To avoid this, start by using the heat gun on a low setting and gradually increase the heat as necessary. Keep the heat gun moving back and forth across the window, never staying in one spot too long.
This will help to prevent hot spots and ensure the heat is evenly distributed. By using the heat gun properly, you can achieve a smooth and successful tint job that will stand up to the test of time.
Removing the Tint with a Razor Blade
If you want to know how to remove tint from car windows with a heat gun, read on. While many people are tempted to use a razor blade to remove the tint, this can actually cause more harm than good. Using a heat gun is a safer and more effective method to remove the tint.
Simply heat up the tint with the heat gun until it becomes loose, and then use a plastic scraper to remove it. Remember to wear gloves and protective eyewear when using the heat gun. While this method may take a bit longer than using a razor blade, it will ultimately leave your car windows looking better and without any scratches.
So, if you’re looking to remove tint from your car, skip the razor blade and try using a heat gun instead.
Starting at a Corner
Starting at a Corner – Removing the Tint with a Razor Blade Removing tint from a car window can be a daunting task, especially if you don’t know where to start. One method is starting at a corner and using a razor blade to peel off the tint. This technique is effective but requires patience and precision to avoid scratching the glass.
Before you begin, make sure you have all the necessary tools such as a razor blade, a spray bottle filled with soapy water, and a clean rag. Start by spraying the soapy water on the tinted area and let it soak for a few minutes. Then, using the razor blade, start at one corner of the window and gently lift the tint.
As you peel, spray more soapy water to prevent the tint from tearing. Keep a firm grip on the tint as you work your way across the window. This technique may take some time but eventually, you will be able to remove the entire tint from the window.
Remember to take breaks, as this can be a repetitive and tedious task. With some patience and practice, you’ll have tint-free windows in no time!
Peeling the Tint Slowly
If you’ve ever tried to remove tint from your car’s windows, you know that it can be a daunting task. Peeling it slowly is the way to go so as not to damage the window. A razor blade is an effective tool in this process.
Begin by spraying soapy water on the tinted area to make it easier to remove. Then, take the razor blade and carefully slide it under the tint’s corner, making sure not to scratch the glass. Once you have a grip on the corner, slowly begin to peel the tint off in a back and forth motion.
If the tint starts to tear, use the razor blade to cut it into smaller pieces until it is all removed. It’s essential to be patient with this process, and it can take time, but it’s worth it to have clean, clear windows. With this method, your car will not only look better, but you’ll also improve visibility and increase safety on the road.
So, if you’re up for the challenge, grab your gloves, razor blade, and soapy water, and start peeling that tint today!
Removing Adhesive Residue with a Razor Blade and Soapy Water
Removing the tint from your car windows can be a daunting task, especially if you’re dealing with tough adhesive residue. But fear not, as there’s a simple solution to this problem. To remove the tint with a razor blade, you’ll first need to wet the window with soapy water.
Once the window is wet, take a razor blade and hold it at a 45-degree angle. Then, gently scrape the tint off the window, being careful not to damage the glass. It’s crucial to use a new razor blade to avoid scratches and ensure a clean cut.
As you remove the tint, the adhesive will be left behind on the window. To get rid of it, use the same technique with the razor blade, but this time scrape it at a 90-degree angle, which will help detach the adhesive. The soapy water will also help to soften the adhesive, making it easier to remove.
Repeat the process until all the adhesive is removed. And voila, your window is as good as new! Just make sure to clean it thoroughly after to remove any remaining soapy residue.
Finishing the Job
If you want to remove tint from your car windows, using a heat gun is a fast and easy way to finish the job. Start by preparing the area and protecting yourself with gloves and eye protection. Then, hold the heat gun about 6 inches away from the window and move it back and forth over the tinted area.
The heat will loosen the adhesive, allowing the tint to peel away easily. Be sure to work in small sections, and if necessary, use a plastic scraper to help remove any stubborn bits. Take your time and be careful not to damage the window or any surrounding parts of the car.
With a little patience and know-how, removing tint with a heat gun can be done quickly and easily.
Cleaning the Windows with Glass Cleaner
When it comes to cleaning windows, using the right glass cleaner is crucial for achieving streak-free results. Once you’ve wiped away the initial dirt and grime, it’s time to apply the glass cleaner. Spray the cleaner directly onto the window or onto a clean cloth, and then wipe in a circular motion, taking care to remove any remaining streaks.
Don’t forget to clean the corners and edges as well! And if you’re dealing with hard water spots or stubborn stains, consider using a vinegar and water solution to help lift the grime. By taking the time to properly clean your windows with a high-quality glass cleaner, you’ll be amazed at how much brighter and clearer your view will be.
Checking for any Remaining Adhesive Residue
When removing adhesive residue, it’s important to make sure that all of it is gone before calling it a job well done. Even if the surface looks clean, there could still be residue left behind. To check for remaining adhesive, try swiping a clean cloth over the surface.
If it catches, there may still be residue. You can also inspect the surface closely, as sometimes residue can be difficult to see. If residue is found, don’t fret! There are a few methods you can try to remove it.
One option is to use rubbing alcohol or adhesive remover on a cloth and gently rub the area until the residue is gone. Another option is to create a paste out of baking soda and water, apply it to the residue, and then wipe it away with a damp cloth. Whatever method you choose, make sure to test it on a small, inconspicuous area first to avoid damage to your surface.
By taking the time to check for and remove any remaining adhesive residue, you can ensure a job well done and a clean surface.
Conclusion
Removing tint from car windows with a heat gun may seem intimidating, but with the right tools and technique, you can tackle this task like a pro. Just be sure to approach it with caution, patience, and a willingness to embrace the heat. Remember, practice makes perfect, so turn up the heat and get ready to give your car windows a brand new look.
“
FAQs
What is the best temperature to use a heat gun for removing tint from car windows?
The recommended temperature for heat gun usage for tint removal on car windows is between 200-400 degrees Fahrenheit.
How long does it take to remove tint from car windows with a heat gun?
The time it takes to remove tint from car windows with a heat gun varies depending on the temperature and size of the window. Typically, it takes approximately 2-3 hours per window.
Can a heat gun damage the interior of my car while removing tint from windows?
Yes, a heat gun can potentially damage the interior of your car. It is best to cover the surrounding areas of the window with a protective material to avoid this.
Is it necessary to wear safety gear while removing window tint with a heat gun?
Yes, it is important to wear proper safety gear such as gloves, eye protection, and a respirator mask to avoid potential hazards while using a heat gun.
Can I use a hair dryer instead of a heat gun to remove tint from car windows?
It is not recommended to use a hair dryer as it may not get hot enough to effectively remove the tint. A heat gun is a better option as it can reach higher temperatures.
How do I clean the window after removing tint with a heat gun?
Use a glass cleaner and a microfiber towel to clean the window. Any remaining adhesive can be removed with a solution of warm water and dish soap, followed by scraping with a plastic scraper.
What is the easiest way to remove tint from curved car windows with a heat gun?
When removing tint from curved car windows, it is best to work in small sections and use a heat gun with a narrow nozzle attachment to focus the heat on the tint. Move the heat gun in a circular motion to conform to the curve of the window.
